-
• #27
Every time I read this thread I want to vote it five stars again.
Great work.
Good point. Rated five stars!
-
• #28
Looking great!
-
• #29
Subbed! Like to see people doing a bit of frame building themselves.
-
• #30
I'm glad you're enjoying the thread!
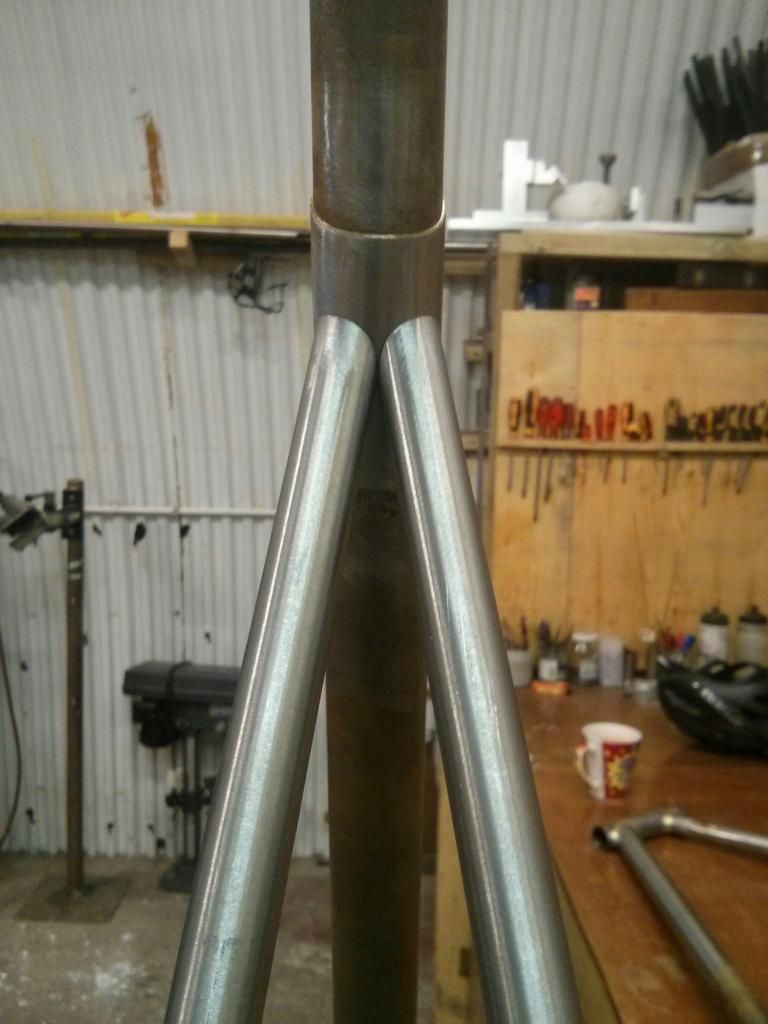
I was at a loose end this morning, so I did a few hours to complete the second seat stay. Once I was 100% happy with the fit of the first stay I made paper templates of the mitres, and then turned them inside out so I could mirror them onto the second. That made the initial cut and mitre a lot faster.
Then it was into the process of matching them up so that they are perfectly level. I've heard more than one frame builder say that's one of the first things they look at on a bike.
I think my choice of fillet-brazed fastback stays made things unintentionally quite hard, so it took a while. I also made a small mistake, filing a little bit too much away where I thought the inside faces of the stays would touch. In the end, they barely contact.
However, it's only a small gap over a short section of the stay, so the braze will fill it. Fortunately the top of the seat stay is one of the least stressed parts of the bike. If you've ever looked at a seat stay attached to the side of the seat tube you'll see how little contact is needed, so I'll have ample strength through the joint. Just one of those things!
Next week I'll braze them up, then start work on some of the braze-ons. I'll probably leave the soak and clean up of the fillets to the week after, as they'll need time in the water bath to dissolve away the flux from the interior of the tubes.
-
• #31
Fortunately the top of the seat stay is one of the least stressed parts of the bike. If you've ever looked at a seat stay attached to the side of the seat tube you'll see how little contact is needed
this is interesting.
what sources do you have for information like this? I want to understand more of the stresses in a bike. size and direction and stuff. -
• #32
keep in mind that the seatstays are thicker than the top/down/seattube in most double butted frames

They are under some stress, hence the thickness; see this heatmap:

-
• #33
Here's a power transfer GIF:
http://www.gurubikes.com/images/tech-focus/holistic/pt/animation-1.gif
-
• #34
and one for frontal impact stresspoints:

-
• #35
Thanks Apollo.
drøn, there's quite a lot of information out there related to finite element analysis of bike frames. Although it's quite old, there's a nice piece on Sheldon Brown's site, http://sheldonbrown.com/rinard/fea.htm and there are various other academic papers too. I've also picked up quite a lot from talking to various builders.
My comment was a bit flippant in hindsight - it's important that the seat tube/seat stay junction is well formed. The position of the joints on my frame mean that I can get plenty of braze around them to form a good strong fillet. Also, the seat tube reinforcing sleeve I added takes the wall thickness of that area to 1.6mm, which is pretty much double the thickness of the butted sections of the tubes.
-
• #36
Here's a power transfer GIF:
http://www.gurubikes.com/images/tech-focus/holistic/pt/animation-1.gif
Cool screensaver, bro!
Loving all this, keep up the good work.
-
• #37
Looking good Mike! Oh, and thanks for the tea.
-
• #38
Thanks! I'll post some more pics tomorrow. I've got the seat stays on and mostly cleaned up. It's actually starting to look like a bike frame.
-
• #39
Yesterday was mostly about seat stays. I also met Jambon, who dropped into the workshop to get some work done on a frame. I share space with Saffron Frameworks & Rusby Cycles.
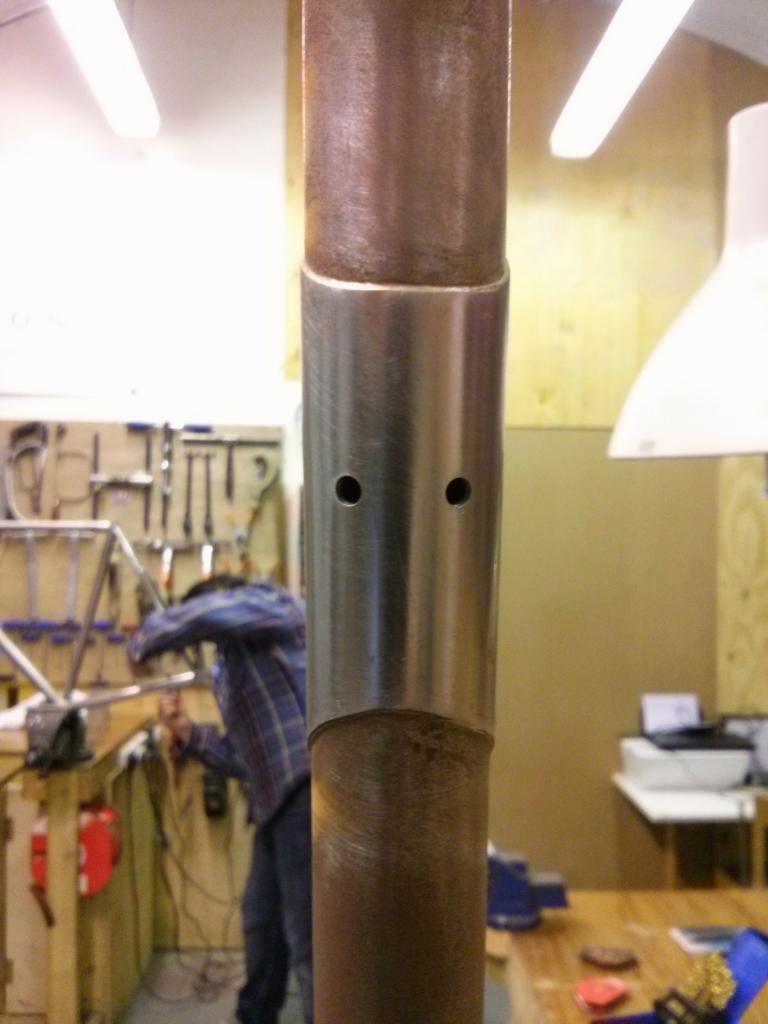
First up was drilling gas relief holes, temporarily creating a sad robot face on the back of the seat tube. You have to give a path for air in the tube to escape, otherwise as you heat it the only path it has is through your brazing area. Do I want a braze with holes in it, or to be sprayed in the face with molten alloy? Nope nope nope.
Both stays were then tacked in place. The heat causes movement, so the top surface tack on the top lifted the bottom of the stay away from the dropout by about 1-2 cm. Once you tack the underside and hold it in position it locks back in. Amazing how much it moves, really.
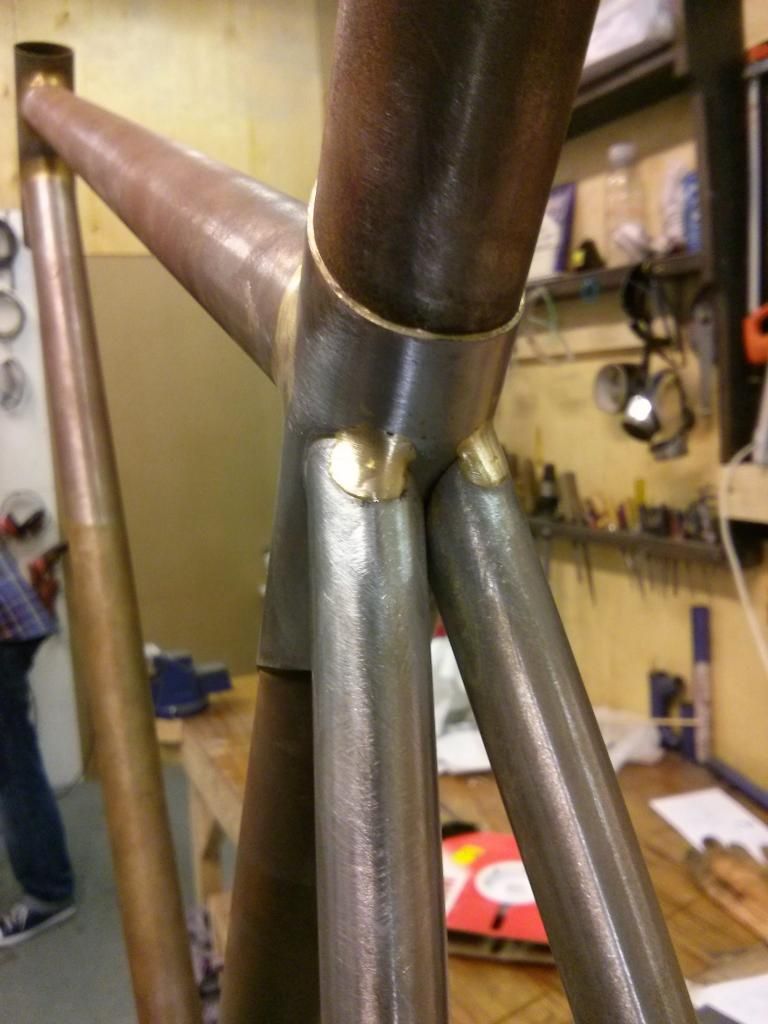
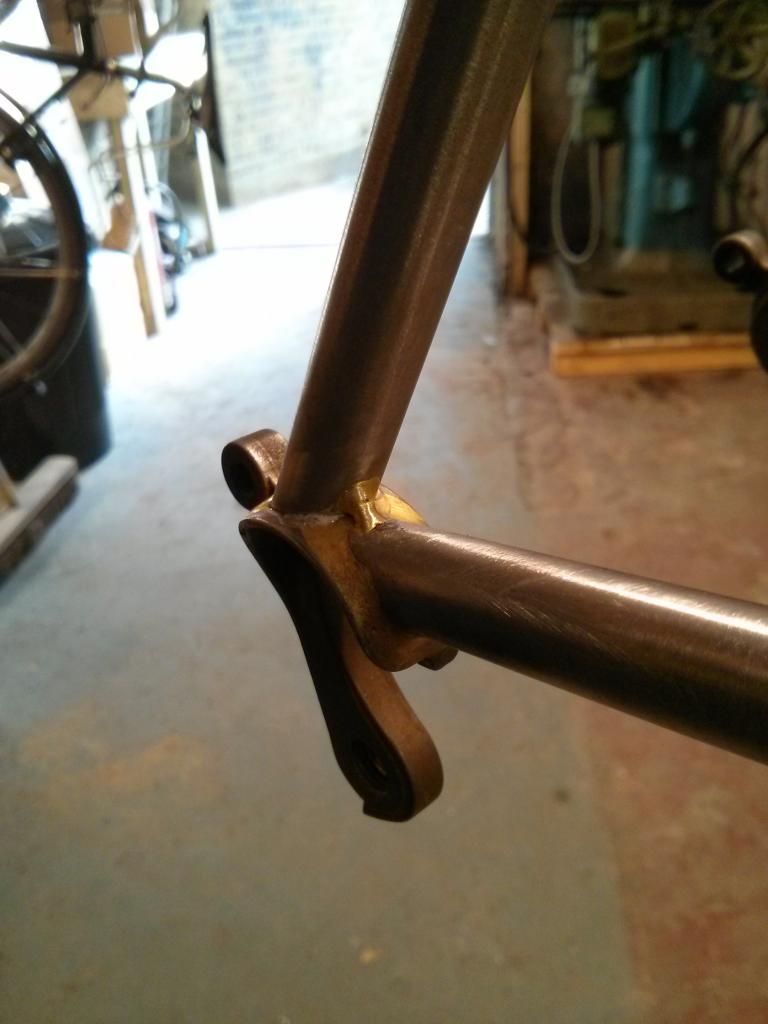
Then the brazing of the stays was done in earnest. On the dropout end they need to be flowed into the existing braze, which involves reflowing some of that joint. The seat tube end is very tricky, as the gap between the stays is tiny.
Thoroughly preheating the area and working with gravity helps the braze flow through. I did have to reflow one small area, I think a blob of flux got in the way. No biggie. Rather than use a small No.2 torch tip for that I was advised to use a No.5. The extra heat output helps to quickly bring the small area up to brazing temperature.
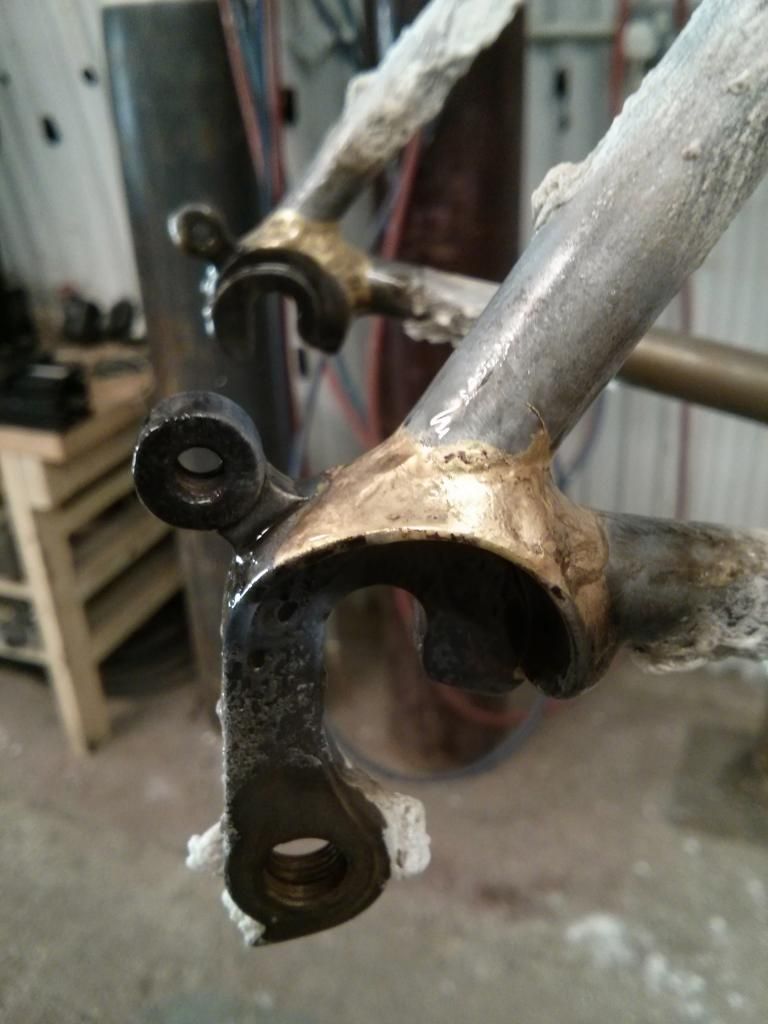
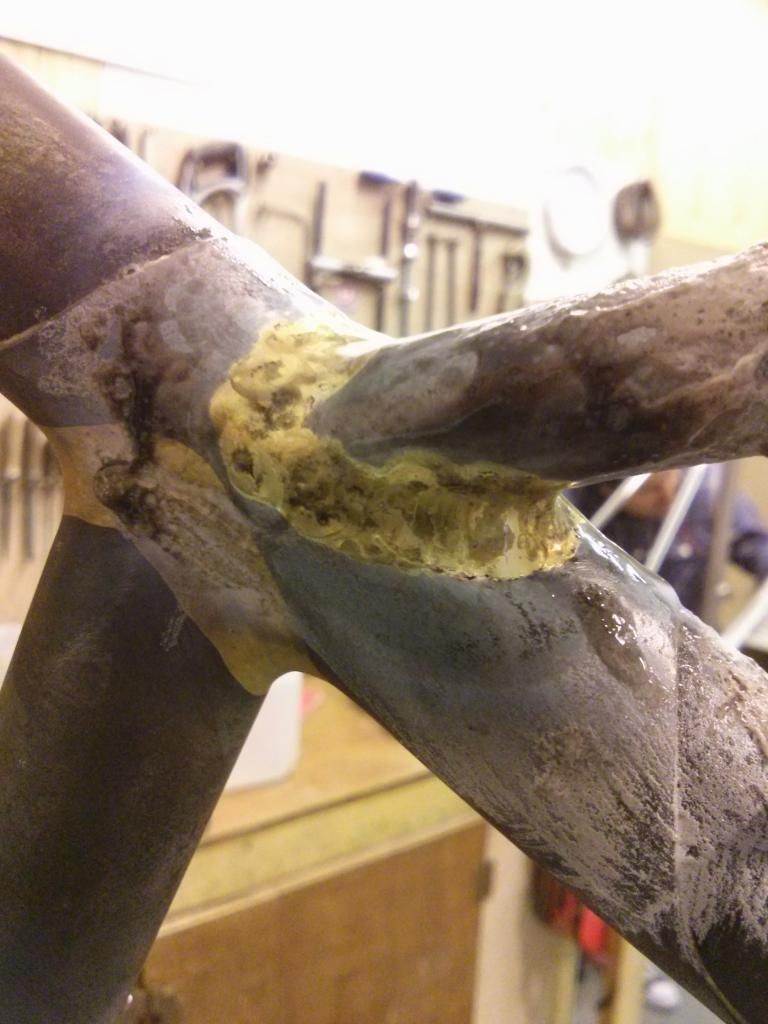
It's important to be as neat and even as you can manage on the seat tube cluster, as it's a very awkward area to file. I did OK, but I did have to use some small jeweller's files called Rifflers to get right around the joint. Awkward, but satisfying to get right in there.
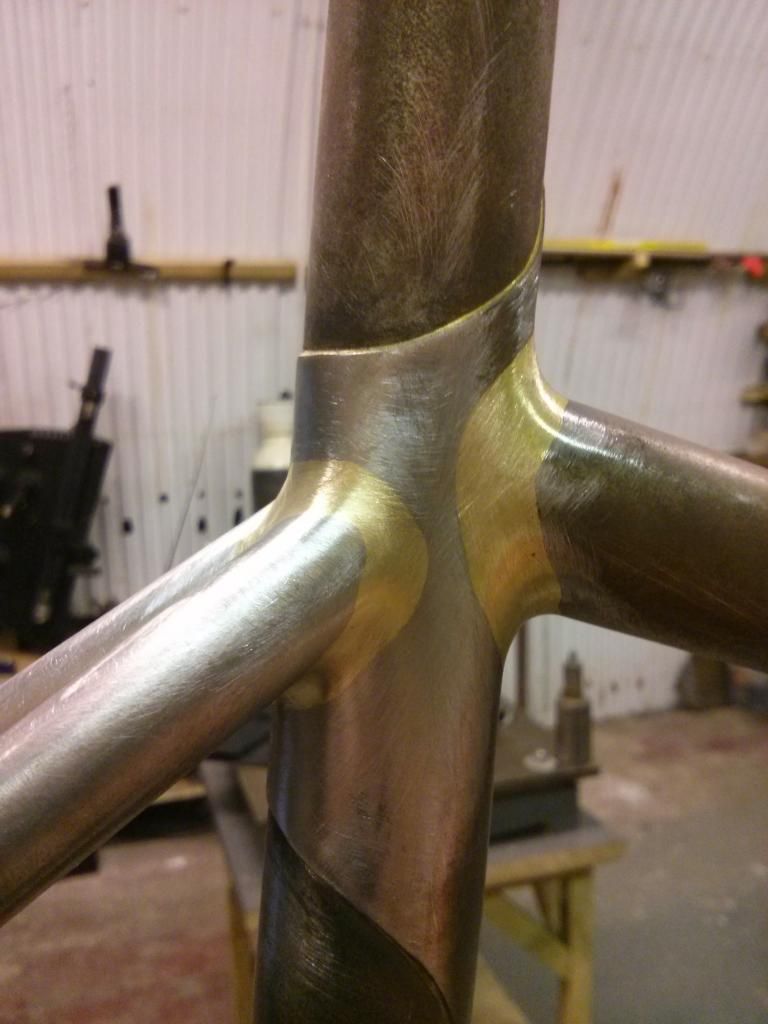
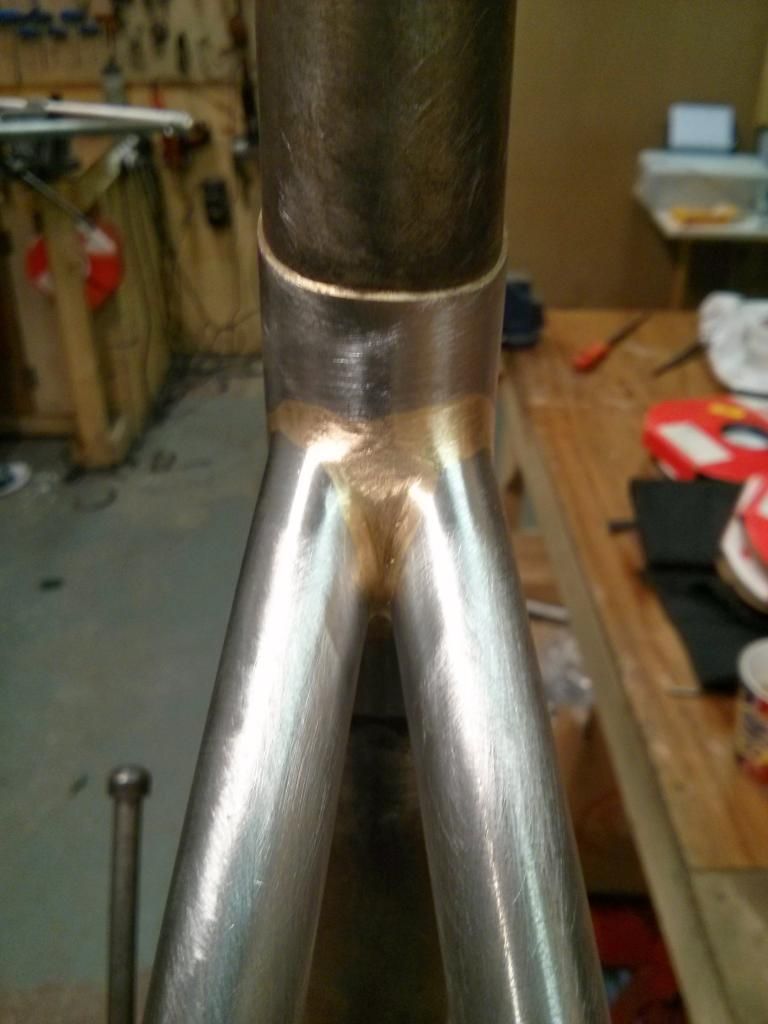
I made the error of not putting a dummy axle in the dropouts as a brazed, which caused the drops to pull towards each other by just over a millimetre. A quite firm push corrected that, and the back end alignment all looks good now.
Next week I'll refine the fillet shapes some more, then it's onto the brake bridge, chain stay bridge, seat post binder and the braze ons.
-
• #40
This is looking lovely. Thanks for all the technical info too :-)
-
• #41
love it, I am getting inspired to have a go at this frame building lark.
-
• #42
So far it's been a very rewarding experience. There's nothing quite like designing and crafting something with your own hands.
Nice that people are enjoying some of the technical side of it too. I'm obviously just starting out, but I really like to understand why things behave the way they do. It all helps you to anticipate what might happen when you do something. I am an absolutely avid bike geek as well, so I'm always rooting around for more info.
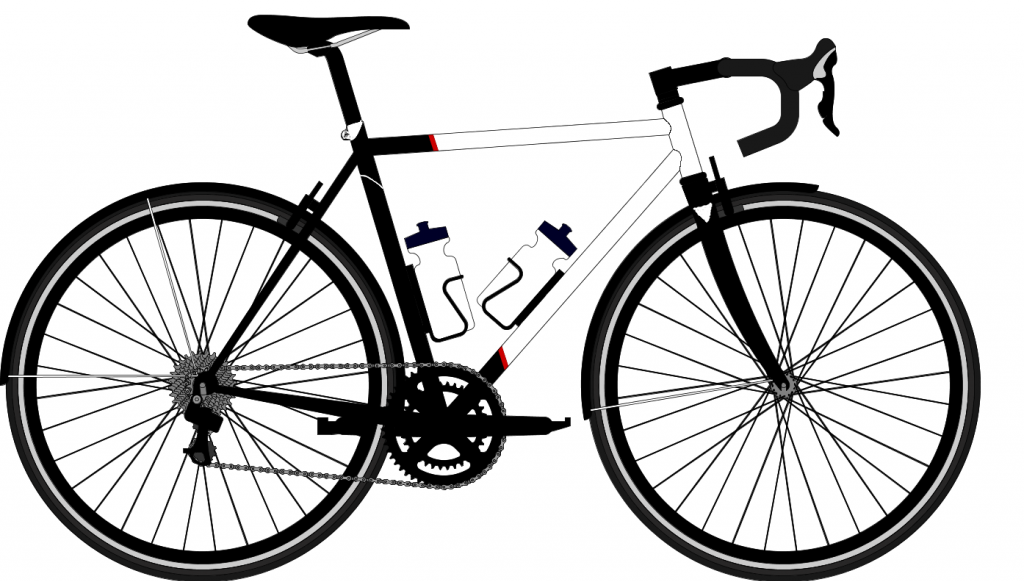
I've been bold enough to start thinking about design schemes. I want to keep it pretty simple, with a very practical dark colour around the fork and wheels. It's a winter bike, so there'll be plenty of muck on there at points. There'll be a logo on the fork, and a name on the down tube.
This is where my head's at. Apparently white paint leaves your fillets with nowhere to hide, so that'll be interesting.
-
• #43
Another place you collect muck is the underside of the DT. Maybe have the road facing section dark/black with white panels facing inward.
Not exactly like this, but it gives you an idea of what I mean:

-
• #44
^ very much this. Was surprised that even with decent mud guards the DT of my Rourke is constantly caked In mud.
-
• #45
Yeah, that's definitely an option. I've looked at the dirt pattern on the underside of my mudguard-equipped Cross Check and based the design on that.
I'll have a think!
-
• #46
I have some old Bluemels guards with a mudflap on my Paulus Quiros audax bike, they must of known something 50+ years ago as the down tube, bracket area and my feet stay very clean and relatively dry. A friend uses SKS longboards which work well.
-
• #47
Lovely work on the seat stays.
I know it's a winter bike but if I was making one for myself I think I'd be obsessively cleaning it anyway, so that I can keep staring at its beauty with smug pride. :-)
-
• #48
A little update from Friday. I spent the morning refining some of the fillets across the bike to get them more trim. Still need more work, but they are getting nicer every time I go over them.
Mostly this week was about cutting and fitting the brake bridge. The mitres need to place it so that the caliper bolt runs tangential to the wheel, and with the bolt dead centre between the stays. It's a process of file, check, file, check...
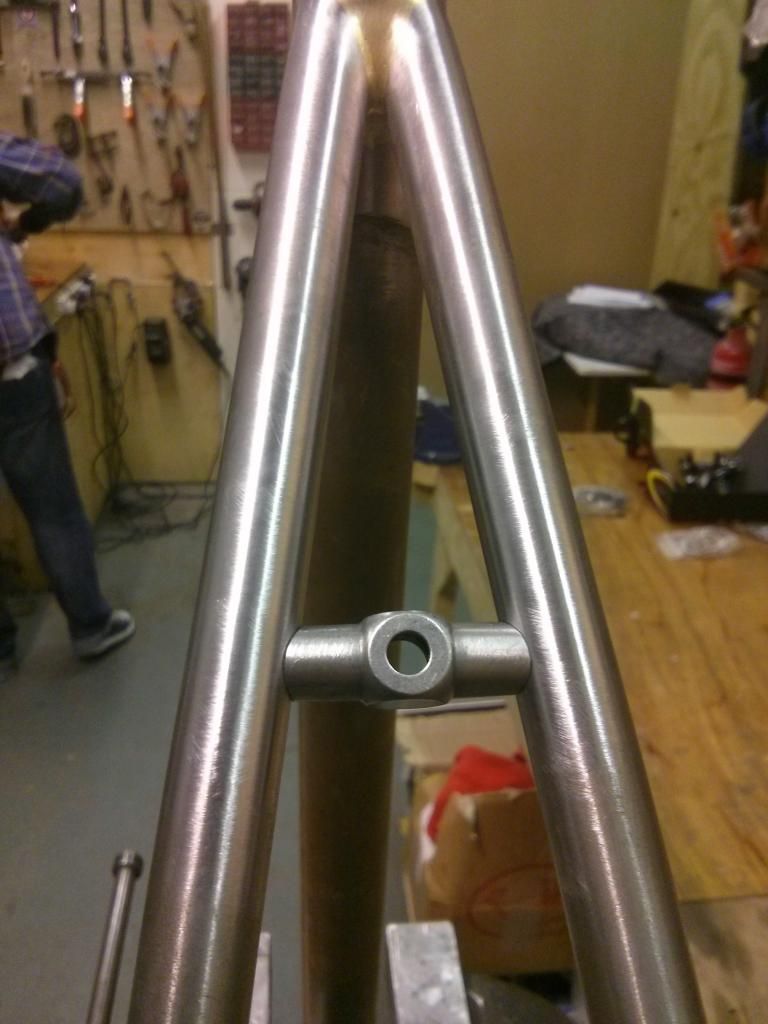
After offering up the brake then I held the bridge in place with a single tack. For tacking you want to keep the heat restricted to as small an area as possible to get a little dab of braze, rather than a big joint. In the event there's something wrong that minimises the amount of work needed to take the part out. You can see the relatively small area where the flux has come up to temperature in this pic, where it's gone glassy is the area that's been heated.
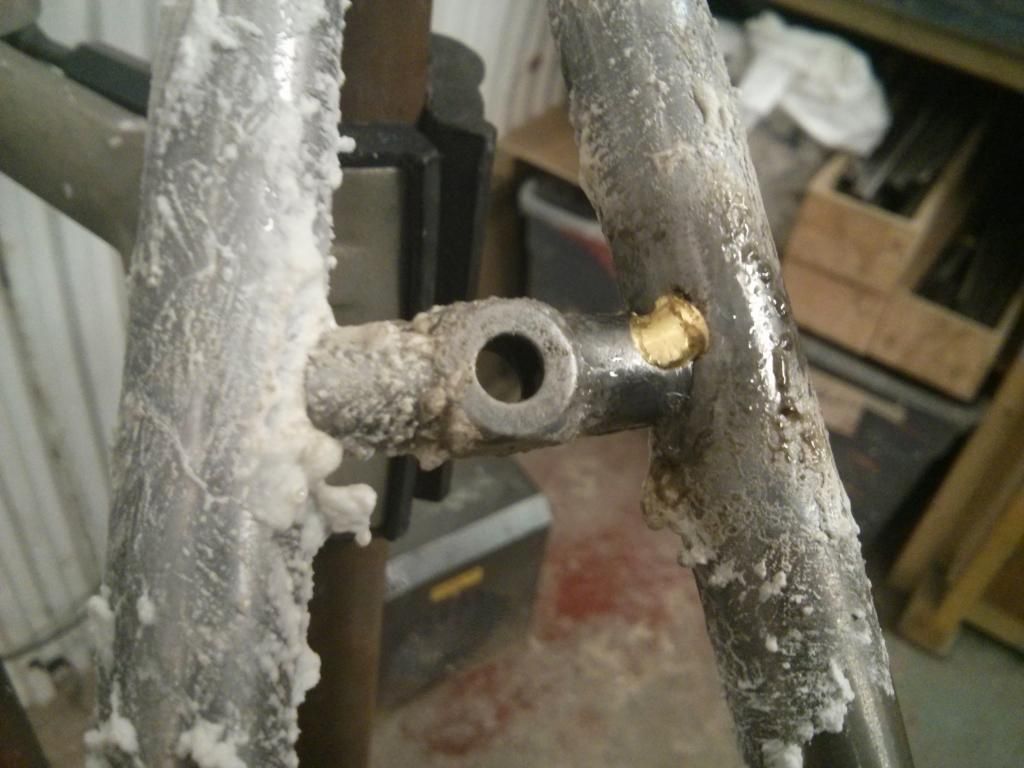
Then a quick fit-up with the brake and tire. I'm going to be using a 25mm, and these are medium-drop Tektro calipers. Although I'm not dead in the middle of the adjustment, there should be ample clearance.
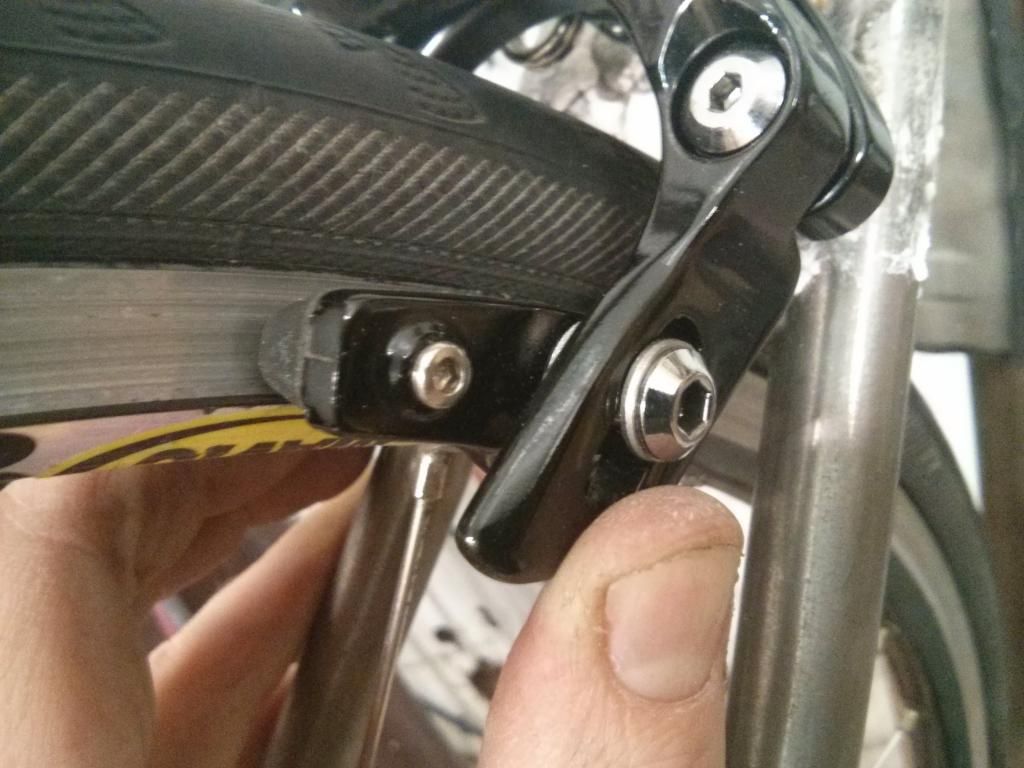
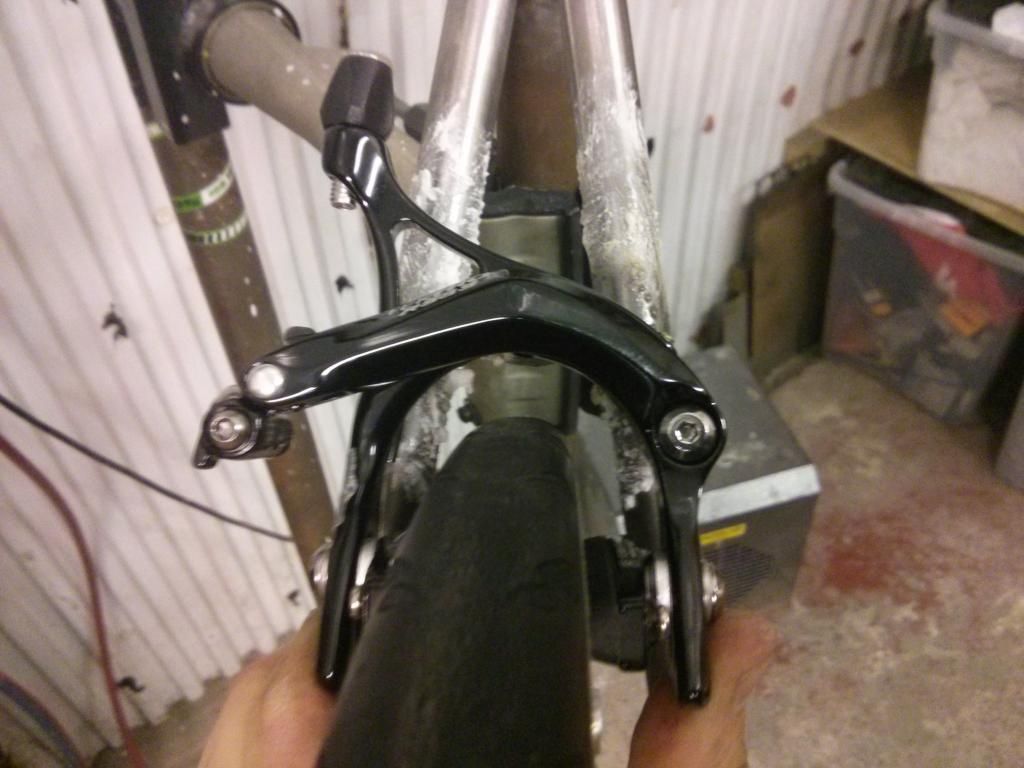
Once I was satisfied the setup was OK I brazed it in. Next week I'll clean it up. One thing I was really surprised about was how much the bridge stiffens the rear end up. Probably wouldn't have noticed but I forgot to put the dummy axle in, and making the slight correction to the spacing took a surprising amount of effort!
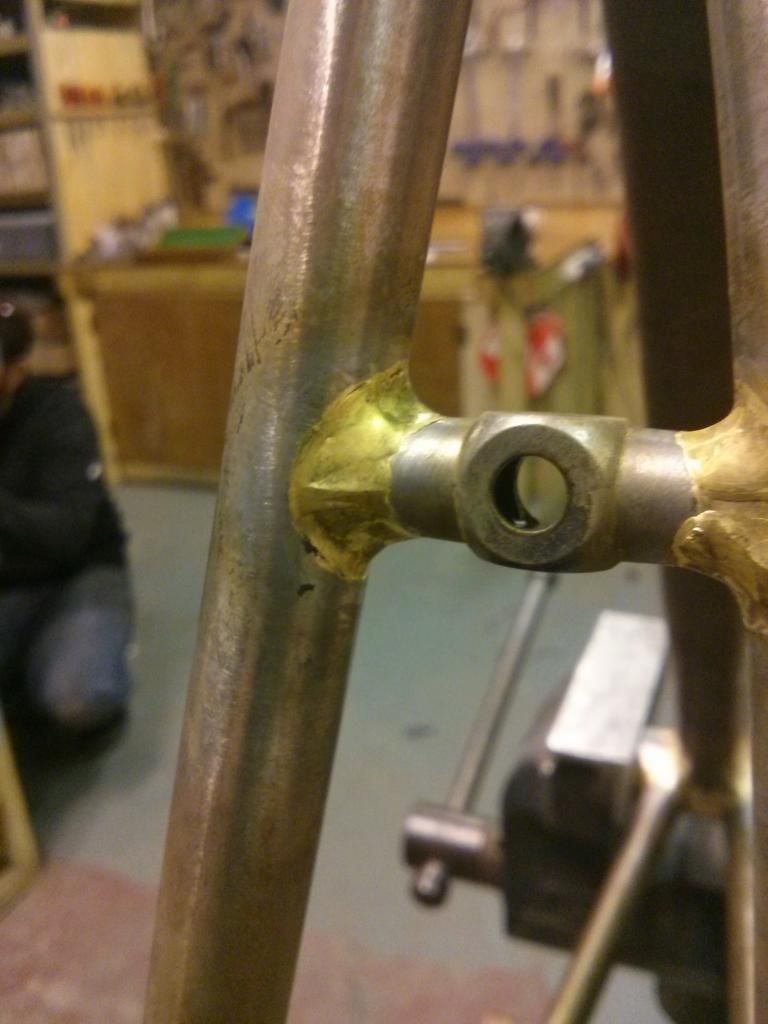
This was done with a smaller diameter brazing rod, a 1.5mm. That way you get an appropriate amount of braze on there.
I also have some very exciting news. I applied to exhibit at Bespoked next year as a new builder. It felt like a bit of a long-shot, but having submitted images of my progress I've been given a spot!
Bit scary. In a good way.
-
• #49
that is pretty awesome
-
• #50
Awesome news, Looking forward to seeing you there!
 loc
loc Mikenetic
 drøn
drøn ObiWomKenobi
 jambon
 BareNecessities
 Stevevw
 hugo7
hugo7 dan
dan loctez
Every time I read this thread I want to vote it five stars again.
Great work.