-
• #52
Also... this is actually a thing, its not just my own hare-brained idea:

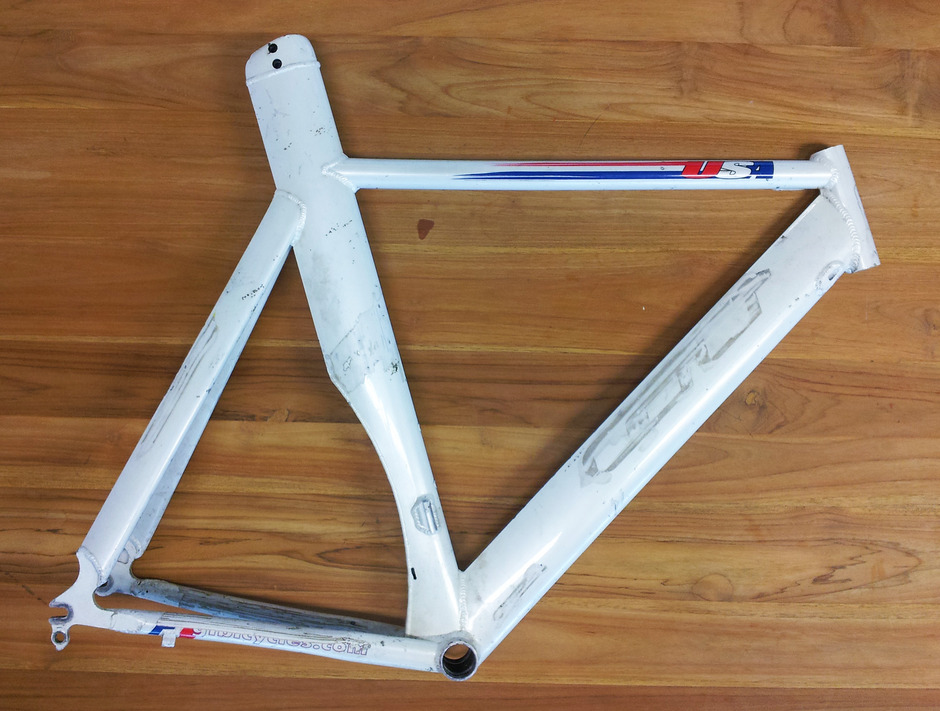
and, more similar to what I hope the end result on mine will look like, this one is on a tiemeyer frame (which has some connection to the GT aero I recall...):

(not that it means anything)
I'll do a step-by-step with pics for those who don't believe a rank amateur like me can pull it off ;)
...or so you can enjoy the schadenfreude when I miserably fail! -
• #53
tiemeyer built the track ones, probobly some of the other olympic team ones as well
-
• #54
Just buy these...
(insert troll.img here)
-
• #55

-
• #56

-
• #57
He also built team USA timetrial bikes, like mine.

Dropouts are aluminium (of course). I'm not sure what to think of this project, it's ambitious but "just buy a Visp" is on repeat in my head.
-
• #58
Due to the proliferation of 'just buy a ________' comments, I should probably clarify that this is a budget project. I am hesitant to say how low my budget is, because of the first round of laughs for "that's a joke" and the second round of laughs when I end up spending way more than the budget ;) I don't plan on spending more than 150 if I can help it, and 50 is already gone on the frame. Any further suggestions of 'just buy a _____' are likely to be met with animated gifs. #justsayin
Edit: sorry about the formatting - not sure why it went italics (wasn't me trying to be aggro)
-
• #59

I for one am looking forward to this!
-
• #60
Ok, here goes nothing :
Step 1:remove derailleur hanger
Step 2: measure and trim track ends (the bit going into the bottom stay was too long)
Step 3: confirm it will fit in on both sides
Step 4:cut other track end to match
4 Attachments
-
• #61
Step 5: mark out holes for drilling
Step 6: use little wood jig to drill straight holes (should really have used a pillar drill for this but don't have one)
Step 7: match and line up on second track end
Step 8: file down welds on stays so the track ends lay flat (to be completed)
4 Attachments
-
• #62
Apologies for all the awful phone shots - not sure why they are so large and out of focus :(
-
• #63
How do you plan to keep it symmetrical? (honest question)
-
• #64

-
• #65
This is the type of mod I had in mind too.
I hope it works and it lines up ok - looking forward to the next photos
-
• #66
Shouldn't you use some kind of recessed nuts and bolts?
-
• #67
@Carabo the plan is to do one side and then create a sort of jig (basically a piece of wood that would be shaped to exactly fit the end dropout bit - ie where the axle would go) that will indicate where exactly the other end should go. Without very precise measuring equipment and machinery, the only way to do this is to be exact in relation of one side to the other, rather than trying to measure it in some sort of objective way. I'll admit it's risky but even if it is slightly wrong, there is a bit of latitude, though obviously I have to be sure that everything is very strongly in place.
@FredyCro I will probably either use a recessed nut or tap the holes in the track ends. Anyone have experience of whether a tapped hole is likely to be secure enough, or if it would need some sort of locknut or flange. Just don't want the vibrations from riding to gradually loosen the bolts, but not sure how likely that is...
@young_gun @HHC - I know you're only here for the gussets, but that will have to wait, but for your entertainment, here is the illustrated plan (red lines for thin webbing with filler, yellow lines for thicker 3-d gussets with foam and fibreglass):
1 Attachment
-
• #68
Why no gusset at chainstays?

-
• #69
... good idea - we'll see what the clearances are like once a wheel is in there, as I think I'd be less interested in a "hollow gusset" as in the picture where the wheel would be just about between the two sides.
-
• #70
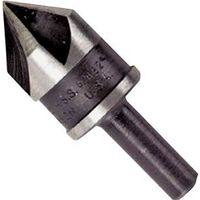
I think a countersunk bolt with a recessed nut and a drop of loctite would do the job. You will need a special drill bit for adjusting the holes for countersunk bolts. Maybe page @mdcc_tester for a more technical explanatio! :)
-
• #71
Good job!!
-
• #72
for simplicity i would go non countersunk, grade8 hardware, and strong ass loctite. inspect at normal intervals.
And honestly, this frame dosent need more gussets... dont have this moment...

-
• #73
Was there a captive nut for the derailleur hanger bolt?
Are you thinking of threading the frame or the dropout? I'd be worried about threading the frame if it's aluminium. I'd also be worried about countersinking it and losing too much material in which case you'll end up with a bolt head on the inside of the frame. -
• #74
If countersinking obviously you do it on the steel droput, I think something like this will do the job

-
• #75
but why? wont be visible, so not for aesthetics, greater risk of throwing this all out of alignment, and doesent add strength
 jdmitch
 young_gun
 Pete4Eyes
 Carabo
 Tijs
Tijs


 Vince
Vince FredyCro
 roboto
 -Tom06-
 Trunkie
nevermind