-
• #2
Nice work...very helpful
-
• #3
it would be a good idea to state the direction of rotation required for the drive (D) side and non-drive (ND) side
-
• #4
I've found my bb tool can't stay in properly due to shallow notches. I use an old QR skewer to keep it in place (only works it the axle is hollow)
-
• #5
^ yup, and if it's not hollow, a long bolt or threaded rod with some nuts and washers will work, too. It really is a good idea to secure the tool properly as the notches are very shallow and a couple of slips will easily damage the BB cups.
Also, your bike is absolutely immaculate.
-
• #6
I've found my bb tool can't stay in properly due to shallow notches. I use an old QR skewer to keep it in place (only works it the axle is hollow)
I use crank bolts and a big plastic washer. Holds that sucker in a treat.
-
• #7
Nice tutorial! As stated in your previous thread, I'm suprised there aren't more like this!
-
• #8
I've got more coming:
Headset removal / fitting
Chain removal / fittingIf someone has a video camera, we could even to video tutorials for the LFGSS forum for the world to see!
-
• #9
Would be good to get them up on youtube and the like.
-
• #10
I've got more coming:
Headset removal / fitting
Chain removal / fittingIf someone has a video camera, we could even to video tutorials for the LFGSS forum for the world to see!
Do it like Dave Grohl .....
How to Fit a Road Bike - YouTube
&playnext=1&v=FAl_5e7bIHkOnly with a wide east london accent, LFGSS cap, beer and tools made from scrap you found in bottom of thames.
-
• #11
Great info and immaculate timing, am just about to attempt this
-
• #12
I've got more coming:
Headset removal / fitting
Chain removal / fittingIf someone has a video camera, we could even to video tutorials for the LFGSS forum for the world to see!
I might do a video of how to remove/install a headset with only a big wrench and a big allen key.
-
• #13
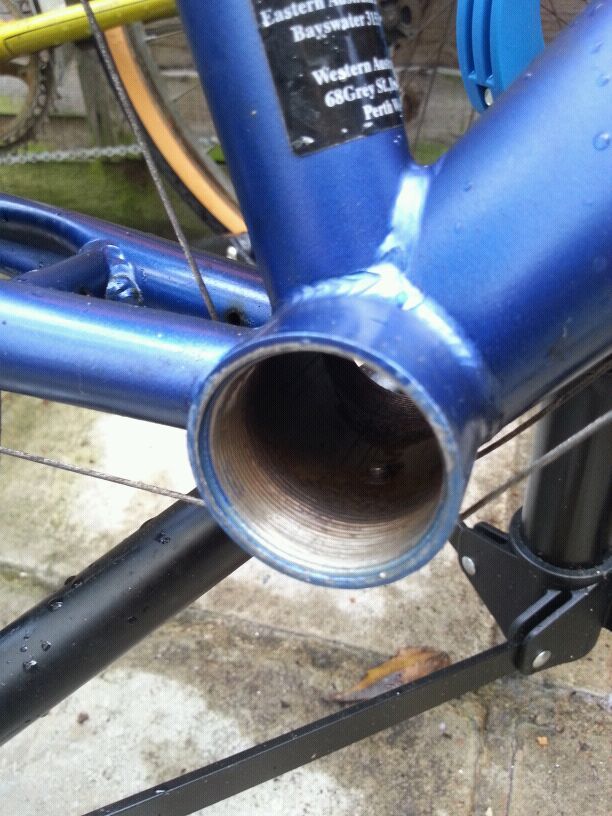
I had to remove a properly stuck bottom bracket last night so I took some pictures.
Remember that on british threaded BB, you undo a BB by turning towards the front wheel for both cups (clockwise driveside, anticlockwise non drive side).
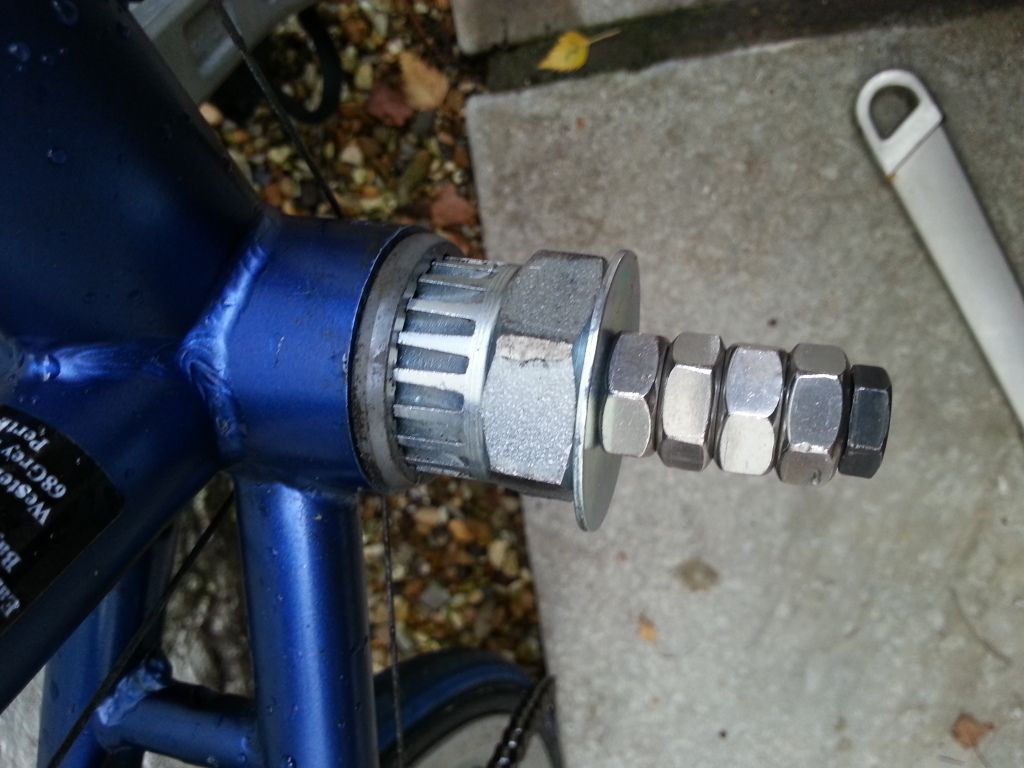
The bottom bracket tool kept slipping off, meaning that everytime I was applying too much force, the tool would damage a teeth. I popped in Clerkenwell Screws and bought an 8mm fine thread bolt, a large washer to hold the BB tool in place. £2 later, that looked like that (they only had a 10cm bolt with 5cm thread so I got a couple of nuts to hold it in place):

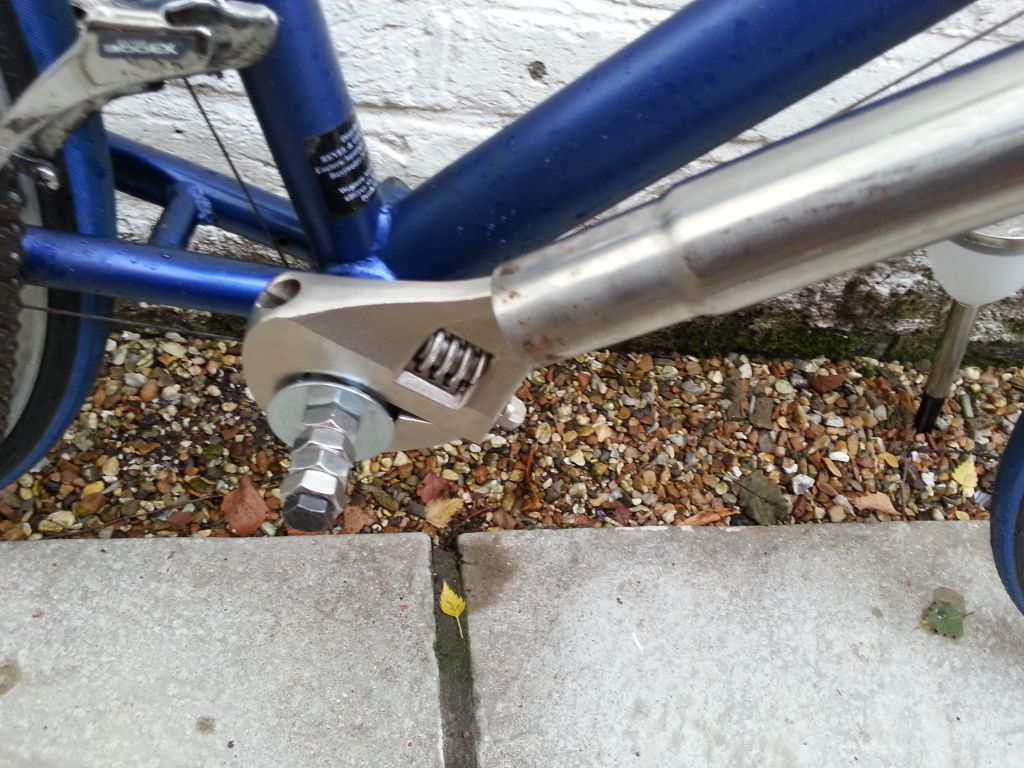
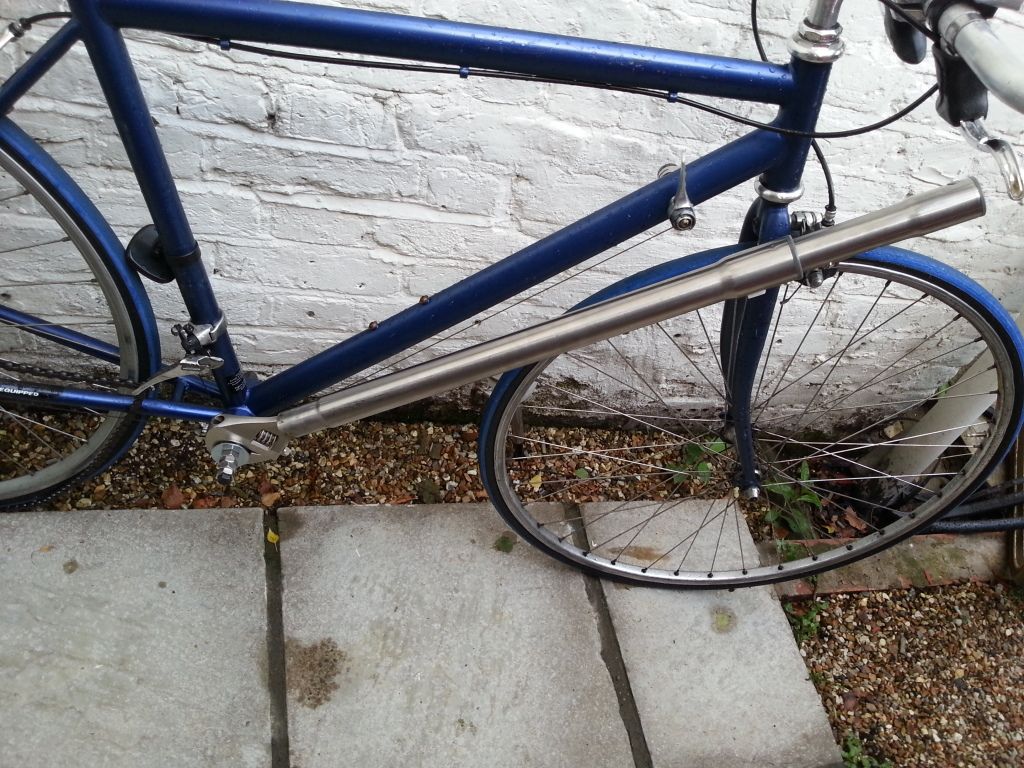
Once this was in place I realised that I didn't have enought leverage with my big spanner and the BB was far too stuck to move. I went into the cupboard, grabbed the hoover metal tube and slid it over the spanner to get maximum leverage (you can even extend it for more leverage.


The BB moved straight away, by applying very little force - that's leverage for you!

-
• #14
wow thats a lot of leverage you got there
-
• #15
wow thats a lot of leverage you got there
That hoover hose can extend even more. I was looking for a pipe or something similar but that is a great piece of kit that most people would have in their house.
-
• #16
Nice work
-
• #17
You crazy vince, a genius, but crazy
-
• #18
Worth remembering that if you need that much force to remove the BB, it's more than likely that the person who fitted it (might be you, might be previous owner) did something wrong.
No grease, didn't clean threads, too tight etc.
Could also just be that you left it too long between maintenance but I find even very very old BB that installed properly come out easily.
In other words, don't make any of those mistakes when reinstalationing.
-
• #19
Tutorial bumpage.
-
• #20
no bump without price drop!
-
• #21
I find rust, and a steel bracket into an aluminium frame makes force a necessary evil!
Especially if theres no grease involved...
-
• #22
mad skills, one question what size bolt did you get, coz I went to Halfords to find one and found a few with the right diameter but the threads aren't the same.
-
• #23
8mm fine thread bolt is the one you need - it will fit in the BB thread and you can put a big washer to hold the BB removal tool in place
-
• #24
Thanks Vince sorry for the tardy reply. I have the bolt now going to try it tomorrow :]
-
• #25
Don't forget to charge yourself at least £25. I have a bolt at home I use to keep it attached but have one of these at work which is super sweet.

 Adscan
 rive_gauche
 Drewzy
 lae
lae Butters
 hollow__legs
 Vince
Vince spenceey
 Sumo
Sumo dicki
dicki pharoahsanders
 Moserism
 M_V
M_V zep
zep snottyotter
I was switching bottom brackets at the weekend and took a few pictures to create this tutorial for those who would like to change their bottom bracket.
Nothing is hard when you have the right tools so the first step is to actually buy the right tools. My bottom bracket was a Shimano and I was refitting a Shimano so here is what I need:
Depending on what you bottom bracket is, you will need a different bottom bracket tool / lockring tool. This tutorial is for Shimano but you'll get the idea of yours isn't Shimano type. Here are my tools:
Start by removing your chain or derail it off the chainring if you don't want to remove it. Give it all a good clean so you've got a nice working environment with no dirt to screw your threads.

Then the graft starts by removing the crank arm bolts on both sides with your allen key, just like this:
Once removed on both sides, grease your crank extractor tool (CET) and bolt it onto your crank arm. The inner part of the CET should be put in contact with the axle tip.

If you only have a big spanner (like I did), use it to screw it the outer part of the CET which will push the crank arm away from the BB - If you have more tools like a socket wrench, use it to screw the inner part of the CET will will push the crank arm away from the BB (this second method is more efficient).
At this point, you have removed your chain, crank arm bolts and crank arms. It's just you, the bottom bracket, the frame and your tools. So far, you are winning so have a beer.
Now use your Bottom Bracket Tool (BBT) + your spanner and slighly unscrew the no drive side, leave it in place at the moment so you can remove the BB nice and straight, like that:

Now you can remove your bottom bracket fully

Half of your work is done and your old bottom bracket is out!
You just need to put your new one in so at that stage, you should really know the BB you need - mine was british thread, 68mm shell and 107mm axle so that's what I got. I can't help with your chainline, but there is a thread for that here.

Start by cleaning all the threads and then greasing it all properly with good teflon based grease or better then put the non drive side cup in place with your hand.
Then insert your fresh bottom bracket by hand so it is nice and straight, through all the way through the non drive side.
As per previous pictures, use your BBT to tighten the bottom bracket in place, starting with the drive side then the non drive side. As a guideline, tight is tight, too tight is fucked so don't go nuts.

Place your crank arms back in place and fit your crank arm bolts - tight.

Once again, you've done it - saving you about £20 from your local bike shop (including the tools you've bought).
Have a beer!
Cheers
Vince