-
• #2
Nicely done. As a forum I'm surprised we've not done more of these kinds of threads.
-
• #3
Awesome. Got all the relevant drifts and stuff at work but this works just as well. Top MacGyvering.
-
• #4
Hitting the axle with a metal hammer can damage the thread. Use a wooden/rubber one, or put some wood between hammer and axle.
-
• #5
Great work! I've said it before, but we need a forum wiki for putting useful stuff like this in. Make it a lot easier for people to UTFS too
-
• #6
Hitting the axle with a metal hammer can damage the thread. Use a wooden/rubber one, or put some wood between hammer and axle.
... or put the track nut on wrong way round, to maximise the striking area.
@ Vince. Excellent tutorial al the same, well done.
-
• #7
good stuff, there should be a sticky for tutorials
-
• #8
Good work. I FAILED at this the other day.
-
• #9
I succeeded at this the other day - rode the resurrected wheels on the Tweed Run! They were dreeeamy!
-
• #10
Very good work!!
I was planning to do this soonish and this will make the job much smoother.More tutorials all round I say!
-
• #11
I read this on the offchance I may be missing a trick - I've chanfged cartridge bearings many times, and yes, using the old bearings to drive in the new ones! Why had I never thought of that!
Great little tutorial.
-
• #12
Yep, I'd always banged them in using the old bearings to prevent damage. Using wrenches is a nice idea!
-
• #13
Just discovered this after dropping my bike at the lbs to replace the bearings this morning... gutted (and bookmarked).
-
• #14
Successfully changed a set of bearings this afternoon thanks to this excellent tutorial. Rep to Vince.
-
• #15
Glad it was useful. Such an easy task when you know.
Happy to do LFGSS video of this task next time if someone is up for filming.
I've got other tutorials on here, I'd like to do more and create a section
-
• #16
Nice one Vince - great having it laid out like this
-
• #17
On some hubs, like the Fuji one I've just done, the bearings really don't want to come out because tolerances are tight and/or they've been there for a long time and a bit of corrosion has made them stick. Heating up the hub makes it a lot easier - about 120 deg C in an oven will make the hub shell expand a lot more than the steel bearing race and relax the fit somewhat. My hub happened to be out of the wheel for a rebuild, but you could heat one up with a hairdryer or heat gun.
-
• #18
You can modify this method for road hubs by using a quick release as the bearing press and drift the bearings into the hubshell. Also works on Powertaps :)
-
• #19
Bump.
Rep.
-
• #20
Outstanding I've been looking for a tutorial to do this for ages. All the others I've found are for loose bearings.
UPDATE: I've just done this, this afternoon and realised I was being a bit of a pussy last time I was trying to knock the bearings out. Bernie's idea of putting the track nuts on the wrong way round so you've got a much bigger surface to hit and spread the force definitely helped. Cranky I'd give up with the rubber mallet and go for a metal one and the track nuts and don't be afraid to give it a good hit - mine were well and truly fused in but a good spray of WD hefty wallop and they popped out no problem
-
• #21
Another tip I learned doing this on motorbikes was keep the new bearings in the freezer for a while, then heat the hub.
-
• #22
I'm trying to "bash" out a set of cartridge bearings at present doing exactly whats shown here. I've also seen videos on line where people hold the hub by hand, tap the axle and the opposite side bearing falls out as if held in by Blu-Tack. This does not happen for me.
The first post here says gently tap the axle. My rubber mallet is now getting scared from bashing the damn thing. How hard can I hit this without damaging the wheel?
Also will pouring boiling water over the hub shell to make it expand cause any damage to the wheel?
I wish I'd stuck to loose ball bearings!
-
• #23
I wrote tap gently but I wasn't gentle.
Hit it with a proper hammer, you can put a bit of wood at the top of the axle so you don't damage the threading.
-
• #24
Thanks Vince. I'll try that. Despite having the whole hub shell supported on a wooden block with a hole in it I was concerned about damaging the spokes or affecting the way they are seated in the shell.
-
• #25
I bought new bearings last week and stumbled across this thread while trying to find out if I needed specific tools to extract and replace them. Happy to find the answer was no and that it was all very straightforward. More +rep for @Vince.
Old bearings must've been really fucked. Even with the wheel removed from the frame and everything taken off the axle the play was still obvious. All feels rock solid now.
 Aroogah
 tallsam
 606
606 upstart
 Bernie
 31trum
 villa-ru
 General_Lucifer
 Drewzy
 conker
 Elvis
Elvis ewanmac
 Regal
Regal Vince
Vince dubtap
 inchpincher
 Brun
Brun
I was changing my cartridge bearings at the weekend and I took a couple of pics to create a tutorial - I hope this is useful to someone that has never changed bearings before.
I had about 5mm of lateral movement in my rear wheel when it was properly fitted to my bike, which can only mean one thing... the catridge bearings are shot and need replacing.
In the past, I would just buy a new rear wheel, but changing bearings is quite easy so you save quite a lot of cash doing it.
This is for a rear wheel but the front is exactly the same technique.
First of all, you need to remove your wheel from the bike and clean your hub and remove all the nuts/bolts that are present on the axle so you can identify which bearings you need to order. (use one spanner on each side, and if any nut doesn't want to come off on one side, re-fit the opposite side tightly to the frame and then remove it).
My bearings were 6000-2RS (inner diametre 10mm, outer 26mm, width 8mm, 2 Rubber Seals) so I have ordered some new ones off eBay. Make sure you get stainless steel ones so they don't rust away. If you are feeling flush or flashy, you can choose ceramic ball bearings or choose the colour of the rubber seal.
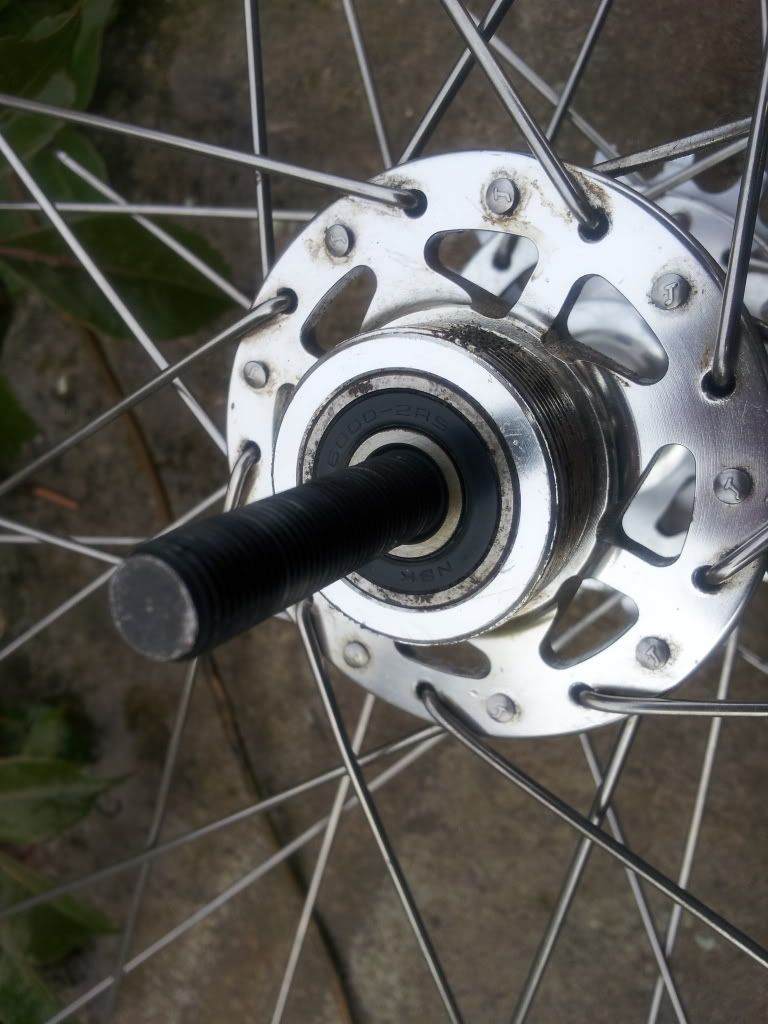
Then put your wheel between two wooden bits so the axle hangs out (without the wooden bits touching the bearing), just like that:
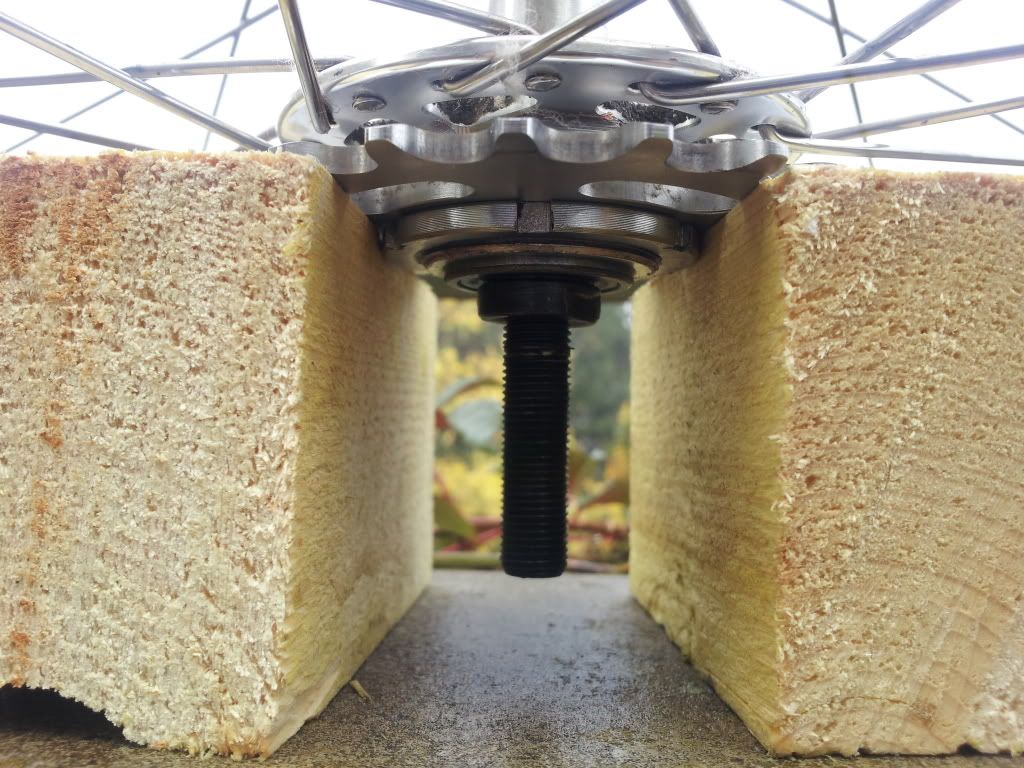
Take a hammer (preferably wooden but anything will do) and gently tap the axle out to 'pop' one of the bearings out:
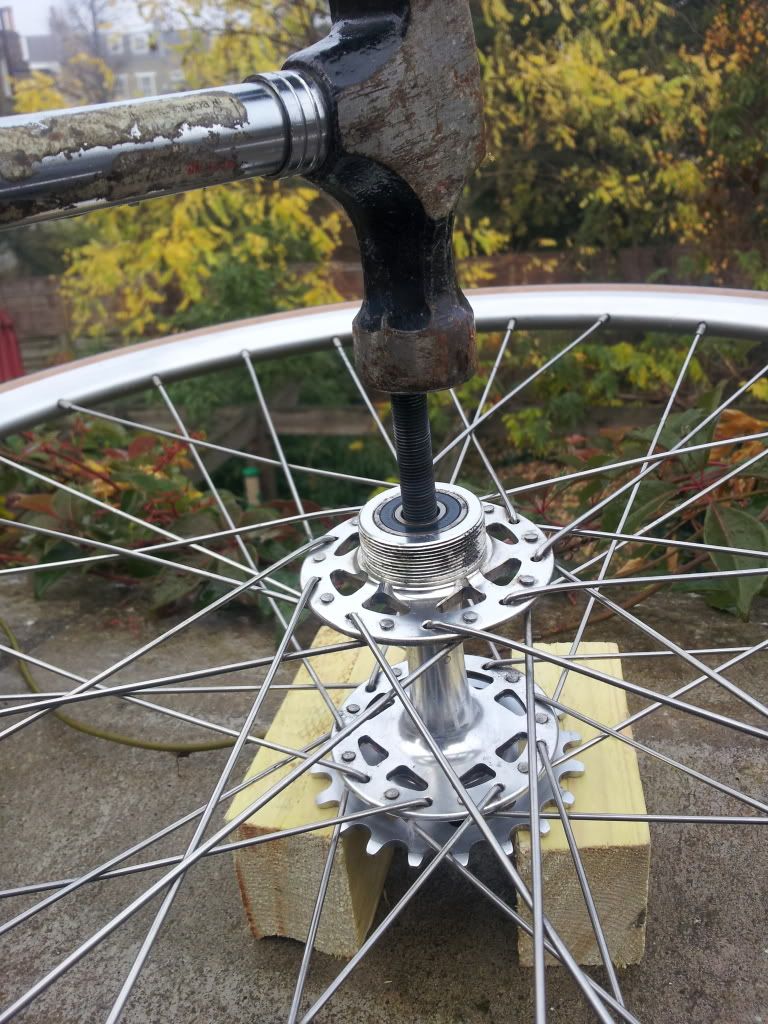

The axle is now free from the wheel and you have removed one bearing. Just slide the axle back in the hub and gently hammer out the opposite bearing with the axle tip.
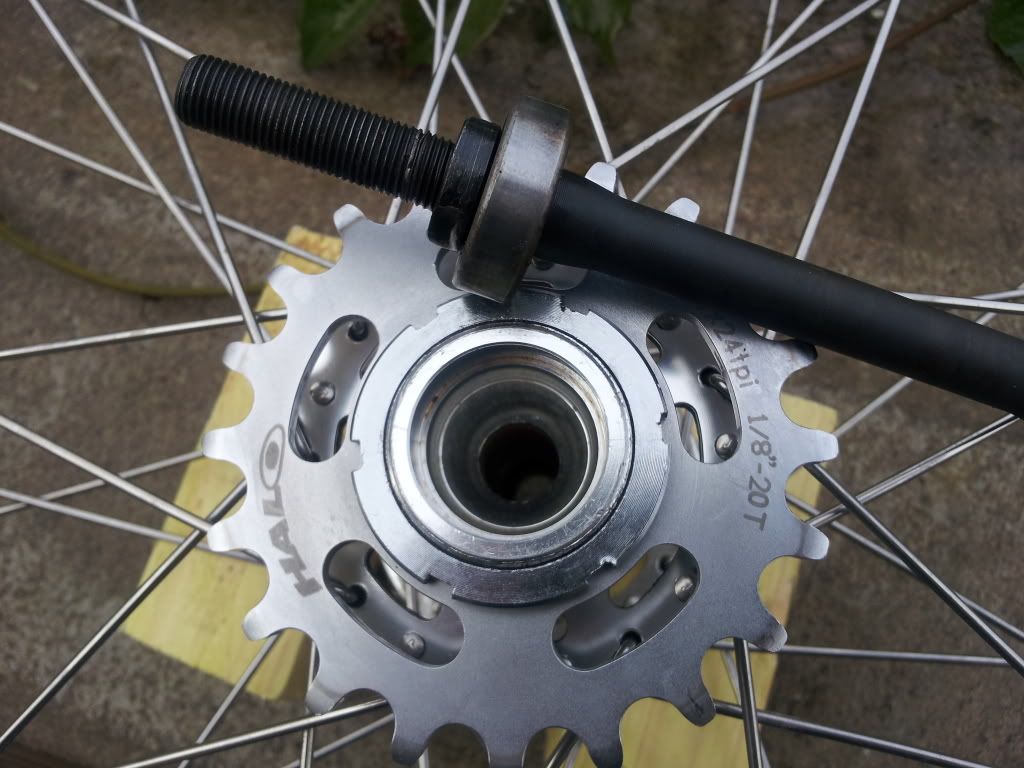
At that point, you have separated the axle, bearings, nuts/bolts/washers from the wheel. it you put back your axle together, it looks like this:
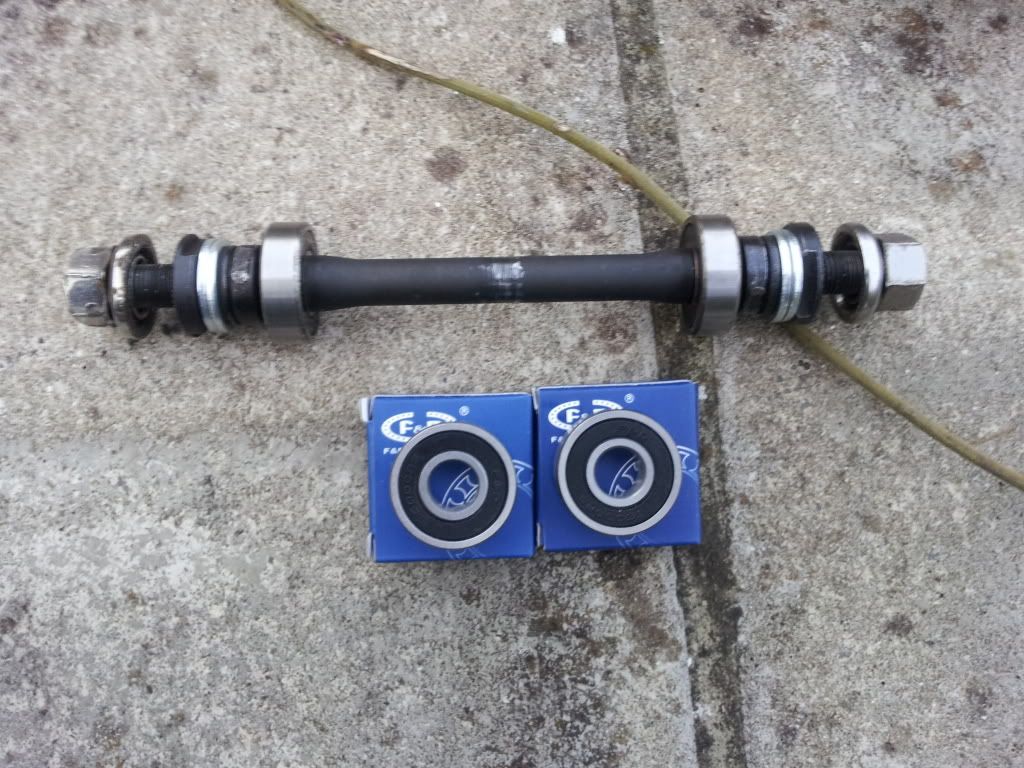
Remove all the nuts/bolts/washers and the old bearings to the the axle on it own:
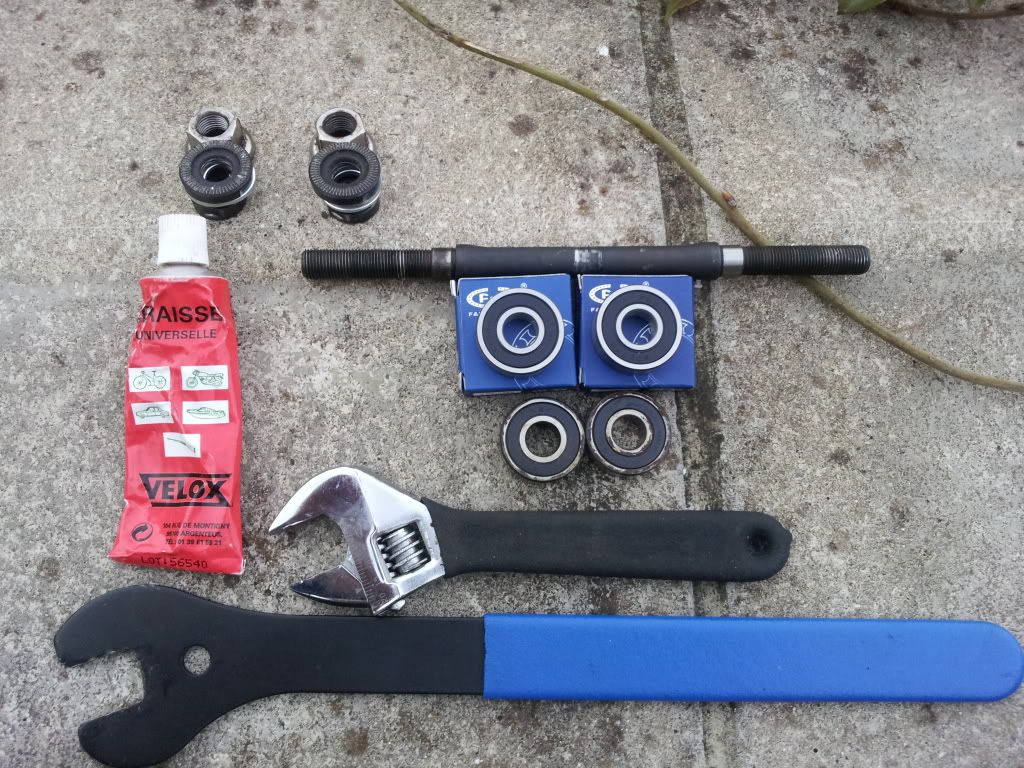
You are now ready to fit the new bearings once you've wacked a bit of grease on the new bearings inner and outer surfaces, in the wheel hub holes and on the wheel axle.
Put your axle back in the hub on its own then slide your new bearings in place on each side of the hub. The new bearings need to be pushed in place so simply place your old bearings on each side then your wheel nuts and tighten them using two spanners, like that.
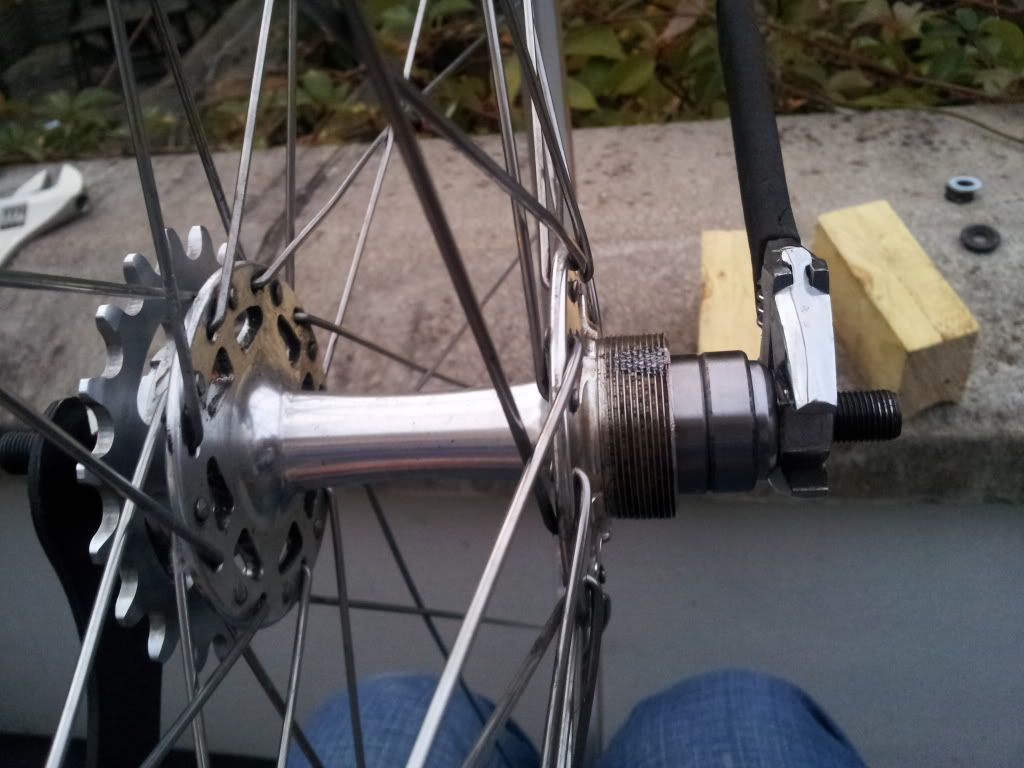
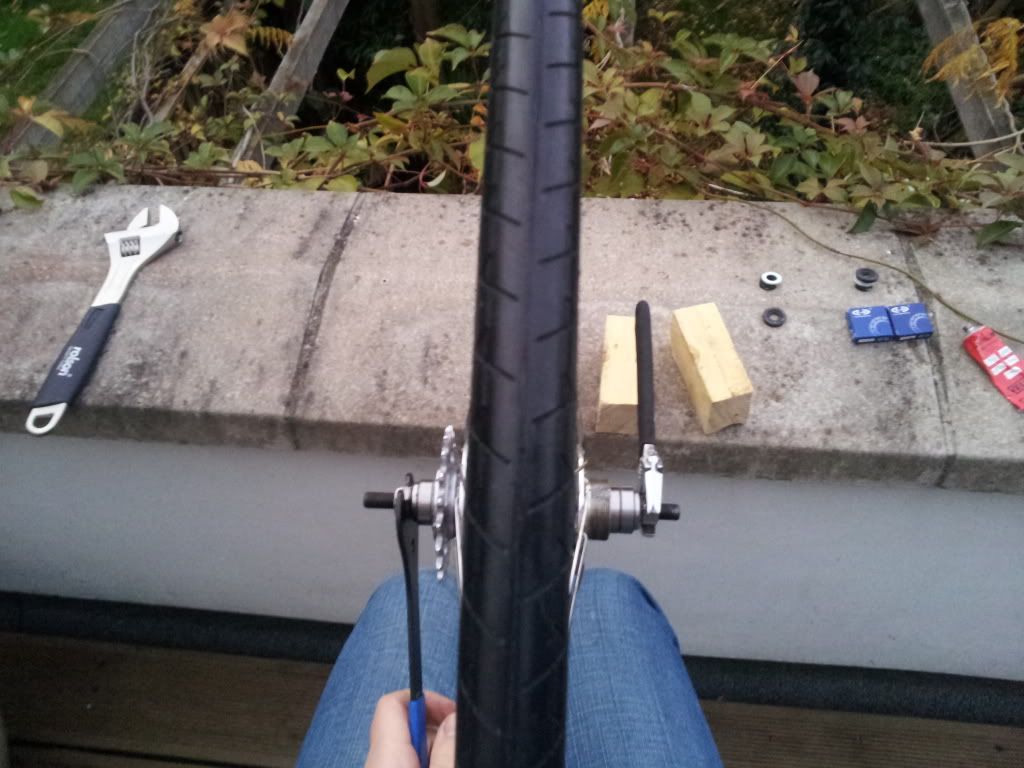
The new bearings are now in place, you just need to remove the old bearing used to push the new bearings in place and place all you nuts/washers tightly back onto the axle then re-fit your wheel.
Job done. You've saved about £20 doing it yourself.
Cheers
Vince