-
• #27
Good work, glad it worked out and thanks for the write-up and tips!
-
• #28
So the rug ended up surplus to requirements?
-
• #29
This is annoying.
I've got a bit of free time this weekend, which I intend to use to put the bike together. So I thought I'd check tonight that the headset and BB fit correctly.
BB: no problem. Threads needed a bit of TLC, but it's all in fine now.
Headset: problem. The crown race just slides straight down over the bottom of the steerer tube, where it sits there, cheerfully spinning around. Not good.
I'd guess there's less than half a millimetre between the inside of the crown race and the outside of the bottom of the steerer tube. I've actually had this problem before and solved it with a Stella-can shim. Will try to repeat the trick tomorrow.
But why is my Athena headset not fitting on my standard-issue Gazelle forks?
-
• #30
As you mentioned in the other thread, the most likely answer is that you have an Italian threaded HS with a 26.5mm crown race.
A frame that passed through my hands had an ITA HS fitted to ISO forks: the steerer had been peened (correct term?), using a punch at an angle to raise the surface at intervals around the circumference.
The race was secure and I'd guess it had been used like that for some time (Seventies frame); I wouldn't like to say whether this is preferable over a shim.
-
• #31
Shimmed it innit. But don't worry, because I've used Ting, which means that my bike will always have a hint of Real Caribbean Grapefruit™

But I've hit another minor snag. My eight-speed Athena rear mech is missing part 3 from the diagram below, meaning that when I install it, there is 1-2mm of lateral movement on the mech hanger. This is bound to affect shifting.
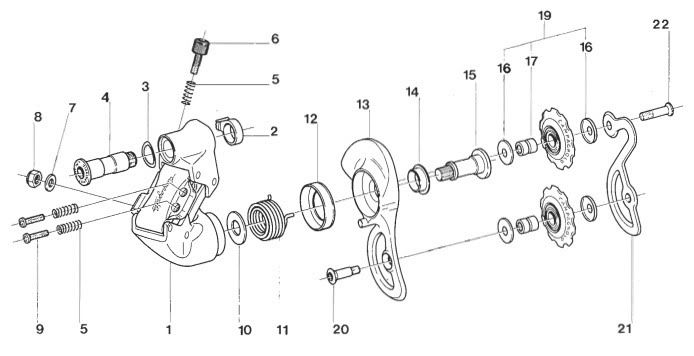
According to this excellent thread on Retrobike (also a Gazelle/Athena), the missing part is a "convex elastic washer"
That bloke managed to track one down. It looks like this.

I haven't even started to think where I'm going to be able to find one.
-
• #32
As you mentioned in the other thread, the most likely answer is that you have an Italian threaded HS with a 26.5mm crown race.
A frame that passed through my hands had an ITA HS fitted to ISO forks: the steerer had been peened (correct term?), using a punch at an angle to raise the surface at intervals around the circumference.
The race was secure and I'd guess it had been used like that for some time (Seventies frame); I wouldn't like to say whether this is preferable over a shim.
"Staked" is the term you're after. I did this to secure a crown race after re-cutting the fork with a tool that cut just a tad too small. It seemed to be secure after fitting and has given me no issues. I'd prefer it to coke can shim just because it can't fall out. As long as you stake the race all the way round it should remain reasonably concentric.
-
• #33
Try searching for A Belleville Washer, a Conical Spring Washer, Disc Spring Washer, Wave Spring Washer, Belleville Spring Washer or Cupped Spring Washer
a quick search found these
http://www.springmasters.com/spring-washers.html
http://www.apexfasteners.com/fasteners/stampings/washers-and-shims/spring-washers
and loads of others on Google.
-
• #34
Responses
^^ I don't anticipate the shim falling out. I had to use a proper crown race setter - thanks to Fignon - to hammer the crown race into place around the shim. Interestingly however, I have just bought another Gazelle (story to follow in another CP thread) where it looks as if the bottom of the steerer tube has indeed been "staked"
^ Great tips. Thank you. I will be visiting Belton and Slade in Wandsworth when I next have the chance.
Updates (and new questions)
Every component is now on the bike and it looks boss. However, the shifting just doesn't work properly.
1) Because of the play around the mech hanger bolt, I can't shift into the biggest cog (though I can when I use my hand to manipulate the mech). This should be solved when I buy the above washer.
2) The nine "clicks" in the nine-speed Ergo levers just don't marry properly with the eight cogs on the cassette. It takes two clicks to move from the smallest cog to the next cog, then three decent shifts, then the chain misses a cog. Similar story on the way down.
Although this problem was predictable, it is annoying. Because I didn't predict it.
So I'm now hunting for eight-speed Athena Ergos. I think I may have found some at a reasonable price. But ideally I'd like to just exchange my nine-speed ones.
But...Apollo, you say above that you were running nine-speed Ergos on an eight-speed cassette. Did it actually work properly? And how!?
-
• #35
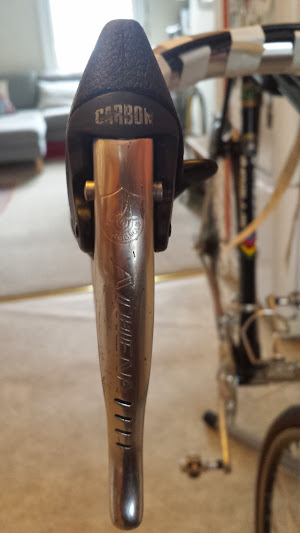
This seatpost seemed like a good deal. And these eight-speed Athena ergos mean that I now have a proper eight-speed set-up.
I have also just taken delivery of a black Gazelle bottle cage, from Hilly Ben. And a new Gazelle cycling cap.
Moar Athena. Moar Gazelle.
I'm closer to solving my rear mech problem too. Though it looks increasingly like I'm going to have to buy a belleville washer of approximately the right dimensions and then trim it to size.
-
• #36
Two good buys! Especially the post, only made for three years from 1995. Do the Ergos say "Athena" on them?
After the C-Record era when Campag started adding groupset names in 1995, they used up left over C-Record parts by adding the group name on them and issuing them with lower groups.
The post-1995 8 speed period is a "sweet spot" for this reason: you're getting kit from one group, at the price of a lower one.
Did you find a BB? I've got one (and '95-'97 RD and cranks).
-
• #37
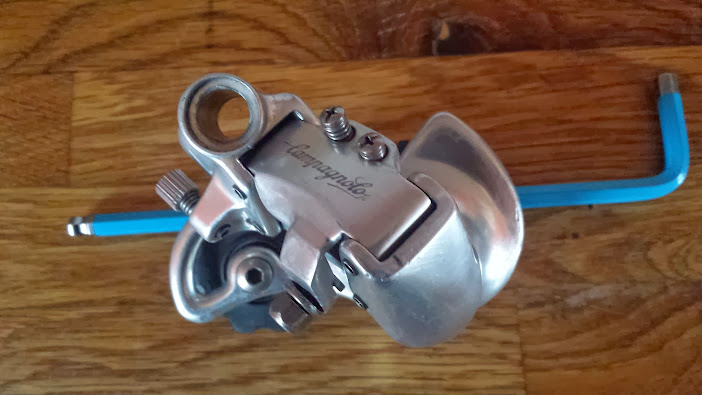
Here's the rest of the groupset. As far as I'm aware it's all Athena, but not necessarily all from the same year. Forgot to photograph the brakes, but they're not monoplaners. And yes, those are SPDs. What of it, eh?
I did find a BB - It's Athena, but it's cup and cone, rather than cartridge.
Looking more closely at this troublesome rear mech, I think I've got a first-gen Athena mech - designed for use with friction shifters or the Campagnolo Synchro system. What I need (and what I thought I had - until this morning) is a "Athena RS RD-01AT"
Which means that I'm worrying about a washer for a mech that probably won't shift properly anyway.
Fuuu...

-
• #38
Found a picture of the BB

-
• #39
Yeah, that's a 1st gen 7 speed Athena RD.
If it has enough travel across the hub, ie it will reach first gear, then I don't see any reason why it wouldn't work with Ergo shifters: the indexing is in the shifter, not the mech.
Even though you have three different generations spanning ten years, it's only the RD that might be incompatible.
-
• #40
Tl;dr: Mech problem solved - by buying a new mech. But now I need to realign my rear dropouts.
Having traipsed around the bike shops and hardware stores of South London, then spent hours trawling the internet for a serviceable 'convex washer', Ebay performed a 21st-century miracle and this arrived in the post.

After delays due to renovating a flat instead of a bike, last night I finally had a chance to see if this little beauty would solve my problems.
It didn't.
Not properly anyway. Although the seven-speed rear mech now functions perfectly in itself, it's just not happy carrying a chain across eight cogs. With the limit screws fully out and some aggressive use of the shifters, I could just about make the shift into first gear. But this wasn't satisfactory.
I had predicted that this might happen and bought this mech as a back-up option. It's not thoroughbred Athena, but it looks (is?) almost exactly the same as the correct RS RD-01AT detailed above. More importantly, it shifts rather nicely.
Having installed my new seatpost, mech and bartape last night, I tried to ride the bike to work this morning.
That didn't work either.
After about 20 pedal strokes, the rear wheel slipped on its axle - pulled to the left by the chain. I thought this might happen, but hoped it wouldn't.
The reason for the slip is that the dropouts are out of alignment following the cold-setting of the rear triangle. I had hoped that my work on the frame wasn't dramatic enough to cause this problem. Silly me.
Sheldon's pretty good on how to realign the dropouts. But does anyone know a bike shop with the proper tool?
-
• #41
This bike is finished. In fact, it's been finished since April, but I've been tweaking it since (new chain, new cassette). Here's how the story ended.
Contacted the best bike shop in London, The London Cycle Workshop, who agreed to let me use their frame tools at 7am in the morning. If there is a greater joy in life than using the right tool for the right job, I don't know it. The dropouts were probably out of alignment by about 4mm before this photo was taken.
In realigning the dropouts, I also needed to realign the rear mech hanger. They had the right tool for that too. So, with my dropouts bent in three new directions, the bike was finished.

It has since been to Yorkshire a couple of times...
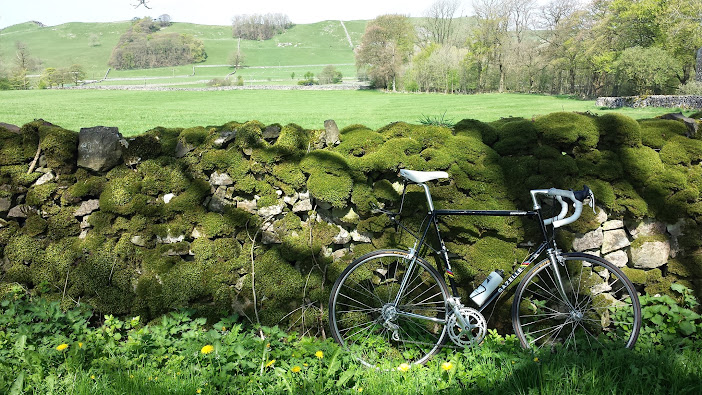
And to the Isle of Wight...with its new Gazelle mate. Yes, that's right: another Gazelle.
This one is my girlfriend's. "I want a Gazelle," she said, stamping her feet. "And I want it to be red."
About a week later, this 54cm red Gazelle turned up on Marktplaats. Huge, huge thanks to forum member Mary Ann, who bought the frame for me, picked it up in The Netherlands and shipped it to London. All at cost price - which, frankly, was peanuts. The frame cost £25!
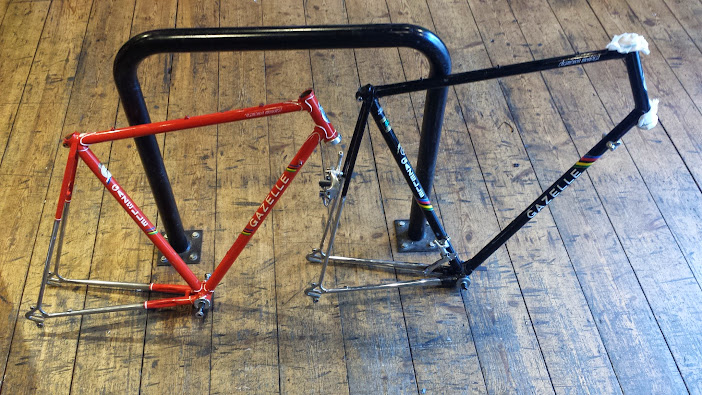
Only it didn't look like that when it turned up; it was covered in grime and bits of tape. Elbow grease and five coats of miracle wax got rid of all that though. Then it was a case of giving it the same treatment as its big black brother, first with the 2x4, then with the frame tools.
The groupset and wheels - mainly Campagnolo Veloce 10-speed - came from Spotter. With a few other bits and pieces from other forum members and ebay, it all came together in about two weeks.
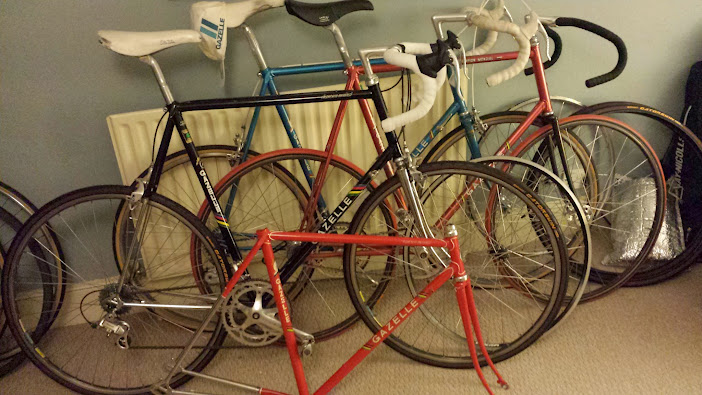
The little red Gazelle is in many ways a better bike than the big black one. But really they're peas in a pod. So that's four Gazelles in our household.
Tandem next.
-
• #42
Nice
 Scilly.Suffolk
 Diamond_Supercool
 ObiWomKenobi
Turns out I couldn't find a threaded bar long enough for my purposes and reading threads like this one convinced me that my frame really could be attacked with a piece of 2x4 and live to tell the tale.
Given that there's not a vast amount of detailed guidance around, consider the following my service to the internet. Though frankly there's not much guidance needed.
TLDR: I increased the spacing of my dropouts from 120mm to 127mm with no dramas. If you're not an idiot, Read Sheldon and get on with it. But be careful.
Pictures

1) The bending bit. Note the need to have someone standing on the headtube
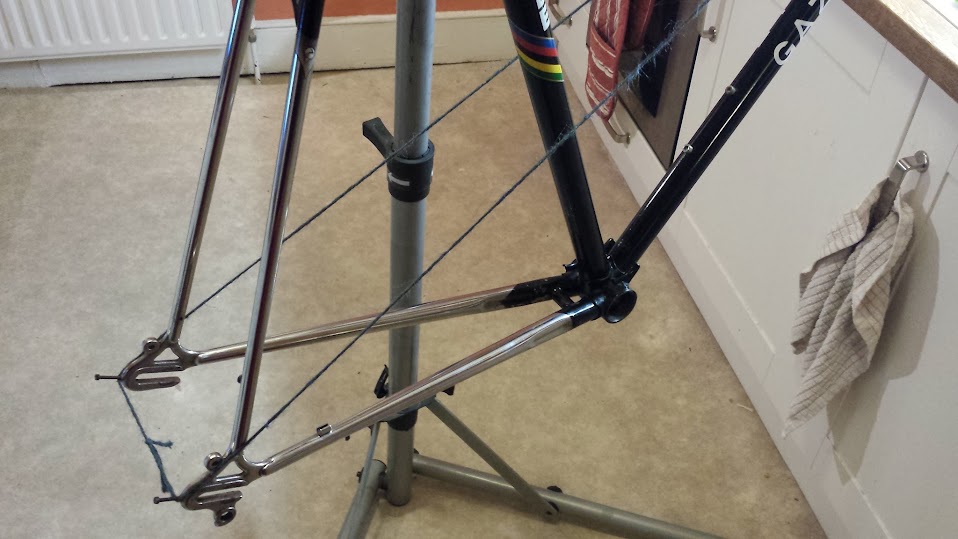
2) The alignment/symmetry measuring bit
Method
I worked pretty slowly, gingerly and methodically. It took about an hour to take the frame from 120mm to 127mm (which is as much as I needed to fit my wheel in). I would have been happy taking this frame all the way to 130mm.
1) Pick a side to bend. Thread your 2x4 (mine was about 4.5ft long) according to Sheldon's method. I used a chair at the other end
2) Do some bending. You'll probably need to gradually add most of your bodyweight.
3) Measure total distance between dropouts. Make a note of it.
4) Wrap string round frame, according to Sheldon's method, then measure distance between string and centre of seat-tube on each side. Hope that one side is noticeably further out than the other (perhaps 1mm). Make a note of measurement on both sides.
5) Repeat for other side of frame, hoping that the total spacing between dropouts increases by about a millimetre and that the spacing between the string and the seattube is now the same on both sides. NB: The distance between string and seat-tube will vary each time you attach the string. That doesn't matter. What matters is that it is the same on each side.
6) Repeat process until you've got the desired spacing between dropouts and an equal spacing between string and seat-tube on both sides. Key stage 1 maths will help.
Recommendations
1) Allow plenty of time. It's easy but it takes a while to do properly.
2) The right side may bend more easily than the left due to the cutout on the chainstay put there to accommodate the chainring.
3) The bending is easy at first, then becomes more difficult
4) For added effect, increase the height of the chair. (Putting a toolbox on top of the chair massively increased the rate at which I could bend the frame)
5) Beware of snapping off cable-guides, chain hangers etc.
6) Be careful, but don't worry too much about bending the seattube. I didn't seem to make even the slightest dent in mine.
7) You needn't totally disassemble the bike. The headset, seatpost, BB, cranks and forks could probably all remain attached.
8) If you have a big enough clamp, I'd probably recommend clamping the seatstays together either side of the brake bridge, though I didn't.
9) Quality of steel probably makes quite a big difference. This was Reyolds 531c.
ps: Dear Google, here are some keywords for this post: bicycle cold setting dropouts 120mm 126mm 130mm steel frame spreading alignment string method Sheldon Brown how to