-
• #2
Alex,
Awesome! That osgear setup looks cool. Would like my next period build to have it. What sort of chain length do you need?
Will be following this with much interest.
Thanks for sharing.
Pete -
• #3
Should be interesting, esp. the Osgear setting up. Subbed!
I'm off for 2 weeks as well....Mrs Hawkes is just about to 'build' #3 from scratch.
-
• #4
Alex,
Awesome! That osgear setup looks cool. Would like my next period build to have it. What sort of chain length do you need?
Will be following this with much interest.
Thanks for sharing.
PeteHi Pete, thanks.
I think I will have to link 2 1/8" chains, as 1 will not be enough. How long I do not know yet as it all depends where is the best position for the tensioning arm when the striking fork is on different sprockets. The arm is quite strong but the length will affect how many chainring teeth are engaging on the chain at any one time.Should be interesting, esp. the Osgear setting up. Subbed!
Thanks 57Hawkes.
-
• #5
Very nice.
'37 is an early one. What's the frame number? -
• #6
Thanks.
Frame number is VE 9302 -
• #7
Subbed - look forward to seeing how this pans out.
Is this the frame we corresponded on re: push-in headset races? -
• #8
I think it's probably more like '39 going off a little run of pre war numbers I have.
V-CC Boneshaker from 2000 has a really good article on Osgears. I can email a PDF if you've not already got a copy.
-
• #9
Subbed - look forward to seeing how this pans out.
Is this the frame we corresponded on re: push-in headset races?Hi, those races were for a head clip of my previous project which is now finished. Thanks.
This one has got a floating type one and it is complete.I think it's probably more like '39 going off a little run of pre war numbers I have.
V-CC Boneshaker from 2000 has a really good article on Osgears. I can email a PDF if you've not already got a copy.
Hi,
You are right. Got a bit confused.
I got an email from the gentleman I bought the transfers from and he said it would be a late 1938 as he knew of a 9459 being Feb 1939 and a 8584 being Jan 1938.
I'd love a PDF on Osgear. Thanks. -
• #10
Wheels are now built and trued.
I needed 285mm spokes to cross 3 at front and 4 at rear. The shortest I could get were 288mm in 15/16 gauge which is the closest I could get to 15/17g that were the norm back in the day.
I thought about cutting the spokes and then rethread them but again 15g heads are not common. So there was enough thread on the spokes to get the wheels built and trued so I cut a few mm of excess after.
Tyres are a pair of old Dunlop Sprite I had. They are more than mature but have life left on them and the thread pattern is really nice.
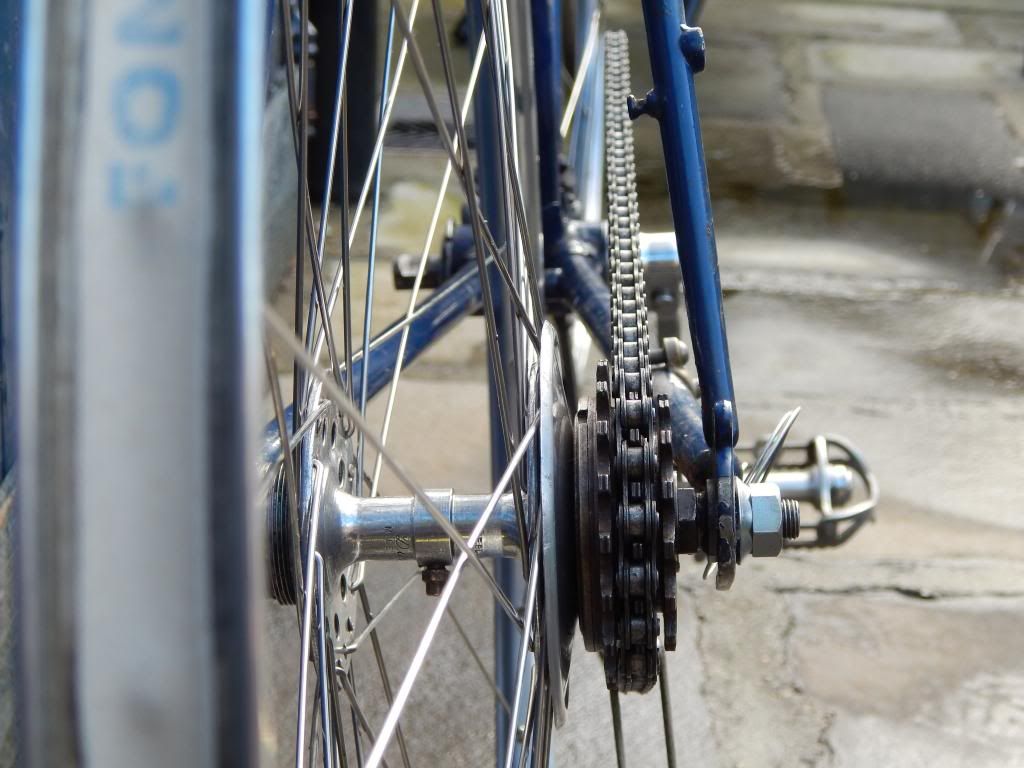
I fitted the spoke protector disc and the Cyclo 3 speed block.
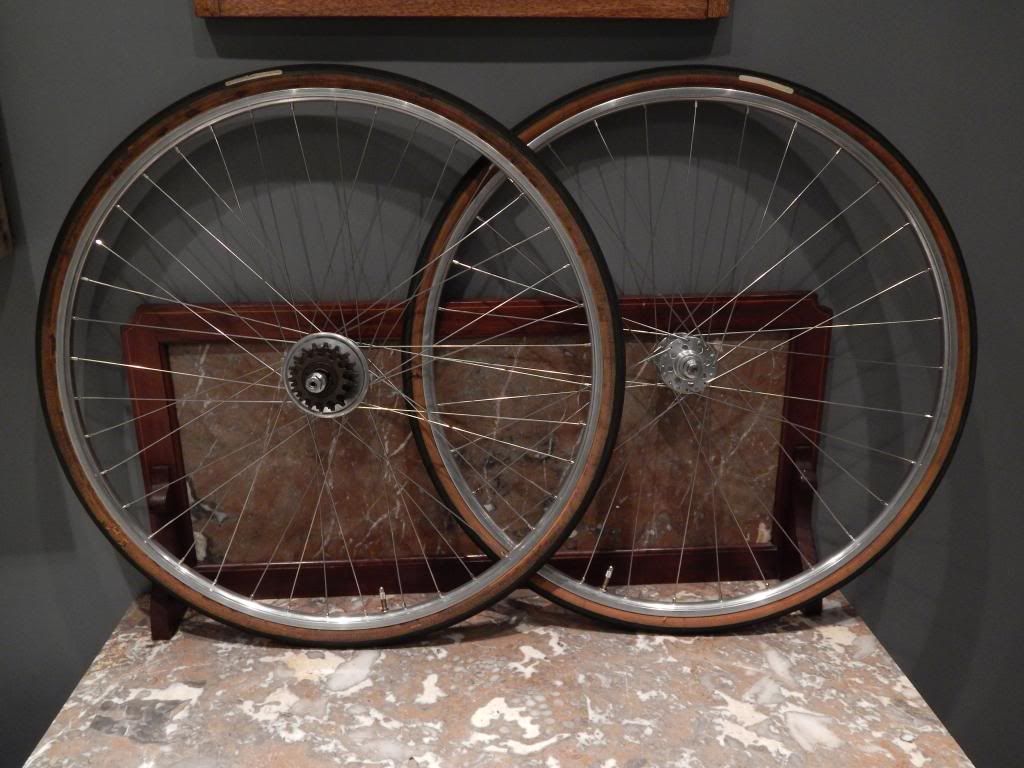
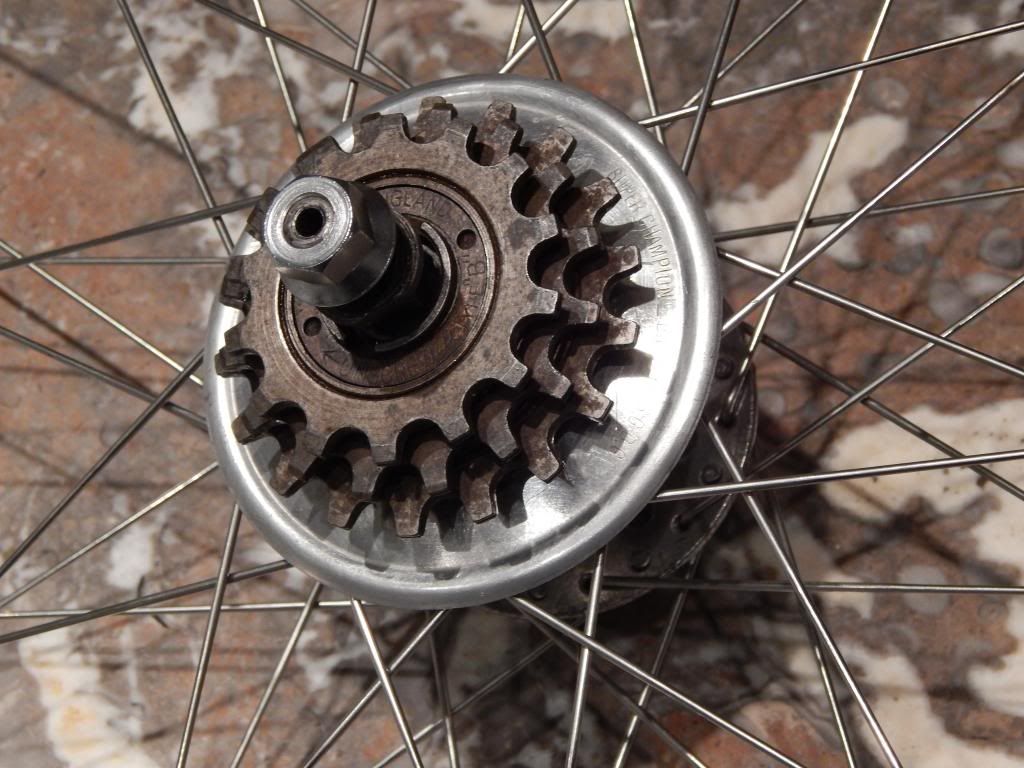
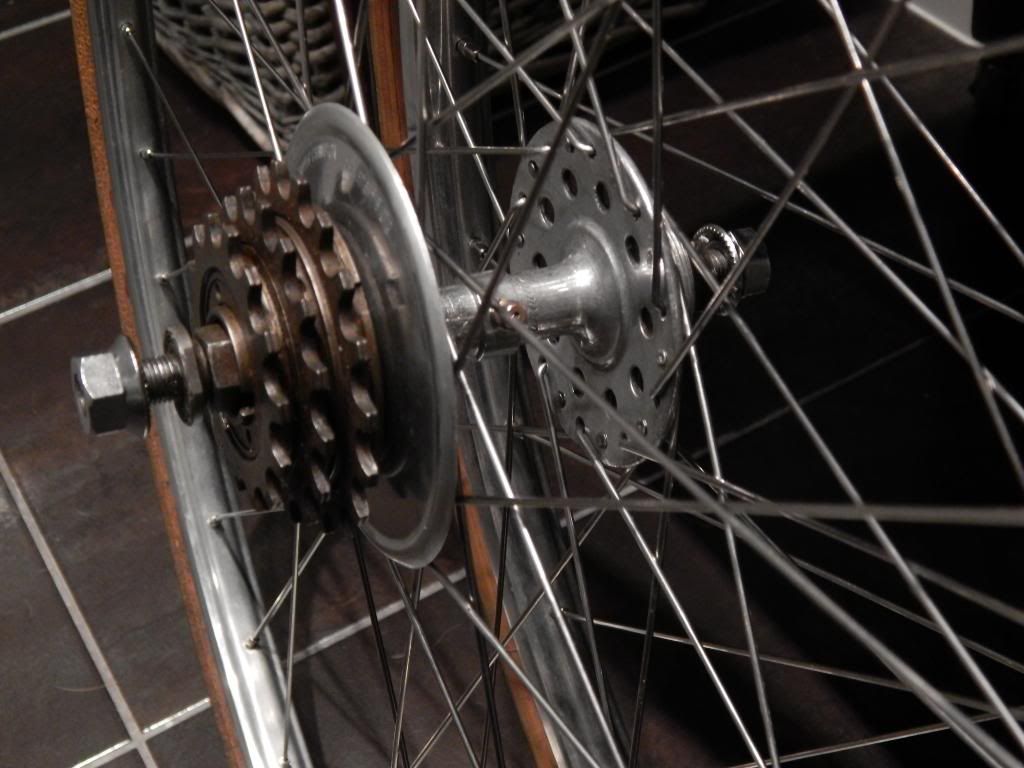
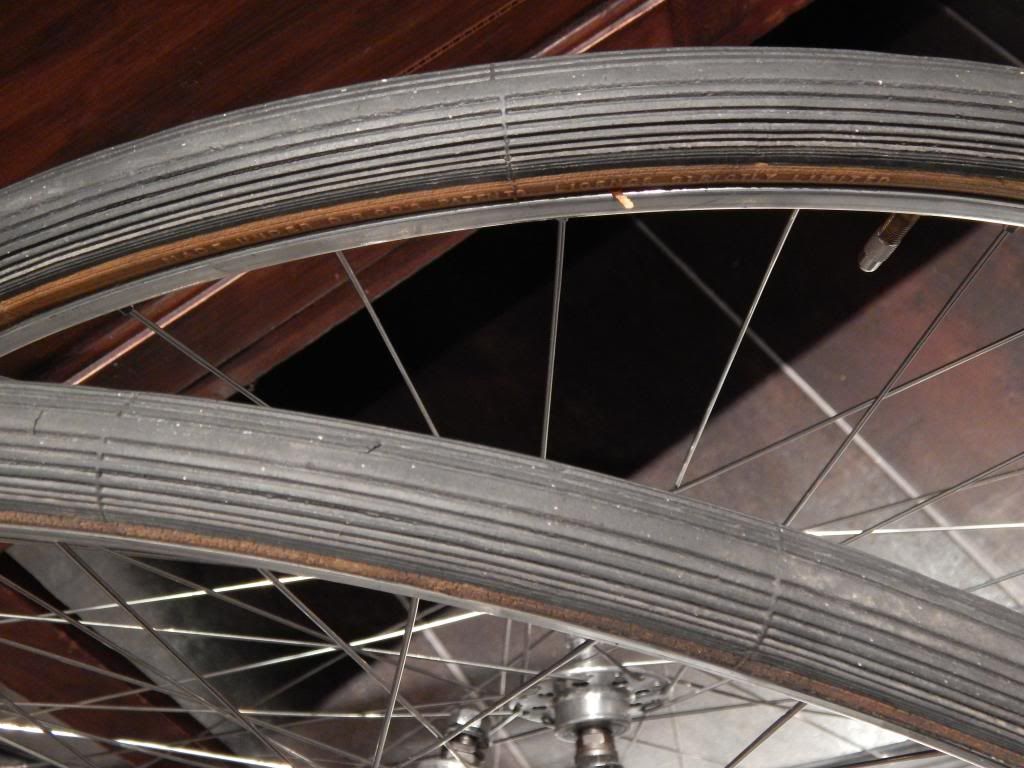
I've also quickly fitted the clip on bits of the Osgear on the frame but I'll have to play around a bit as the Cantiflex shape of the tubing limits where I can place each part.
I will hopefully get some pictures tomorrow if the weather improves. -
• #11
sensational - are you going to strip and chrome before paint?
-
• #12
^Thanks. It would have had the head tube, head lugs, fork crown, rear ends and fork ends chromed originally, and I'd love to replicate that, but it will be too expensive. So it will be just enamel, transfers and lug lining.
-
• #13
Subbed as well , good to see a project like this here , great stuff
-
• #14
niice ! even the old tyres look good i had some 27'' ones like that once and they arent slow ! i really need something like this to add nostalgia to my collection, be great if i burnt
off modern carbons on something like this ![yeah they should have made double cable frame clips but i spose singles will still work] the fork and the lugs just jump out and hit you in the face! it would be great to do the L to brighton with a bunch on stuff like these ! but the carbons would get revenge at the beacon ! -
• #15
^Thanks. Not into carbon myself yet. Maybe one day, just maybe…
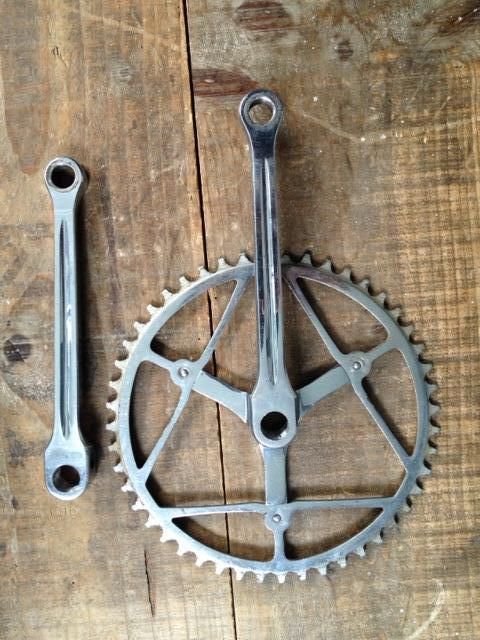
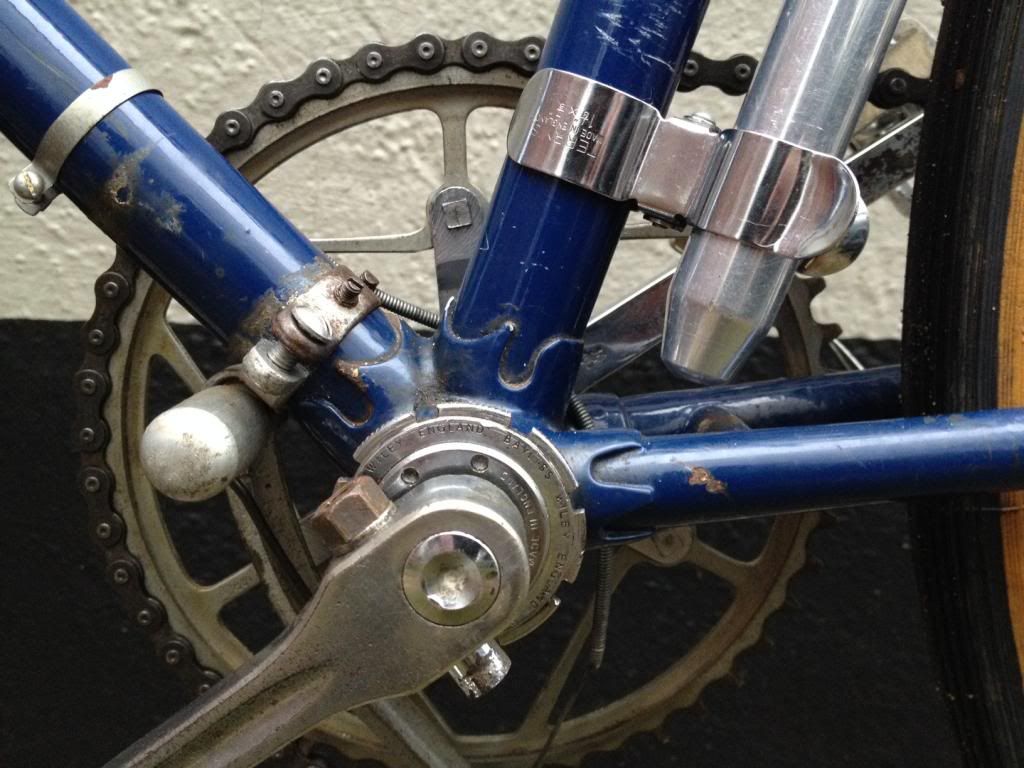
I've been reading a very interesting PDF on Osgear that The Bonk kindly passed to me.Thanks.I fitted the drivetrain. Williams C1200 chainset, Bayliss Wiley Featherweight bottom bracket cups and number 14 axle.
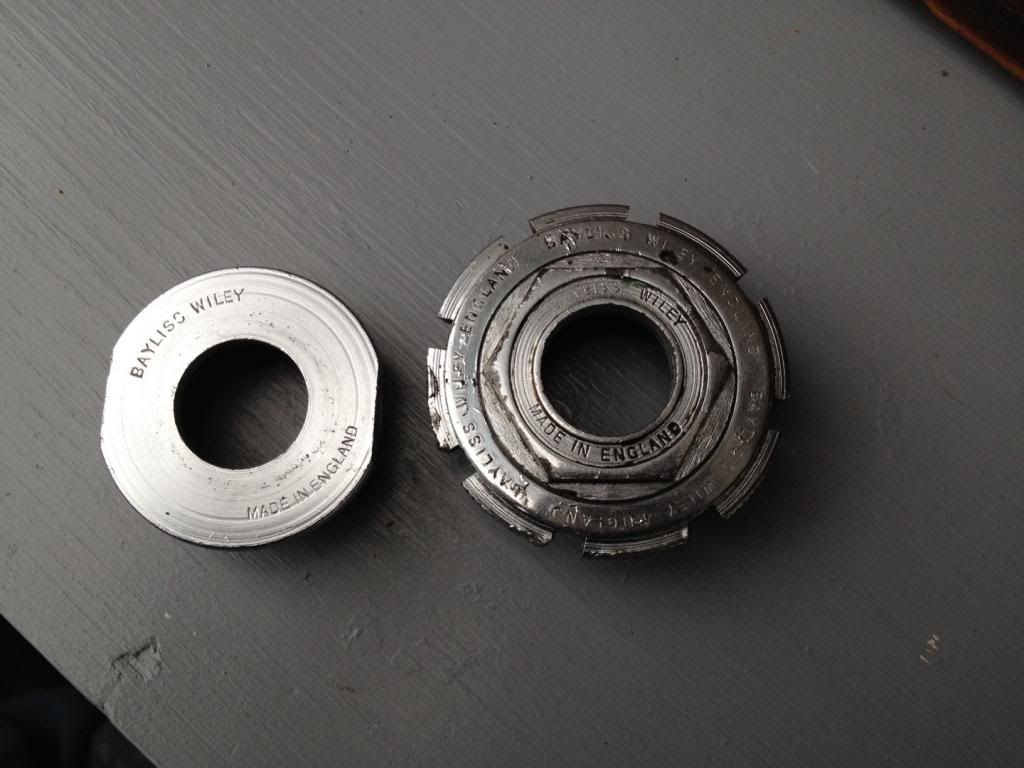
The axle is a number 14 which gives me a very good chain line with the middle sprocket.
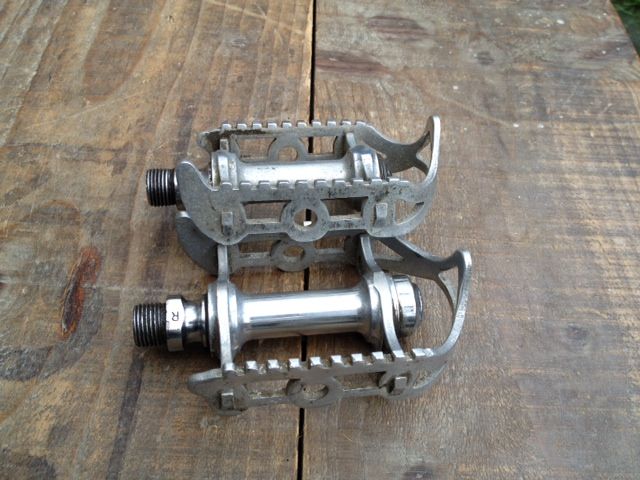
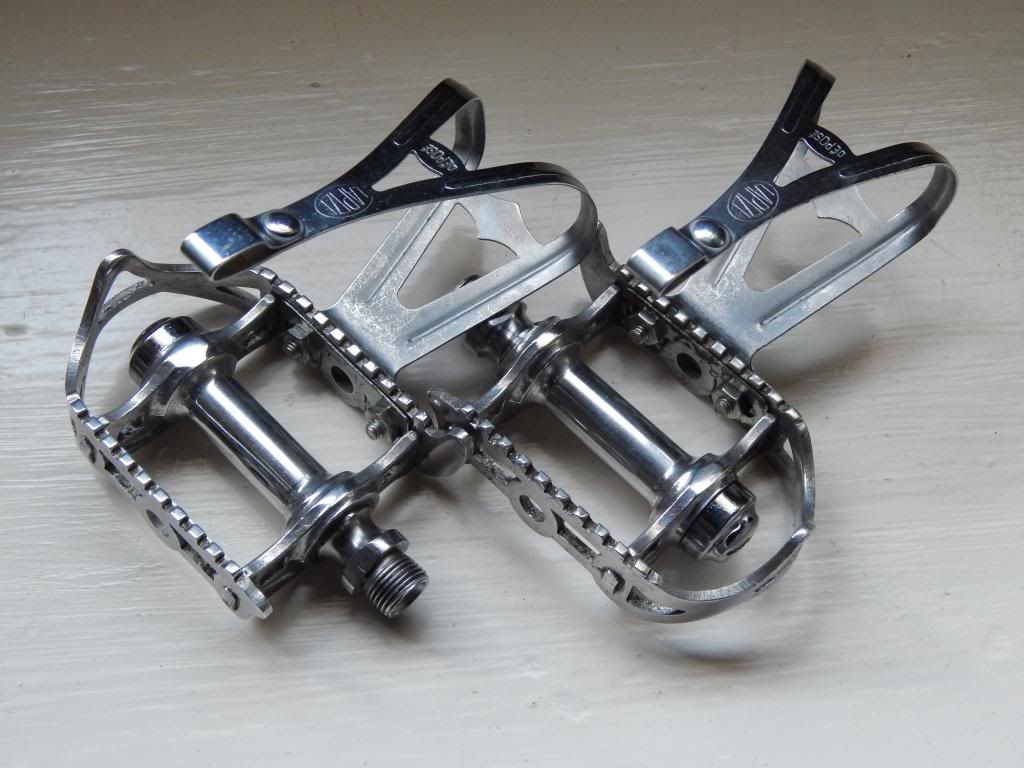
Lyotard 45 Ter pedals. Found a 1938 Brothers Catalogue on Classic Lightweights and were sold as a Duraluminum Track pedal. The lightest as used in the Tour the France. I'll service them and fit the missing dust cap that I just managed to get.
NOS Binda straps and Lapize toe clips.
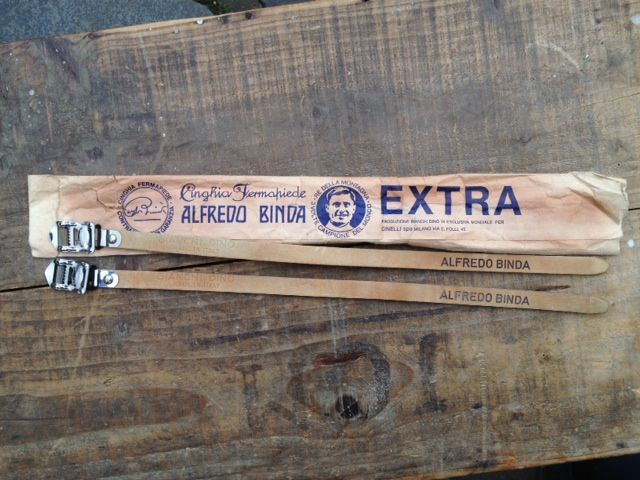
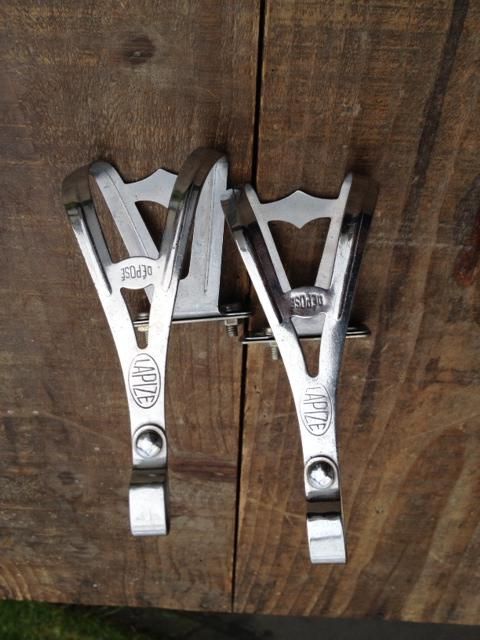
I've tested the Osgear but it needs fine tuning as I had to go over each hole with the shifter for it to change properly and then go back to rest properly. Still need to get my head around this a bit and might shorten the chain and see if this improve shifting.
-
• #16
yes! great project. would really like to see the osgear PDF......
any more pictures of the Super Champion fitted to the frame?
-
• #17
Cheers luckyskull.
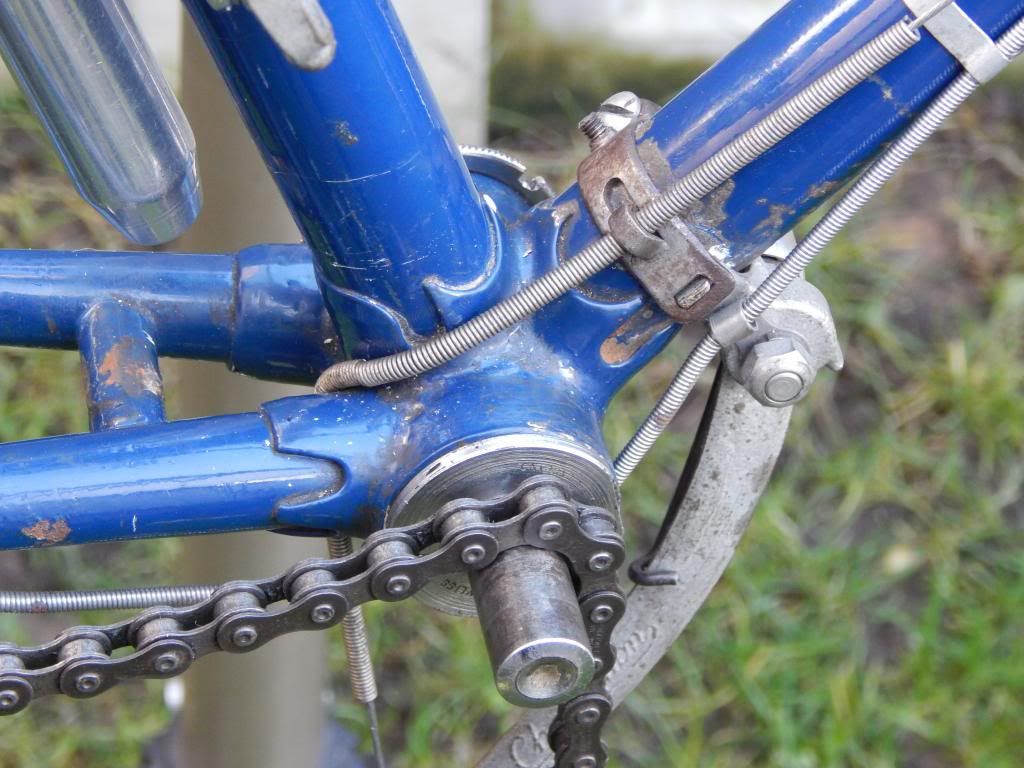
A lot happened today. It took me a bit of time to tune the gear up. If it was changing gears well going up, then it wouldn't going down, and viceversa. I was trying to run the chain right in the middle of the striking fork to avoid rubbing but then it would not change sprockets as the minimal movement of the arm when using the shifter wasn't enough to push the chain to the next sprocket. Very frustrating until I found this piece of information: …'The shift lever had stops for each gear though the lever had to be overshifted before being dropped back into the stop'… so that is the way. No much wrong with the way I was setting everything up. No much of a problem going forward, but if overshifted too much backwards, then there is a risk that the chain will get trapped in between the biggest sprocket and the spoke protector disc as there is no adjustment for the striking fork. It happened a few times while testing but I was trying on the stand and I guess if going at speed then it might chew the disc up.Few more bits fitted.
NOS or nearly NOS 1950's oval badge Brooks Champion Narrow.
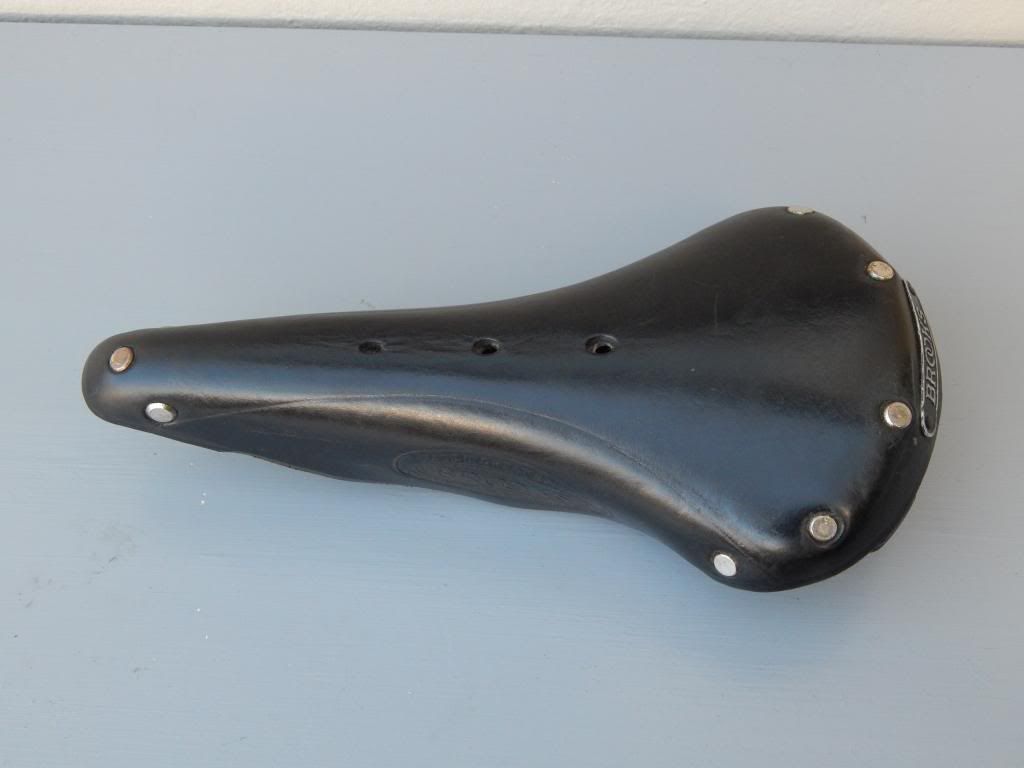
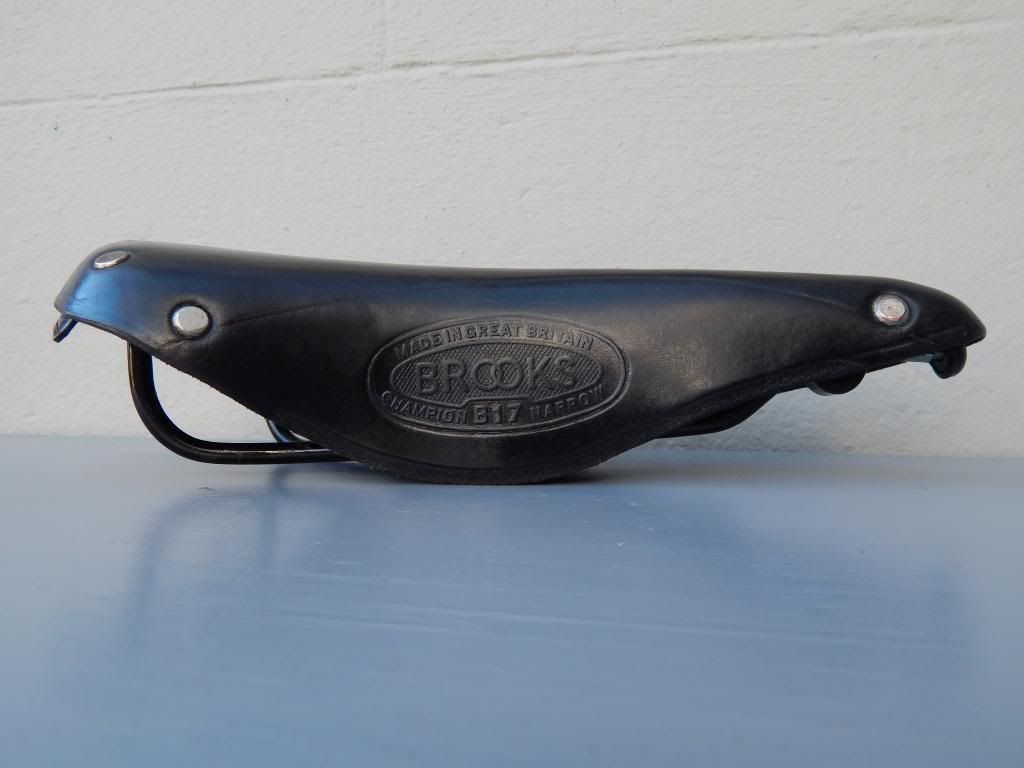
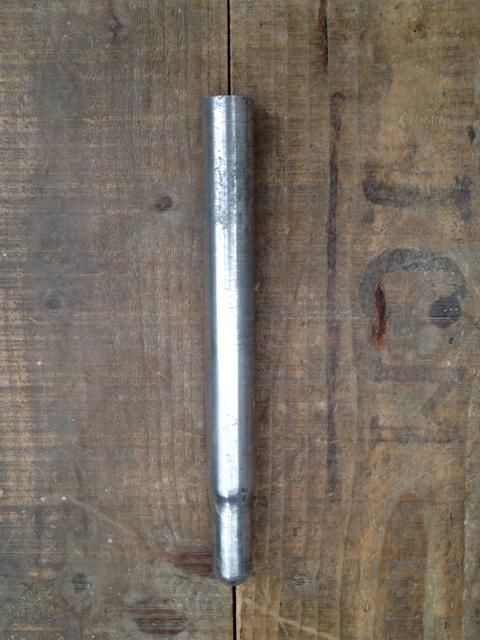
Alloy seatpin
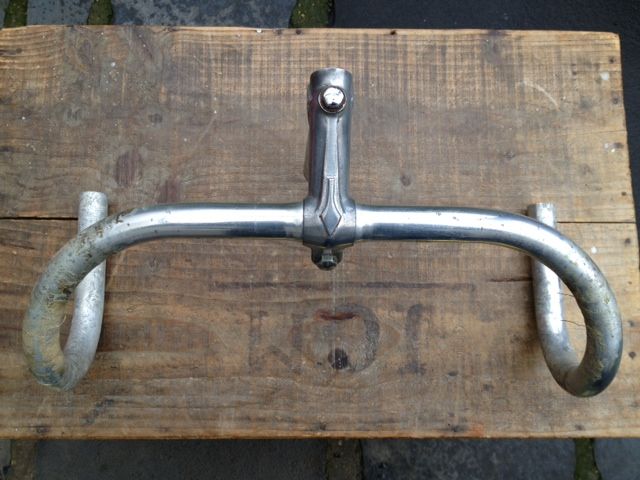
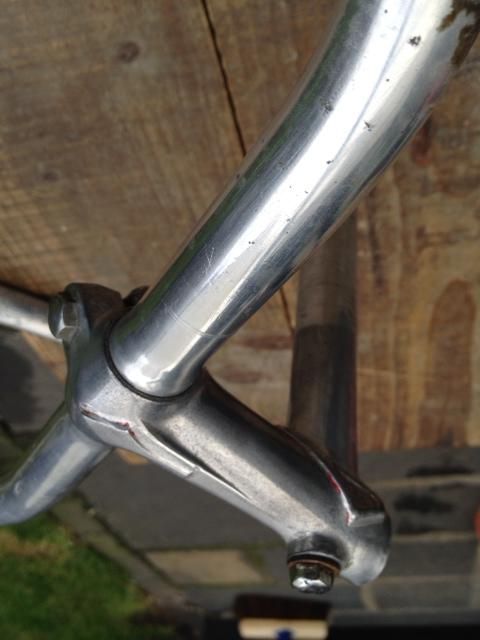
Stratalite bars and Strata stem
Gear setup
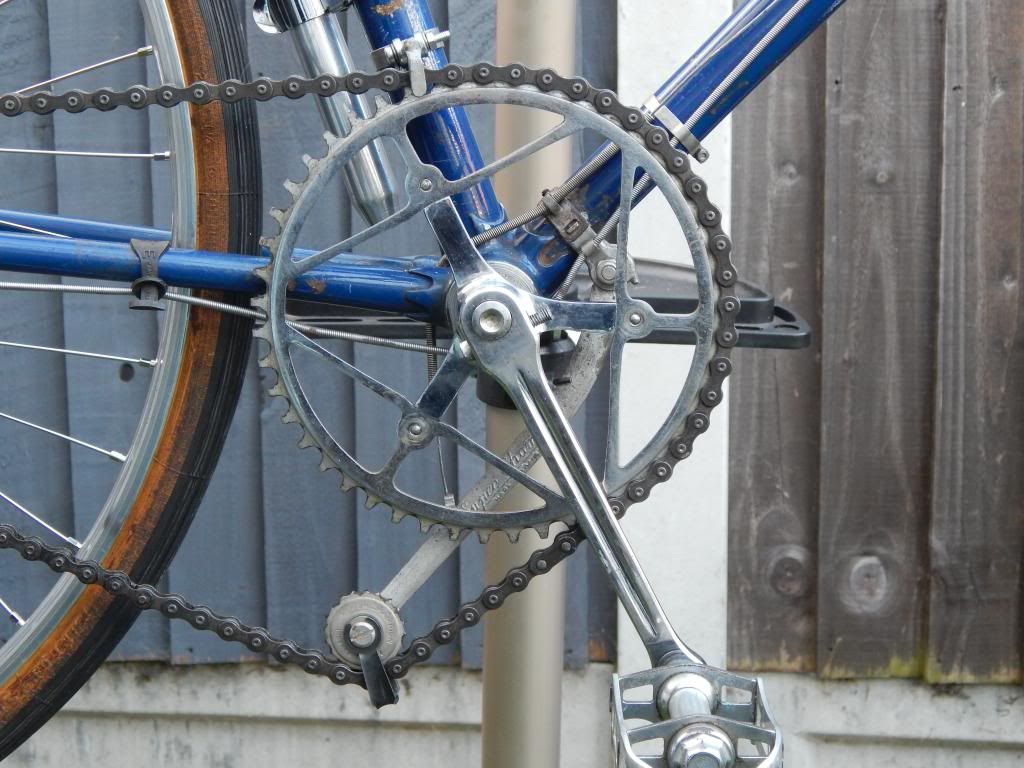
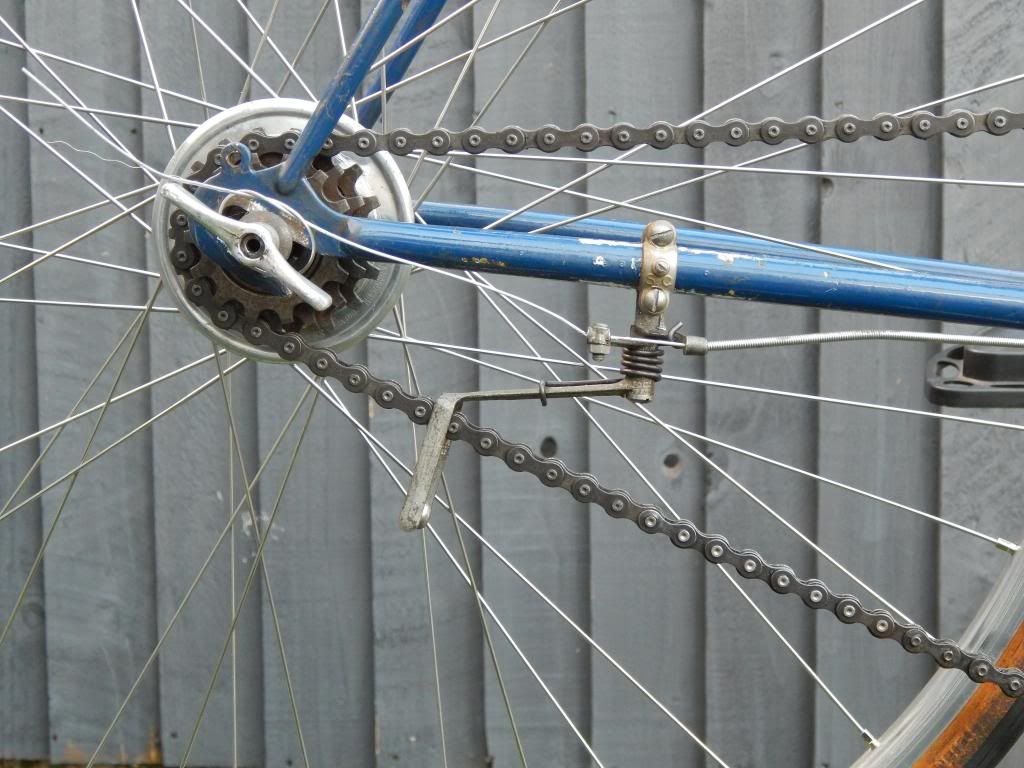
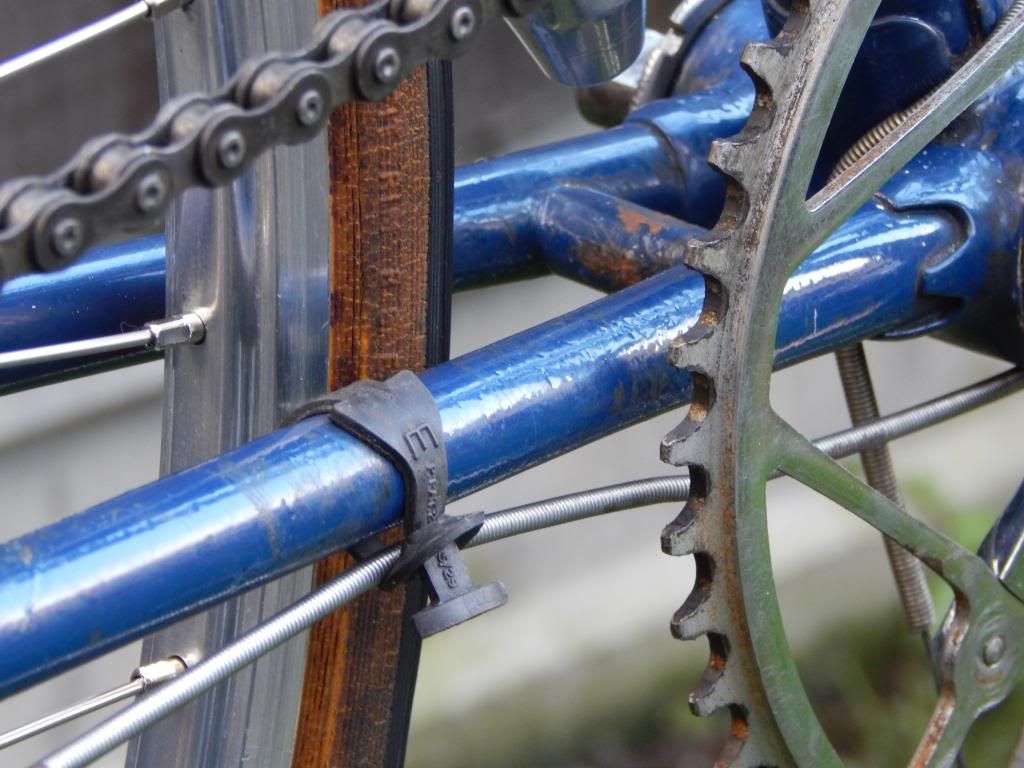
The whole bike so far.
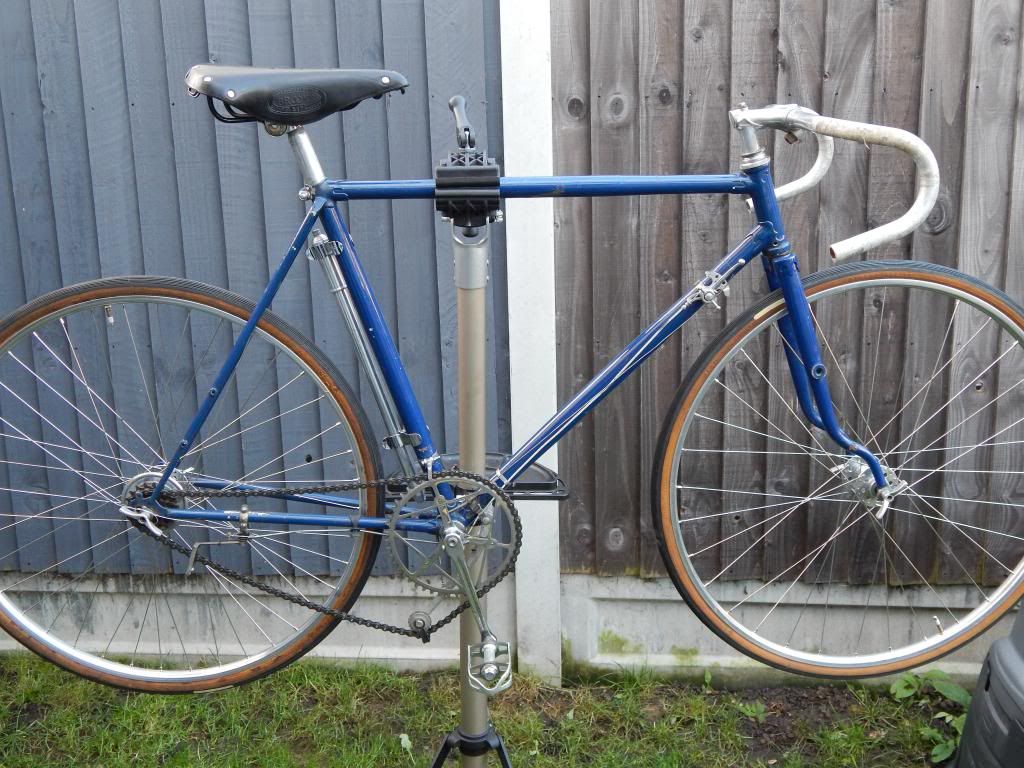
There still loads to be considered/checked: chain length, second cable for tensioning arm correct fitting/tensioning and the chain guide as I will have to adapt the clip because of the Cantiflex tubing shape.
-
• #18
Tremendous stuff ElGato. Thanks for taking the time and effort to share the build. Looking really good so far.
-
• #19
^ this x 100
Would be great to have this ready for a LFGSS classic lightweights ride in spring. -
• #20
Tremendous stuff ElGato. Thanks for taking the time and effort to share the build. Looking really good so far.
Thanks for the kind words OldCanal. Now need to get my head around the 2nd cable :)
^ this x 100
Would be great to have this ready for a LFGSS classic lightweights ride in spring.^ Hopefully 7VEN, would love that.
-
• #21
Quick update.
I've cleaned and serviced the pedals. they came up really nice. I could have buffed them more but did not want a mirror polished look on these.
The slots for the straps on the cages are quite narrow and might not be able to fit the laminate Binda straps, so will have to find a different pair.
The second cable for adjusting the tension has been doing my head in.
The shifter screw was fully adjusted to the band to keep the serrated wheel, that controls the second cable, attached to the shifter. So I thought, if I adjust give the right tension at the right gear, then when I change gears the cable will adjust the tension accordingly. But upon changing gears, the chain was getting slacked, so the amount of tension needed was not going together with the different size in sprockets. I thought that I probably needed a wider ratio block to make up for this.
After going through tons of images and info online, I thought about a Louison Bobet derailleur that has also got a twin cable to adjust the tension. But to do this it has got 2 'obvious' levers. And that's what made try the same on the Osgear. Change the gear with the inner shifter and adjust the desired tension with the outer wheel, which makes little 'clicks' as it is serrated. I've noticed that it runs better and smoothly when the tension is not excessive.
It seems too obvious now, but for me, it really wasn't.I've been thinking how to improve shifting, specially going onto the biggest sprocket as if I go over the chain will get stuccoed between the disc and the block, maybe locking the wheel. So I found this useful extract from an article on Classic Lightweights to solve the problem:
"I also drilled a couple of extra holes in the gear lever quadrant from 5 to 7. This enabled the rider to move the lever that extra bit 'over and back' to the desired position for an easier gear change, with practice, all in one motion."
So, I thought about drilling 2 extra holes on the 3 speed shifter as there is enough space on the quadrant so that I will have more room for error, and the shifter won't slip beyond the last slot. But I do not want to ruin it, so I will fit instead an alloy 4 speed shifter that I have as spare, and will leave the last slot as my cushion, as going forward is not much of problem.
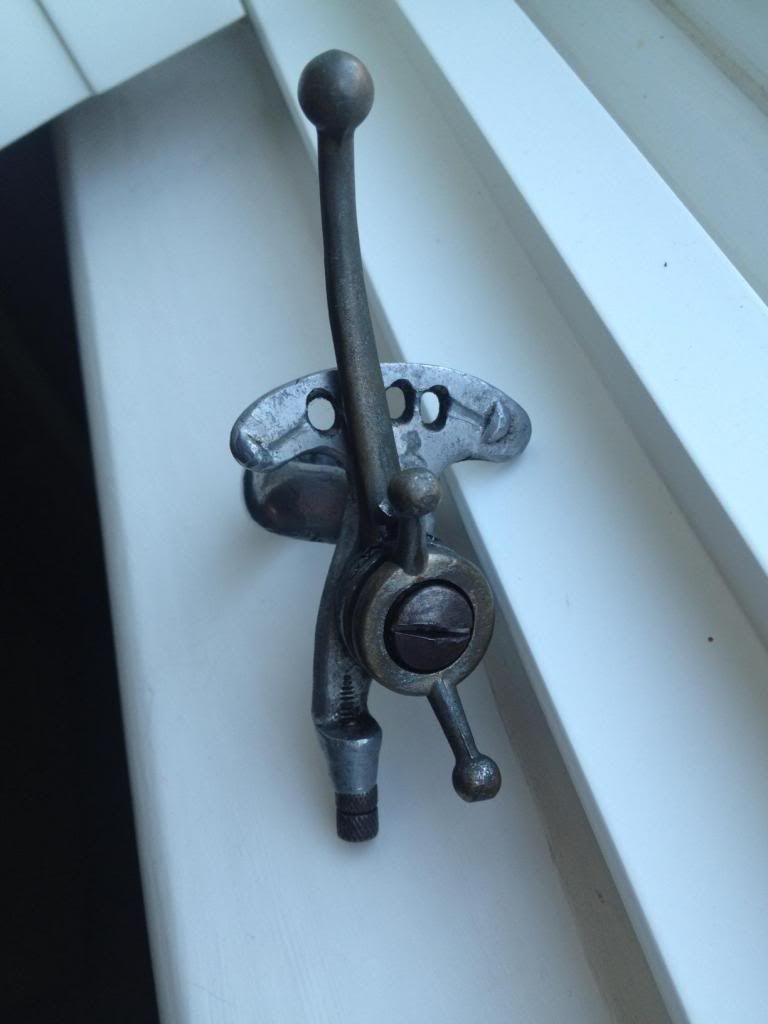
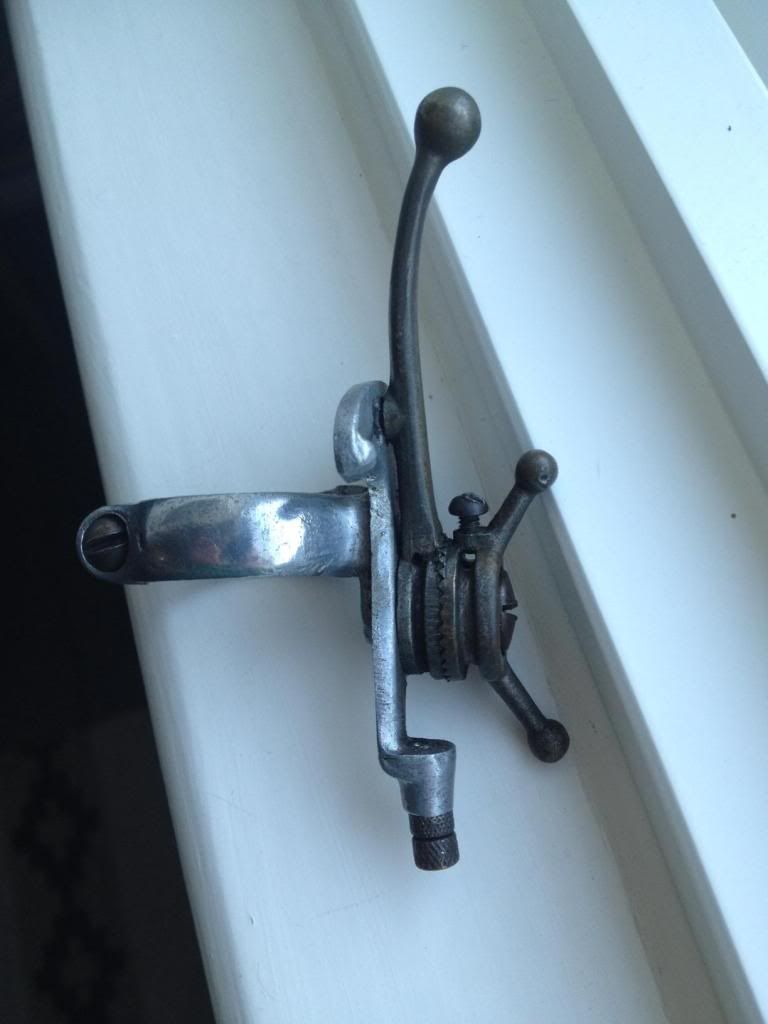
Will give this a go once I find the time, and if everything goes well, I can then fit the brakes and the rest to take it for a spin.
-
• #22
The striker forks need to go much closer to the sprockets. Nearly touching the big one. If you do set it up like this you have to make sure you shift to the small sprocket before taking out the wheel. This is one of the problems with Osgear hence the special Stallard ends where the wheel goes backwards to come out of the frame thus protecting the striker from damage, For this reason Osgears were popular as track bike conversions 'back in the day' when riders finally gave in and used gears for the first time - most people were using road/path frames with rear facing ends as they had been on fixed for years.
Needing to overshift is common. These gears were often used on very close-ratio blocks with one tooth difference. Should cope with a two-tooth difference but it helps if the ratio is even, eg 16-18-20.
You have to adjust the tension both ways every time you change gear - at least you are not juggling with a Paris/Roubaix changer and having to do the changes pedalling backwards!
-
• #23
Great bike and great thread, nice input ^ as well
-
• #24
^Thanks scorch.
^^ Thanks for the tips Innazi. I've moved the striker fork much closer to the sprockets now, but I was being cautious about fitting it too close because as you've mentioned the forward facing dropouts made it a bit tight to get the wheel off. It just clears the smallest sprocket now.
I've also fitted the 4 speed shifter and that makes it much easier to change gears when over shifting as I've got a spare slot to use.
3 speed block is a Cyclo 18-16-14, so even ratio, should make it easier!
And yes, I've been playing around with the chain tensioner and it's starting to work properly now.Brakeset is GB Hiduminium (that a member kindly sold to me. Thanks) with the nice brass adjusters. I took the front one for another bike so I've fitted a GB Sport in the meantime until I find another front.
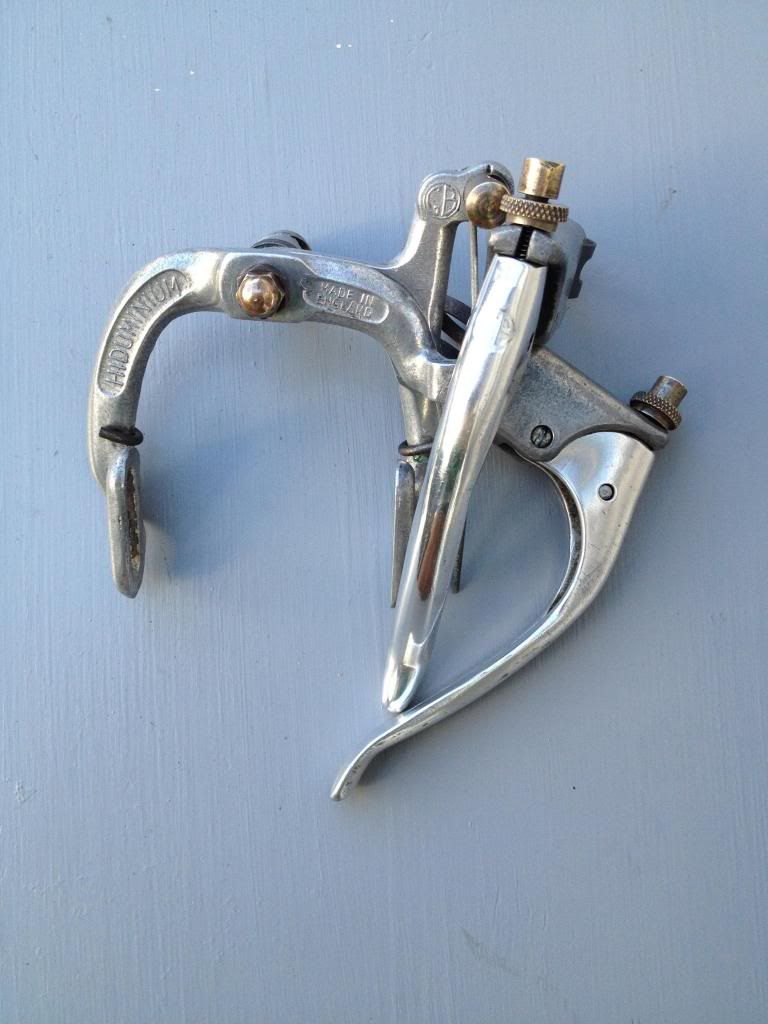
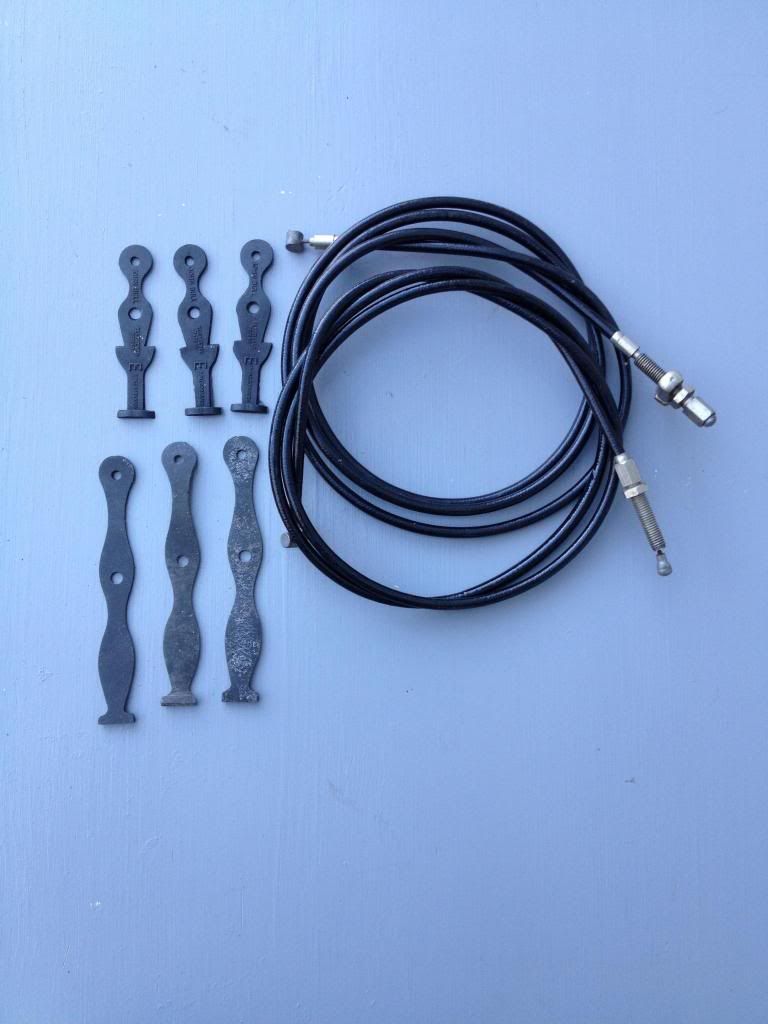
I've been lucky enough to find a pair of NOS cotton case brake cables. Small rubber cable 'clips' for chain stay are John Bull and no name bigger ones for the top tube.
I will fit normal brake cables first to set everything up until I am happy with the length, and will cut these to the same length after.

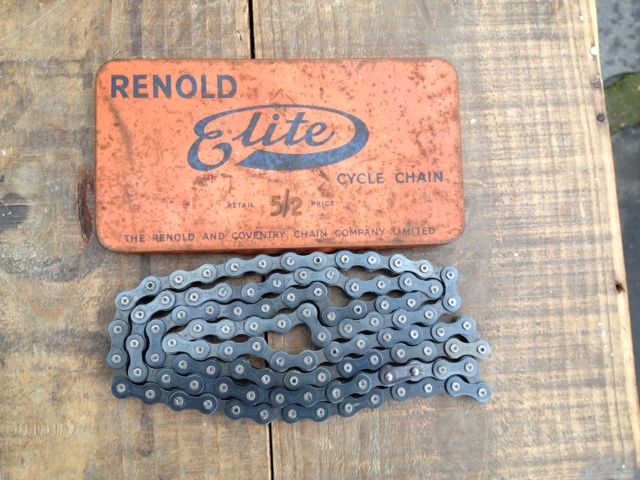
I'm running a 104 links chain now that I made out of 2 old ones and this Renold Elite is 102 links, so still have to decide which length is best, as Elite's are not the easiest to split.
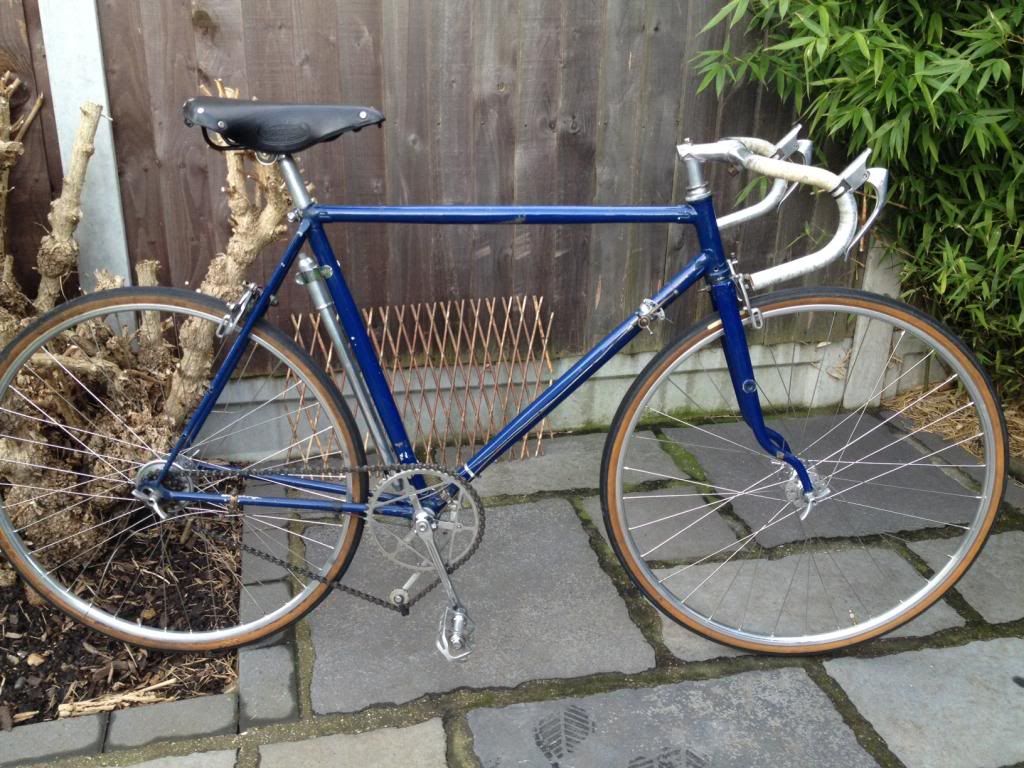
This is how the bike looks now. I have to fit the non drive side crank and pedal, brake cables and pads, and weather permitting, I shall be taking it out for a first test soon.
-
• #25
Bike was finished on Sunday and I managed to take it for a spin. I am very pleased with it. Forks definitely make a difference in terms of absorbing bumps on the road.
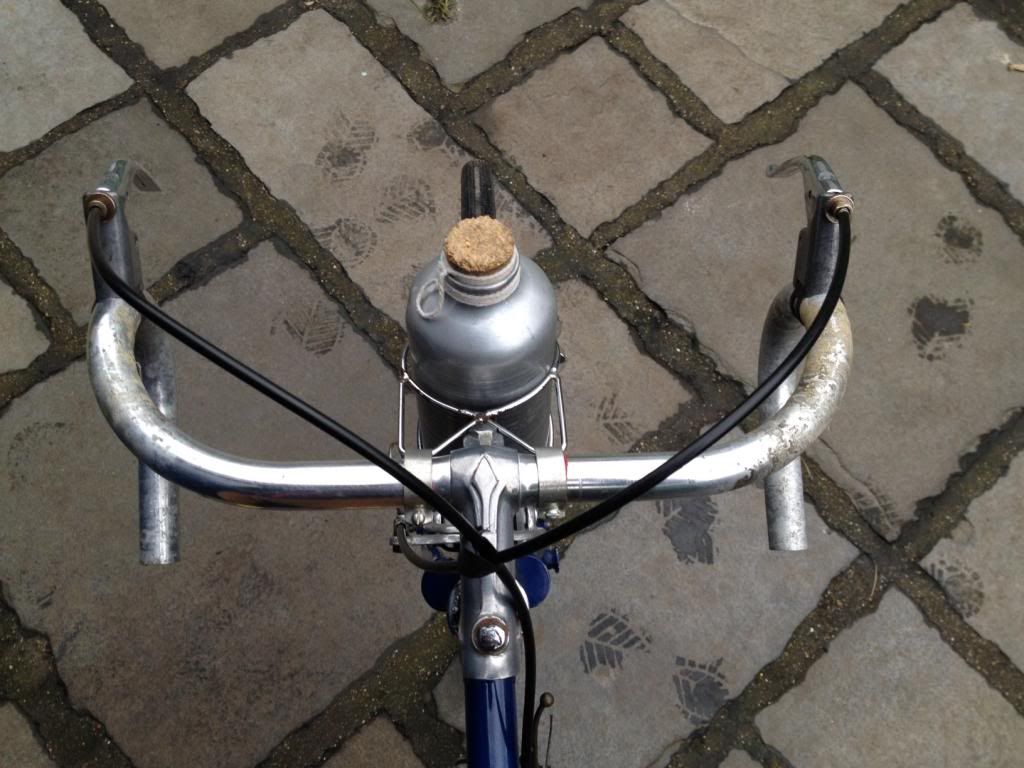
I fitted an Ale bottle cage and alloy bottle to the bars and an Apex Ultralite pump with Terrys clips. I will have to tilt the saddle slightly for a better angle and I still do not know which tape colour for the bars so I haven't put any yet.
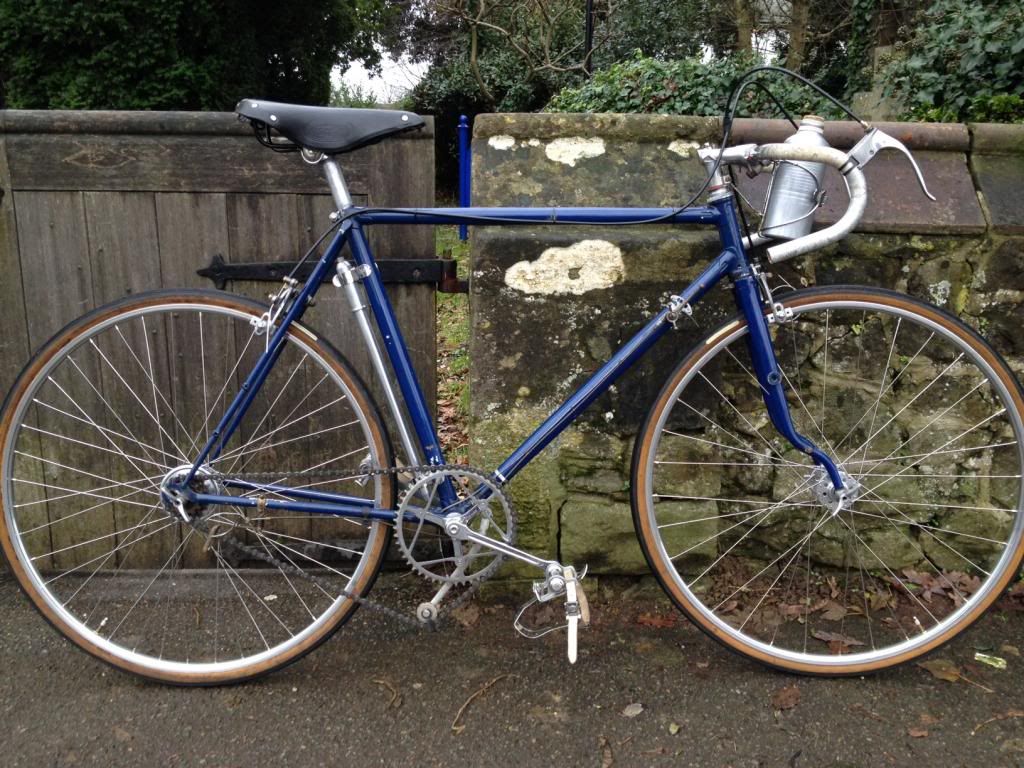
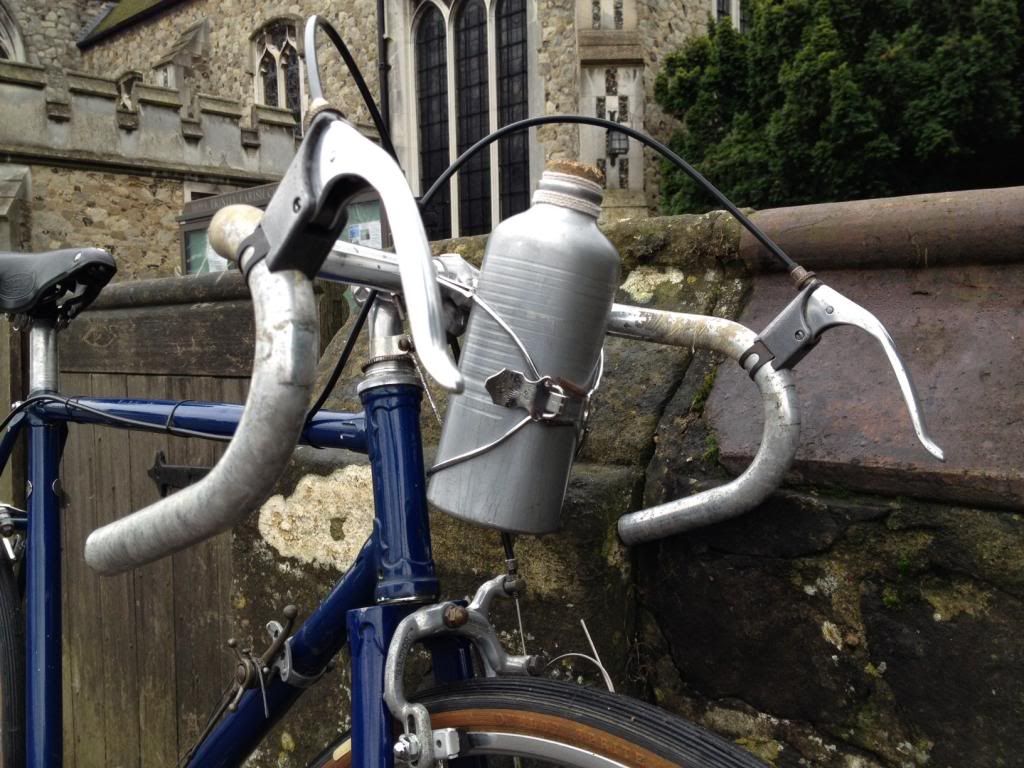
It looks like there is a lot going on down there.
and a cockpit's view
So all it needs now it's to be stripped to be painted.
I've been thinking a lot which colour I would like and finally decided to go for this but the head tube will also be red. Ideally I would like to have the head tube and head lugs chromed (as per original catalog) but it would cost just too much.
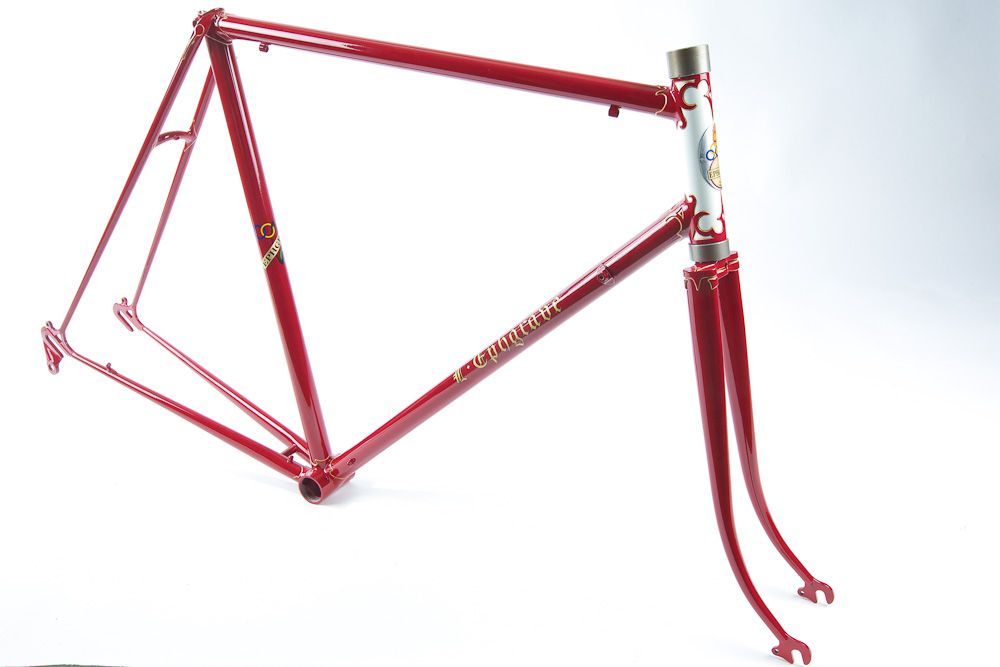
The head badge is missing so the holes will be filled and will use a transfer (an original badge went for more than £80 on eBay!) I have got a set of transfers already but I'm not sure which ones I will fit.
I've been researching and apparently some of these were not fitted to pre war frames like the frame and forks rosettes, and the unique Reynolds Cantiflex one.
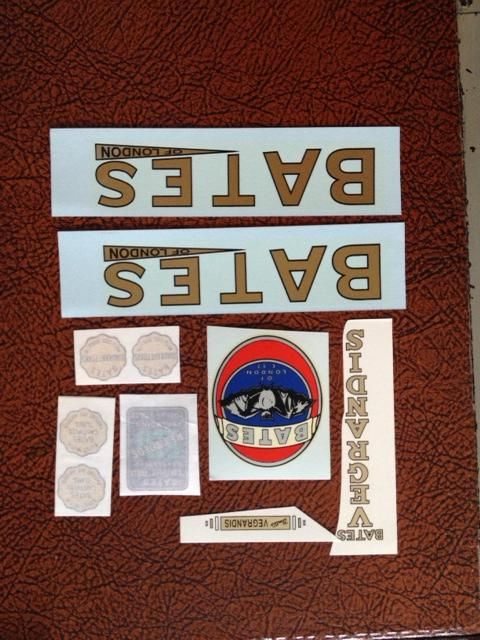
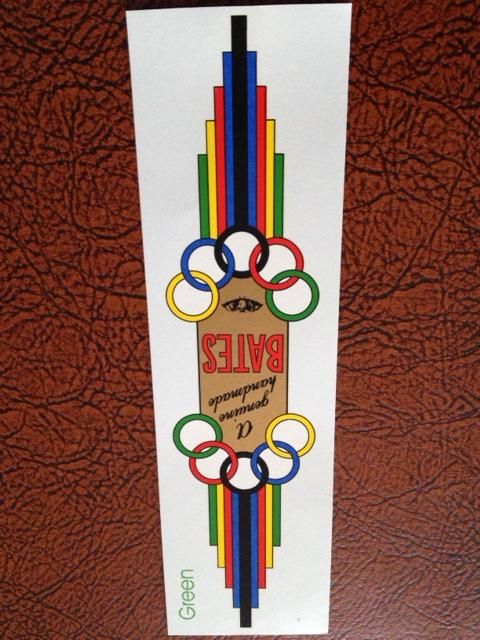
Again, I would pretty much like to fit the colourful 'organ pipes' on the seat tube in favour of the vertical Bates Vegrandis, but I've only seen them on post war bikes, although I've been told by the gentleman that sold them to me that either is correct. I'm not that keen on the little Bates Vegrandis top tube.
If somebody can confirm this, that would be great.
The research continues.
 TheBonk
 Rik_Van_Looy
 conquistador
 cino
cino luckyskull
 scorch
Hi everyone,
In the wake of some interesting recent builds I've been following here, I've decided to document this as I always get sucked into projects and then regret not taking pictures as I'm going along.
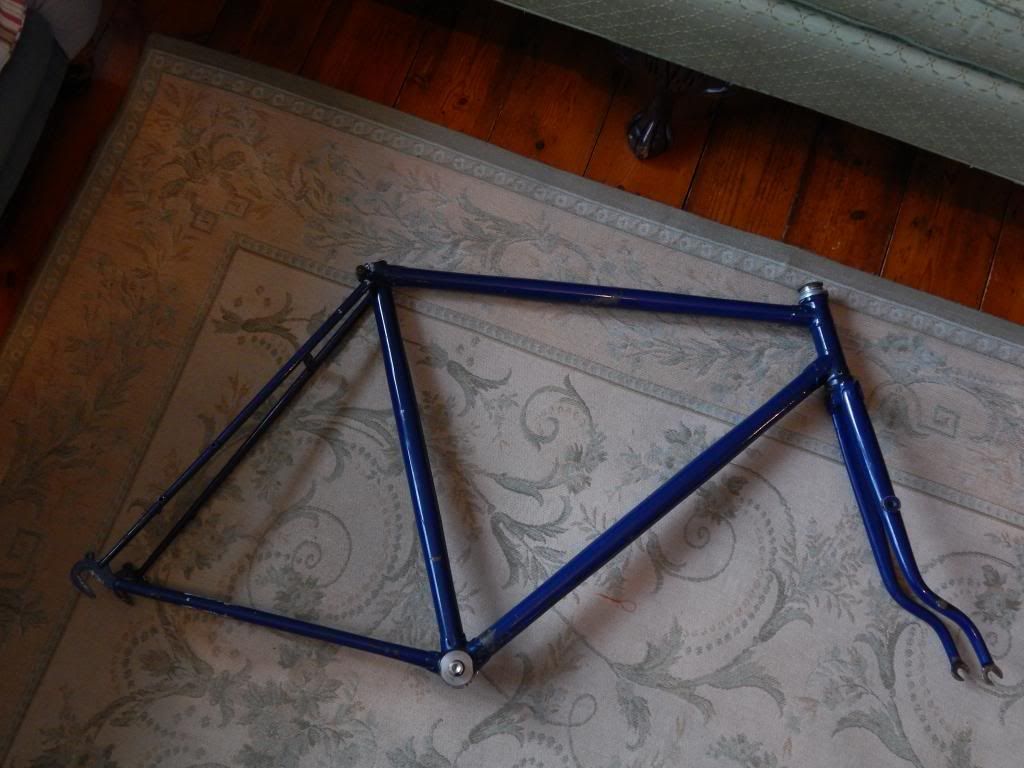
I bought this frame about a year ago but I've been postponing the project as another frame came my way and that one was more straight forward to put together.
I cannot edit the title but it is a 1938/39 frame and not a 1937.
It took me a little while to get all the parts needed on my previous bike so since then I've decided to buy parts I thought I was going to need when I had the chance, so when the right frame came I did not have to have sleepless nights thinking about that elusive bit. And at the same time it does not feel as harsh on my wallet as if I were hunting all in one go.
So I think I more or less have everything I will need to put this together and I will list the parts as I make progress.
I managed to get a copy of a 1938 Bates catalogue and the Vegrandis was sold as a fixed bike but could be upgraded to gears if wanted. I would have liked to build it as to original spec but since my last one was built as a fixed time trial, I've decided to have this one geared.
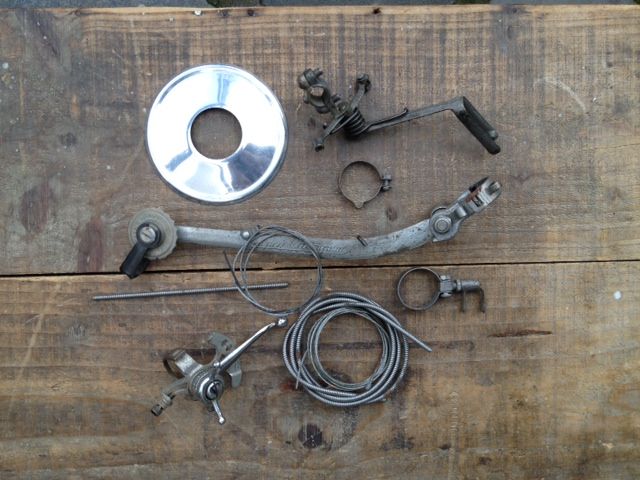
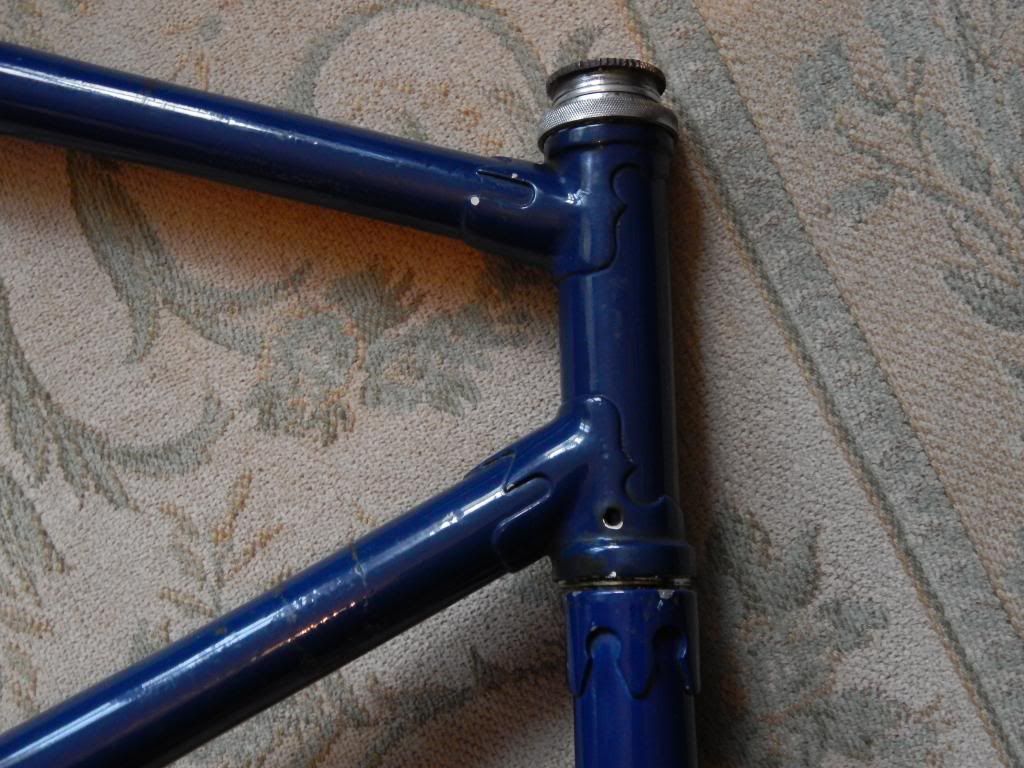
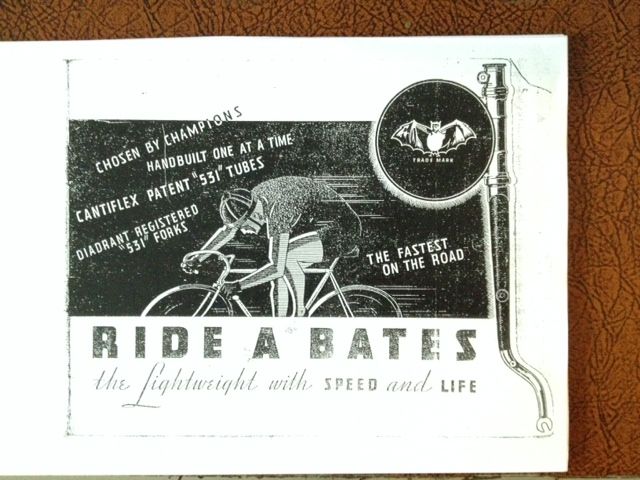
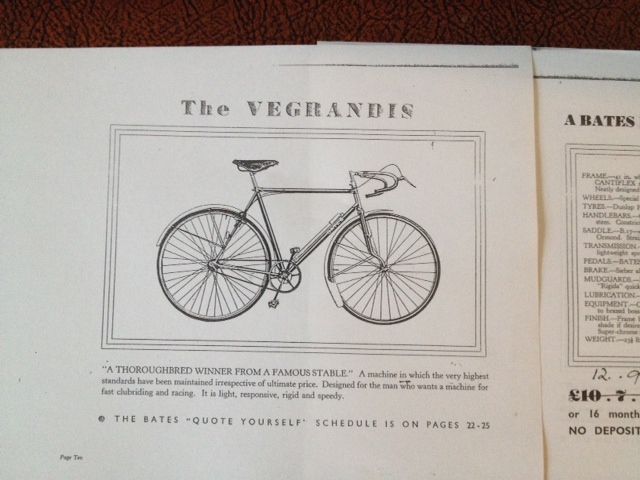
I've got a NOS 3 speed Osgear that it is about the same age as the frame.
The idea is to get the frame re sprayed (paint is not original and it is not in very good shape overall) but first I'll try to get the Osgear to work, measuring where all the clamp on bits will go so I do not have to mess around once the frame is re finished.
I'll get the wheel laced and trued so I can start setting the gear up. Hubs are Blumfield large flange and rims are Alumlite KP (I think that is what they are called?) 26 x 1 1/4".
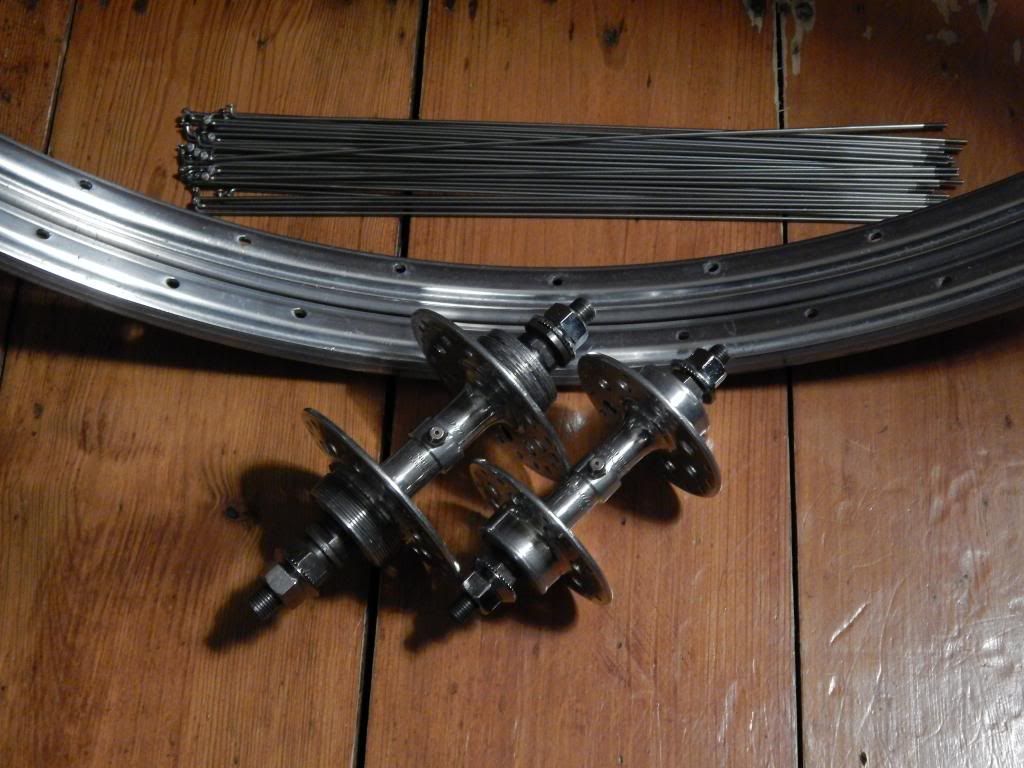
I'll have a couple of weeks off now so hopefully I will make progress depending how it goes getting the double cabled Osgear to work properly. So if anyone has experience fitting one of this, all advice will be very much appreciated.
Cheers
Alex