-
• #52
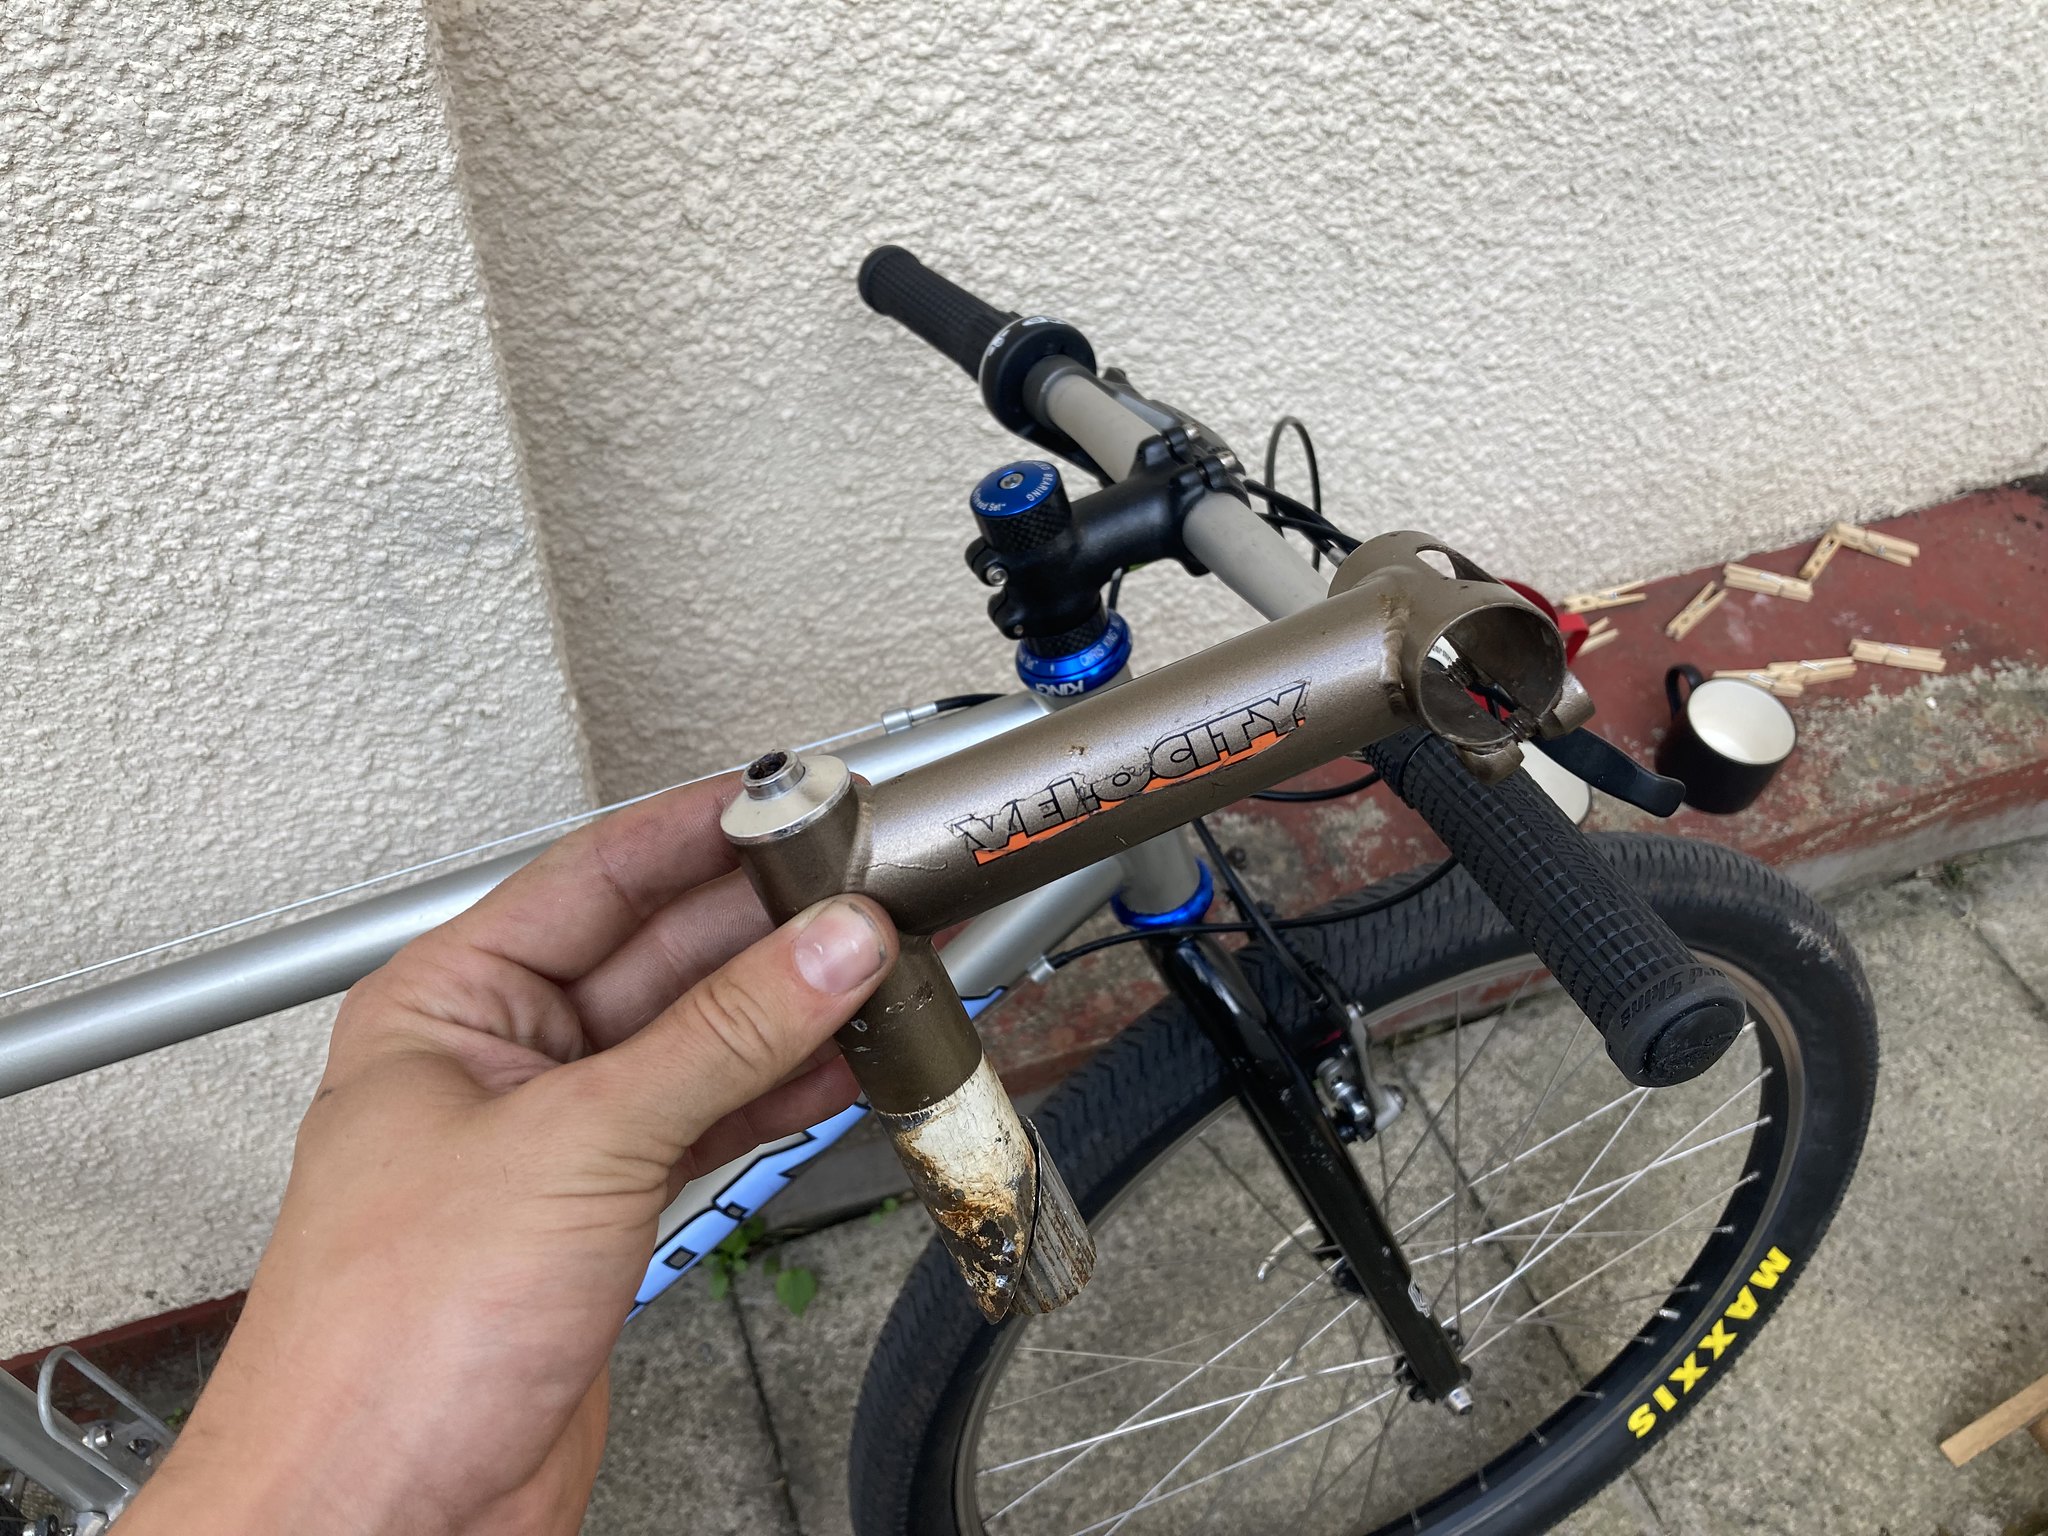
That would be incredible, but sadly this build will be fairly budget. Scope for the future though! VO tall stack or similar would be good. Even a cheap, skinny generic short stem would look good.
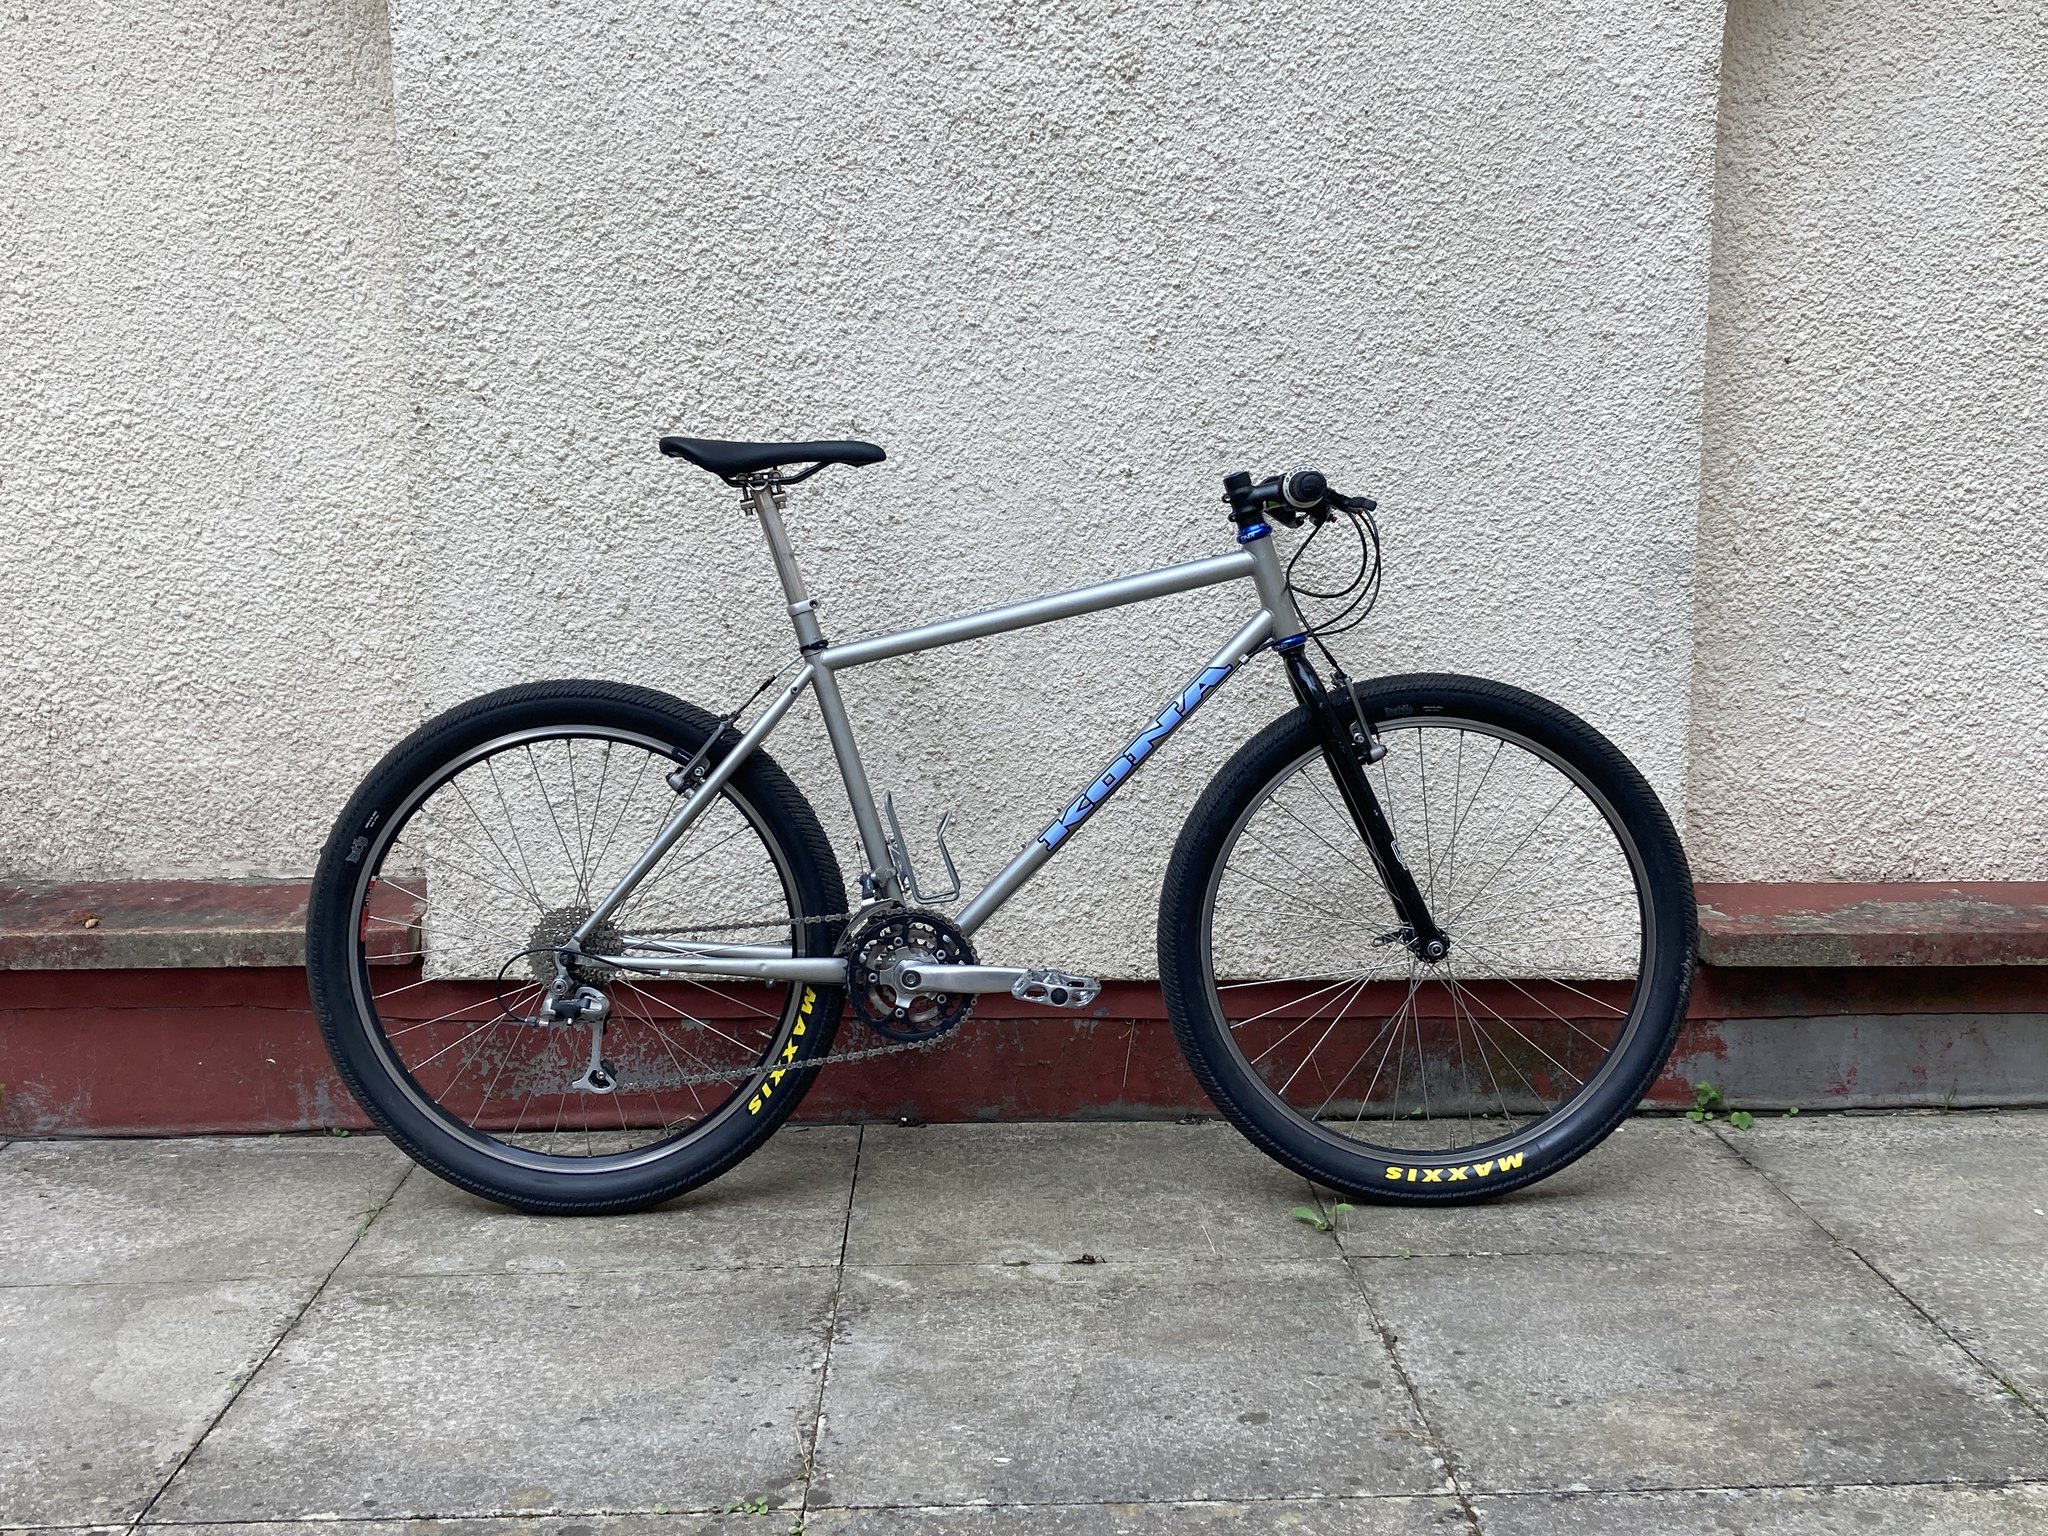
Cranks removed today, BB buttery smooth and straight as far as I can tell. Held the rings against a straight line and could see that the crank wasn't parallel. New cranks on the list then!
Rode the bike around town for an hour or so last night and found the stem much too long, it puts you very far over the front wheel. So while I love the way it looks. A more modern shorter solution is the way I'll be going with this.
Mock up of P2s in the frame, just need to source headset, stem and bars to make this work!
1 Attachment
-
• #53
P2’s look excellent. Know what you mean about long stems, old mountain bikes always had like 100-120mm stems which makes them feel a bit unsteady for me personally.
I think I’m quite local to you, so if you ever need to borrow some tools message me I might be able to help!
-
• #54
Just seen this! Thanks mate, I’ll be sure to reach out if I need anything. Good to meet you today, tyres looking great on the new build!
-
• #55
Another project I’ve been working on is a new town bike for my girlfriend. After her last bike was too small (with 24” wheels), I was looking for a versatile 700c bike on a budget. I came across this Raleigh Pioneer on gumtree for £50, cantis, step-through and 700c with plenty of clearance. I don’t really know anything about the bike, it seems an unusual combination of features for a bike of this (which?) era, but I liked it.
1 Attachment
-
• #56
I did a full strip down and rebuild, rust treated some bits, greased some others. Removed the decals and got some new ones made by a friend in the style of the famous Raleigh Panasonic team bikes. Most of the original parts went back on fine, other than the original cockpit from my Giant, some tyres from @rawspuds (cheers!) and some extras from the Bay. Here’s the finished result! I’m chuffed, and very jealous.
2 Attachments
-
• #57
One last piece that I’m missing is the barrel adjuster for this style of brake lever. I tried making a washer out of wood but it didn’t have the correct shape to hold the cable stop in securely and the cable kept wobbling every time the lever was pulled. Anyone got a spare?
Other than that, it’s a case of maybe sticking a triple chain set on and it’s ready to go! Will report back on how Holly likes it. It has passed the aesthetic test so far.
1 Attachment
-
• #58
Alternatively, anyone know what levers these are so I can get the spare part?
-
• #59
After struggling to find the levers online, and not wanting to wait for a new set to arrive - I turned a little spacer on a drill out of the end of a broom handle. Not perfect (at all) but works fine enough for now😅
3 Attachments
-
• #60
haha! proper laughed out loud with that.
I'd say that you don't even need to find a replacement now. -
• #61
Try the Bristol Bike Project - they will likely let you have a rummage around the box of brake levers and you might find a match for a small donation!
-
• #62
That spacer is amazing hahaha
Bike looks so good and I’m glad the tyres are getting put to good use!
-
• #63
Stuck the DTHs on the Kona while I patiently await the new headset to arrive, for forks sake. Clearance (if you can call it that) is questionable. Dimple the stays, swap the tyres back, keep going as is? Rubber is softer than steel right. Water is softer than rocks, but pebbles eventually go round. Maybe a slight re-tension will give a solid 2mm each side.
Will probably buy the complete set of decals this week, but do I want top apply them on top of a clear coated, poorly finished paint job? Or do I want to spend £80 (thereabouts) on repainting the frame and adding decals under the clear?
3 Attachments
-
• #64
The fake 'King' headset I picked up for this bike was passed through my window by my friendly post man Jason yesterday. It's arrival meant I could fit the project two forks and begin to think about a new bar and stem setup.
I went down to Wickes looking for threaded rod and a section of pipe to DIY my headset removal/installation tools but found neither and came home with a pair of carriage bolts and part of a clothes rail I found in a skip on the way home. Clothes rail headset tool crumpled after 5 minutes of relentless bashing so I broke out the big guns and cut up the original seatpost from my Giant which was probably 3 times the thickness.

The headset cups (painted over) came out and revealed bits of white and black paint underneath. I've been in touch with the original owner today to ask if he'd painted the silver over the original white without stripping the paint, and he told me that the silver is on top of a black paint job, which is over the original white! Three paint jobs on this frame. The temptation to sand the whole thing back just to reveal what's going on under there is more tempting that ever now.

Carriage bolts worked like a dream and the headset went in perfectly. Forks in, carbon spacers on and stem fitted brings this bike into the 21st century. Needless to say that this whole cockpit setup is temporary and I am looking to change it ASAP once I've got a feel for position and feel. I'm currently looking at silver risers (spank spoon or similar) and a short, slim stem. The original Velocity stem looks sooo good with the frame, and the idea of getting something custom made with similar aesthetics in mind is tickling me. Any suitable gas pipes still floating around?


I think the bike looks great with the slimmer fork, and the frame has dropped back down to it's original position. Still to get more that 20 minutes of dawdling around the block on it, but so far it's feeling smooth and lovely. Next steps are cockpit, or paint.


-
• #65
Why the fake headset?
-
• #66
Looks great. Don't worry if you can't find a stem still looks amazing. You want an old steel GT stem or I think Onza did one as well.
-
• #67
When I wrote the update, I went back and forth over justifying the purchase and in the end couldn’t really think of a strong argument for or against it, so left it out. A friend had one on his fixie a couple of years ago and I found it funny. I got the link for this build so that I could get the fork on and try a bolder colour on the frame at a lower cost. I'm still unsure whether it suits or not.
There's something about paying >£100 for a headset that feels a bit trivial when this £15 one feels great, but there are plenty of other headsets out there for under £20. Saying that, I recognise King components aren't priced as such because of 'feel' so much as quality and design so even writing this feels daft.
The more I go back and forth, the more it seems like a peculiar choice. I put it in the first line of the update to make it clear that it wasn't genuine, and even mounted it upside down to invite conversation about it. Open to hear your thoughts!
-
• #68
Stripping this frame in the sun, ready to repaint it (the same colour). First time attempting to remove a BB, wish me luck
1 Attachment
-
• #69
Well that came out surprisingly easy! The previous owner seems to have a soft spot for under-torquing components, which in this case I’m thankful for. I’ve take the weight of a the bare frame to see what 3 paint jobs adds. Paint comes off tomorrow, and I’ll report back with my findings
2 Attachments
-
• #70
Here’s the end frame of an hour+ timelapse of me wet sanding the etch primer on the frame, ready for paint. Minutes after, I read that it’s not advised to paint directly over etch primer. It’s a learning process, and I am having the time of my life. High build coats going on this evening, slices of pizza in between.
1 Attachment
-
• #71
The repaint is going super smoothly so far other than this setback. Three paint jobs added 107g to the frame. I’ll be interested to see what goes back on. Stripped and primed the bike on a pleasant Sunday afternoon, not many pictures (not in order either), but a few videos I’ll piece together once it’s complete
5 Attachments
-
• #72
Nice work.
What is the final colour going to be? -
• #73
Thanks! The same colour as before actually. But to a (hopefully) much higher quality. The previous owner used a metallic silver over two other paint jobs, with no primer or clear coat so it was bumpy and chipped.
I also have a full set of decals from H Lloyd Cycles whereas I bought this bike with a ‘Kona’ on each side and ‘Kilauea’ on just one. So not the biggest change, but I’ll notice it for sure. I’ve always wanted to repaint a bike properly, so this seemed like as good a chance as any
1 Attachment
-
• #74
First coat on, this is REAL TIME baby. This metallic is metallic. Almost robot future space metallic. Do I like it so far? Unsure. I think I need to persevere. Frames will always look a little odd with no decals or components. Scrolling back up the thread, the previous silver was pretty nice🤔
1 Attachment
-
• #75
I started a Retrobike thread for this build, for retro based advice. But it's meant posting to two forums at once, which doesn't lend itself to timely updates. So here's some shit copied and pasted from there if anyone is interested!
Decals went on a treat. I got mine form H Lloyd cycles, before hearing about the forum favourite source: Gil. The decals are great, they seem very high quality. I marked the centre line of the decals, then used tape to mark position and centreline of each tube before slicing the decals down. I've applied a couple of decals before that have looked 1 or 2° out and you can never unsee it. I thought if I was clearing over these, I best get it right.
2 Attachments
 Arnomatic
 rawspuds


 si_mon628


 ectoplasmosis
 Tom13
Tom13


Just read that bit.