-
• #2
Got the rest of the roof on and started to frame the inside for the insulation and lining

First few panels went in, cut to size with a stanley knife

(Bought a proper insulation saw after that; so much easier)Electrician came to do the first fix

6 x LED strips, new mini consumer unit and wiring for a dozen sockets and external lightingInstalled the roof trim and made sure that the roof was properly watertight


Then got to work on the rest of the ceiling

Ripped out a rotten old workbench at the far end. Was mostly held together by woodworm shit.

Then started battening the walls

Foil blanket insulation on top of that, with a vapour barrier on the ceiling

Sealed one of the doors shut as it'll never be used (but left the mechanism in place just in case)

Going to build an insulated stud wall in front of this. -
• #3
Next on the list is to paint the external walls and get the door ordered to replace the other knackered up and over.
-
• #4
Phew, quite a project! Following with interest.
-
• #5
^ What he said
-
• #6
Interesting you have to replace a pres. order tree that has come down naturally
-
• #7

Yes, that's a photo of a white wall. The fun never ends round here... -
• #8
I thought it was a bit odd too. I guess it's so 'accidents' don't happen. Doesn't have to be the same kind of tree though. I think I'll put something a bit more slow-growing in; maybe an apple or cherry.
-
• #9
Stud wall is up and half insulated.

-
• #10
Any progress?
-
• #11
A bit. I’m nearly done boarding out the one half. Going to finish the edges then paint so I can get the floor tiles down.
1 Attachment
-
• #12
Getting to the slightly more fun bits then.
-
• #13
Finished lining the lower half, and my wife finished painting the external walls

Cleared the upper half so I could batten and insulate.


I need to wait for the doors to be delivered and fitted in a couple of weeks before I can do the last little bits of insulation around the new door frame, then finish the lining. Then paint and floor...
-
• #14
Is that a damp proof layer one block up in the third photo?
-
• #15
Trying to work out what it's going to look like in there once I'm finished. Knocked up a pretty rough CAD model:

L-shaped workbench with a vice and pillar drill on top (tumble drier and freezer underneath) in the back left. Toolbox and some clear floor space for a workstand in the upper half. Probably some wall units and a toolboard at the back. Want to leave some room for framebuilding kit and a lathe in the future. Family bikes and general storage space in the lower (right-hand) half. -
• #16
Yep. It doesn't leak now I've repaired the render on the outside wall.
-
• #17
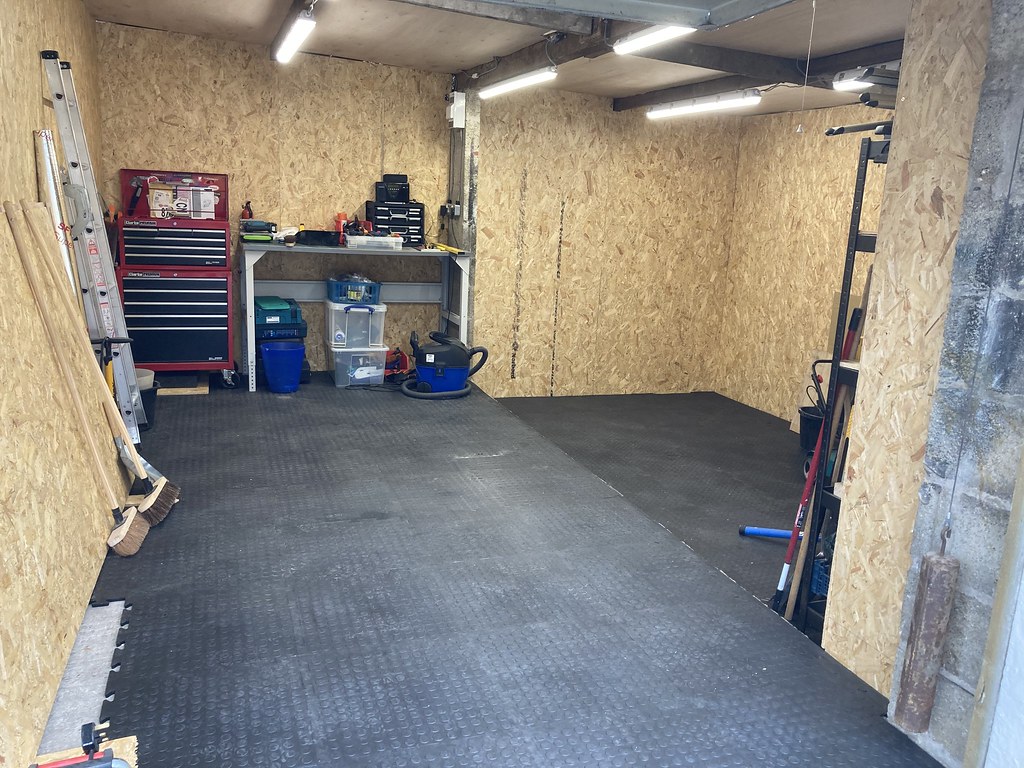
Decided I like the wood finish and CBA to paint so I got on with the floor tiles - almost done.

-
• #18
that looks great! very envious.
Are the flooring tiles rubber or foam? -
• #19
Thanks! The tiles are recycled PVC - quite rigid, but easy to cut with a jigsaw and lock together easily. They'll keep the dust down and hopefully be a lot more comfortable to stand on.
-
• #20
Getting closer...
Doors on

The mismatched doors bugged me so I bought some colour-matched paint for the right hand side.That meant I could finish the insulation and boarding around the door ...

... get the bikes in and some shelves built ...

... and build a workbench to fix the vice to.

Going to finish the ceiling next, and fit a toolboard above the bench. Electrician is coming in two weeks to finish fittings the sockets. Hoping to get some cupboards for some more storage next to the bikes as I've still got a load of stuff that needs to be put away.
-
• #21
It looks fantastic, is this on your own land or part of a block? If part of a block I wonder if the mis-matched doors are a bonus as it looks like two separate, standard garages rather than a super cave full of goodies.
-
• #22
Thank you! It's on our own land - well, shared with the neighbours who have the two next door. But I know what you mean. My neighbour wants to refurbish his roof at some point too, so hopefully then it won't stand out too much.
-
• #23
Great stuff. Might do a thread for my much more modest shed build once it's a bit further on.
-
• #24
You definitely should. It's always good to see what others are up to.
-
• #25
Been sorting the storage:

Moved the bike racks, got a cabinet from work, built a stand for the family's bikes and a ramp so the kids can wheel them up and down.Got a toolboard up above the workbench too:

Reckon I'm pretty much done. The electrician will be here on Friday (hopefully...) to finish off the sockets. Then I just need to buy a lathe, grinder, brazing kit...
 hiraethus
 russmeyer
 JesperXT
 picco
picco
 jellybaby
 TheShipwright
 Alan_tbt
 si_mon628
Copied over from here: https://www.lfgss.com/comments/15322987/
Bit of a shed (well, garage) renovation project on the go...
On Christmas Eve the silver birch at the bottom of my garden fell onto my garage

It properly fucked the roof

And covered everything in moss, broken branches and bits of asbestos

Tree surgeon came and chopped it into bits and got it off the roof

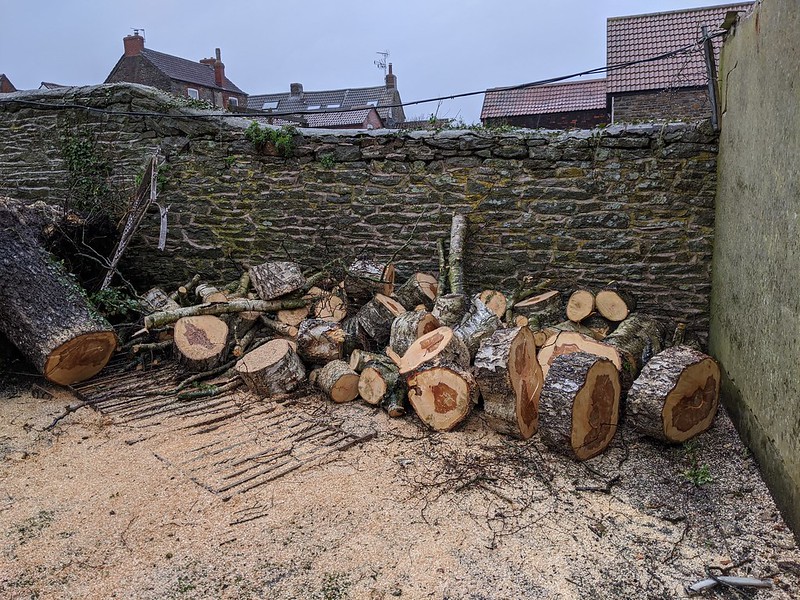
Which left me plenty of firewood:

(there was actually about twice this once I'd split the remains of the stump as well)
Had to winch the stump off the wall in order to get it cut down further

This is what was left after I'd emptied the garage into our cellar

Started to strip the old asbestos panels off. They're 40kg each and 2.8m x 1m, and I had to wear a mask while moving them and getting them wrapped so I could dispose of them.

Knocked out some of the blockwork so I could repair a some cracked joints

The ever expanding junk pile

The tree has a preservation order so will need replacing eventually
Got the last of the roof off and wrapped, and started to repair and strengthen the roof timbers

The junk pile, stump remains and wrapped asbestos all got collected. Good to have our parking space back.

Started to fit the replacement fibreglass roof panels

Fiddly but satisfying job. Needed to get some panels on as we're forecast rain for the first time in weeks tomorrow.

Once I've got the roof finished I'll move on to the electrics (more sockets!) and getting decent doors fitted.