Hi everyone, it has been a while I have not done a photo tutorial so here we go.
I have helped a workmate with his bike - his 6 speed freewheel was shot and the LBS asked him a whooping £50 to supply & fit one.
Real cost of a budget 6 speed freewheel is around £8 so I said I could do if for him if he bought a freewheel online. I changed his tyre/tube and regreased his bearings but that's another tutorial...
This tutorial is for a geared freewheel but it applies to singlespeed ones, you just need a different freewheel tool (they all cost less than £10).
**I hope this helps - pretty basic stuff but it will be handy for someone who hasn't done it before **
Before you get carried away, get the tools / gloves / rags ready.
You will need to check what tool fits your freewheel - standard freewheel take a standard Shimano UG Freewheel which is roughly the same as a Campagnolo cassette tool (silver one on the photo).
They cost less than £5 so it is worth having in the toolbox.
For older / french / italian freewheels tools like Maillard, Suntour, Regina, have a look on Ceeway as they stock them http://www.framebuilding.com/index.html - once again, about £5 a pop.
Get a quality adjustable spanner, ideally with a long handle so you have more leverage power when you try remove the freewheel.
Here is the wheel before any work is done - for those with OCD, it is a 27" wheel from a 1979 Raleigh Equipe.
As you can see, the freewheel has seen better days, teeth sharking and really gritty bearing. Since these cost less than £10, there is absolutely no point servicing them. Just head onto SJS / Spa Cycles / eBay and buy a new one.
Since you don't know how long the freewheel has been fitted to the wheel and if the previous mechanic grease all the threads properly, you are better off giving it a good soaking is penetrating fluid.
In this instance, the freewheel came off straight away but I had situations where major brute force was needed.
You need to unscrew the freewheel anticlockwise - it makes sense as the freewheel tightens when you cycle (therefore when the freewheel turns clockwise)
Place your freewheel tool in the freewheel slot then put your axle nut back on (or quick release skewers) in order to keep the tool secure and in place when you are going to attempt to remove the freewheel.
This is quite important as if the tool slides out, you might injure yourself, or worst damage the tool or strip the freewheel.
If the freewheel is properly stuck, you will need more leverage so up an extension on your wrench - personally, I use my hoover metal extension.
Once the initial brute force has been applied, the freewheel should unscrew easily. Make sure you remove the axle nut or QR skewer which was holding the tool in place.
Voila! the freewheel is off. Chuck it in the bin and while it is off, you have a good opportunity to clean the rear hub and regrease the bearings (that's another tutorial).
When the rear hub and freewheel thread are clean, you can grease them up to put the new freewheel on.
Make sure you grease the freewheel thread too, the next person changing the freewheel will thank you.
Now it is just a matter of screwing on the freewheel in place. Freewheels tighten when you pedal therefore you need to tighten clockwise.
I like to tighten it properly in place with the freewheel tool so it won't move once the wheel is on the bike.
Technically you could just tighten it by and it will tighten itself properly when you ride.
But since I like adjusting my rear derailleur, it is best if the freewheel is in place properly.
Remember that different brands of freewheel have different offsets so you will probably need to re-adjust your rear derailleur top and bottom stops by a couple of mm.
Looks great now it is in place - Job done!
I have also replaced the tyre (27 1 1/4), tube and rim tape on this wheel as well as using wire wool to polish the chromes.
Good as new and ready to be refitted.
Since a new chain costs around £8, you might as well changing too so you have a new drivetrain. Make sure you buy a chain with a quick link (like a KMC Z7) as it is so much easier to fit and remove in the future.
Now you can have a beer and contemplate your work -* you saved yourself about £30 in LBS labour.*
Hi everyone, it has been a while I have not done a photo tutorial so here we go.
I have helped a workmate with his bike - his 6 speed freewheel was shot and the LBS asked him a whooping £50 to supply & fit one.
Real cost of a budget 6 speed freewheel is around £8 so I said I could do if for him if he bought a freewheel online. I changed his tyre/tube and regreased his bearings but that's another tutorial...
This tutorial is for a geared freewheel but it applies to singlespeed ones, you just need a different freewheel tool (they all cost less than £10).
**I hope this helps - pretty basic stuff but it will be handy for someone who hasn't done it before **
Before you get carried away, get the tools / gloves / rags ready.
You will need to check what tool fits your freewheel - standard freewheel take a standard Shimano UG Freewheel which is roughly the same as a Campagnolo cassette tool (silver one on the photo).
They cost less than £5 so it is worth having in the toolbox.
For older / french / italian freewheels tools like Maillard, Suntour, Regina, have a look on Ceeway as they stock them http://www.framebuilding.com/index.html - once again, about £5 a pop.
Get a quality adjustable spanner, ideally with a long handle so you have more leverage power when you try remove the freewheel.
Here is the wheel before any work is done - for those with OCD, it is a 27" wheel from a 1979 Raleigh Equipe.
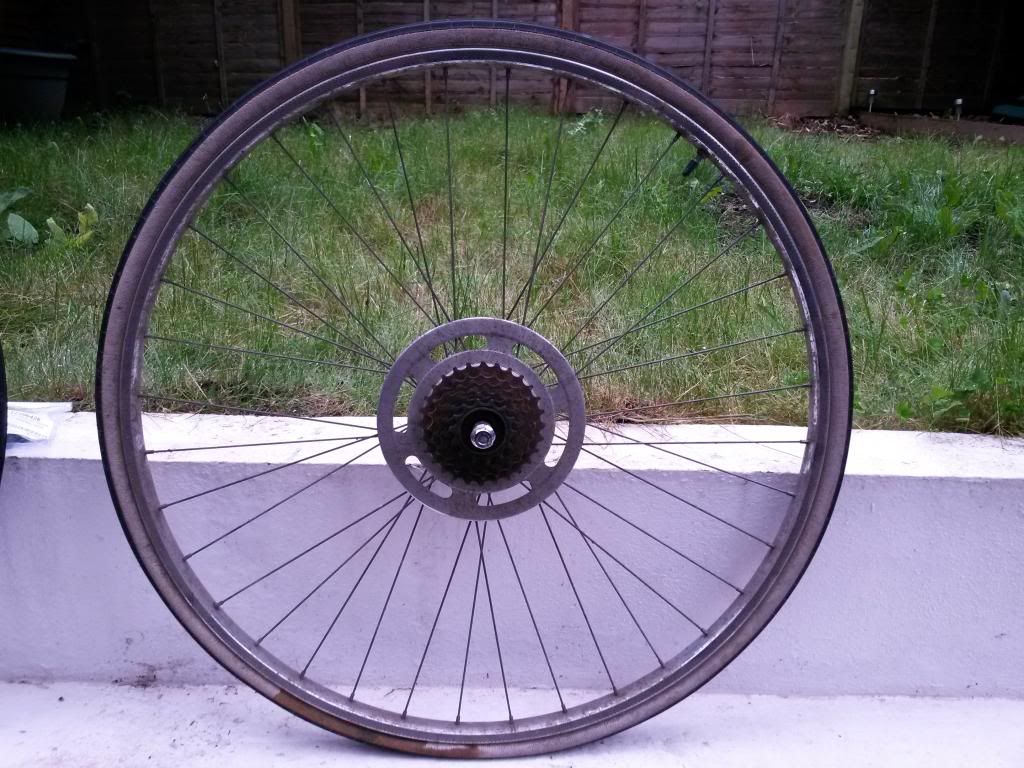
As you can see, the freewheel has seen better days, teeth sharking and really gritty bearing. Since these cost less than £10, there is absolutely no point servicing them. Just head onto SJS / Spa Cycles / eBay and buy a new one.
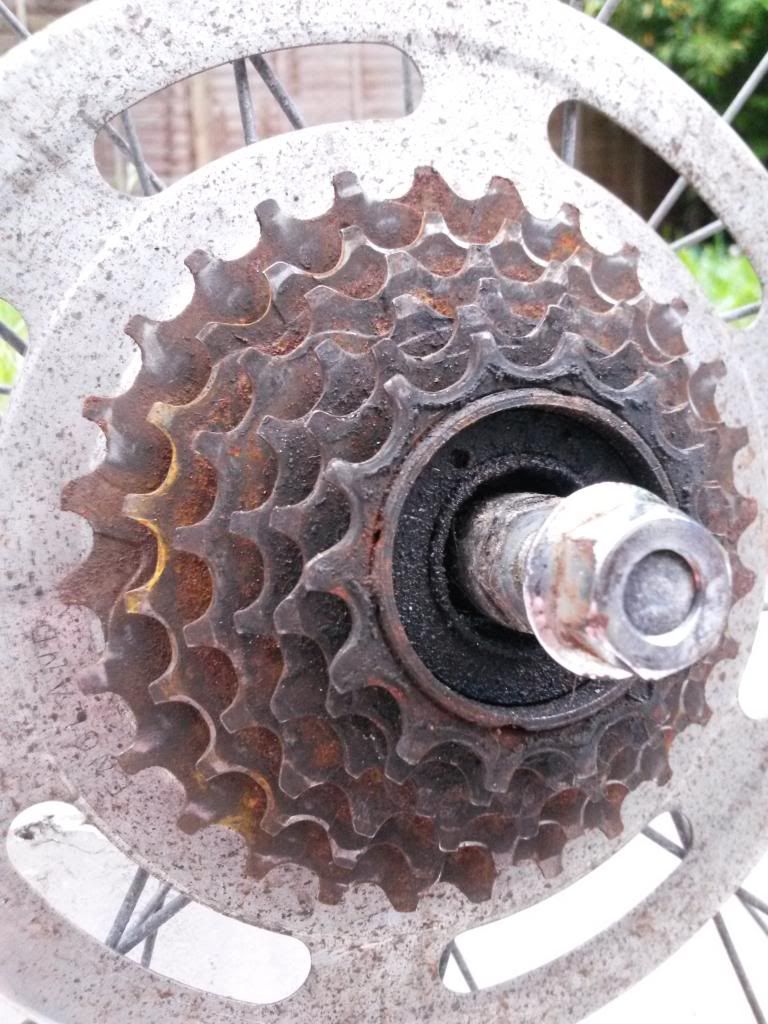
Since you don't know how long the freewheel has been fitted to the wheel and if the previous mechanic grease all the threads properly, you are better off giving it a good soaking is penetrating fluid.
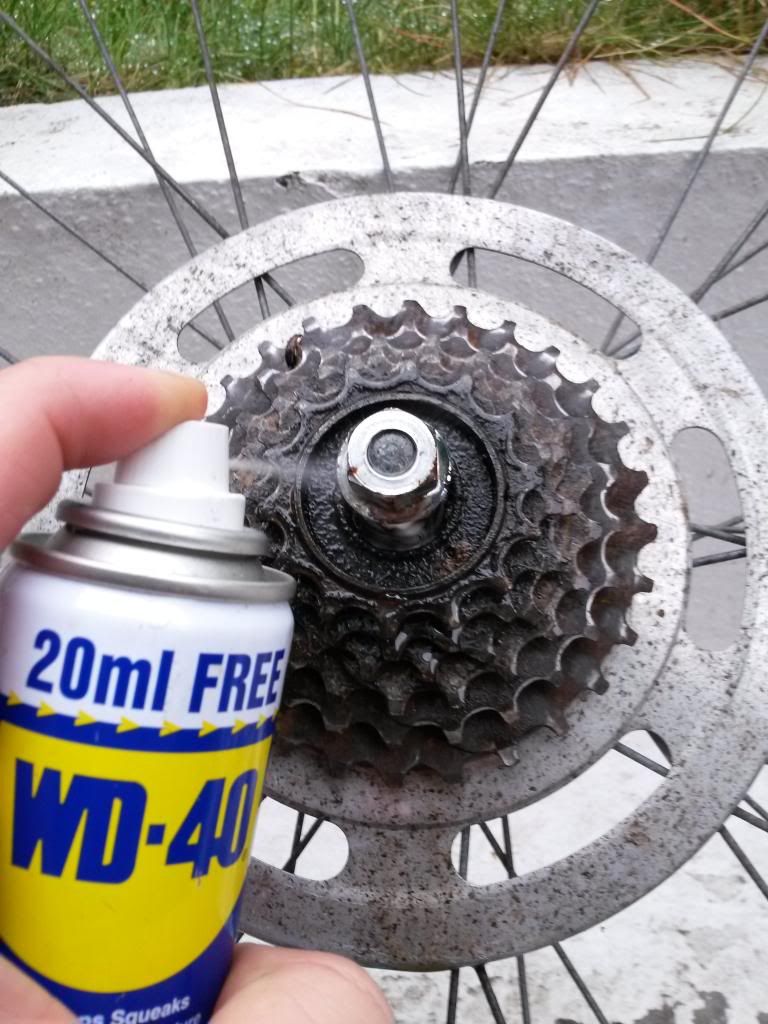
In this instance, the freewheel came off straight away but I had situations where major brute force was needed.
You need to unscrew the freewheel anticlockwise - it makes sense as the freewheel tightens when you cycle (therefore when the freewheel turns clockwise)
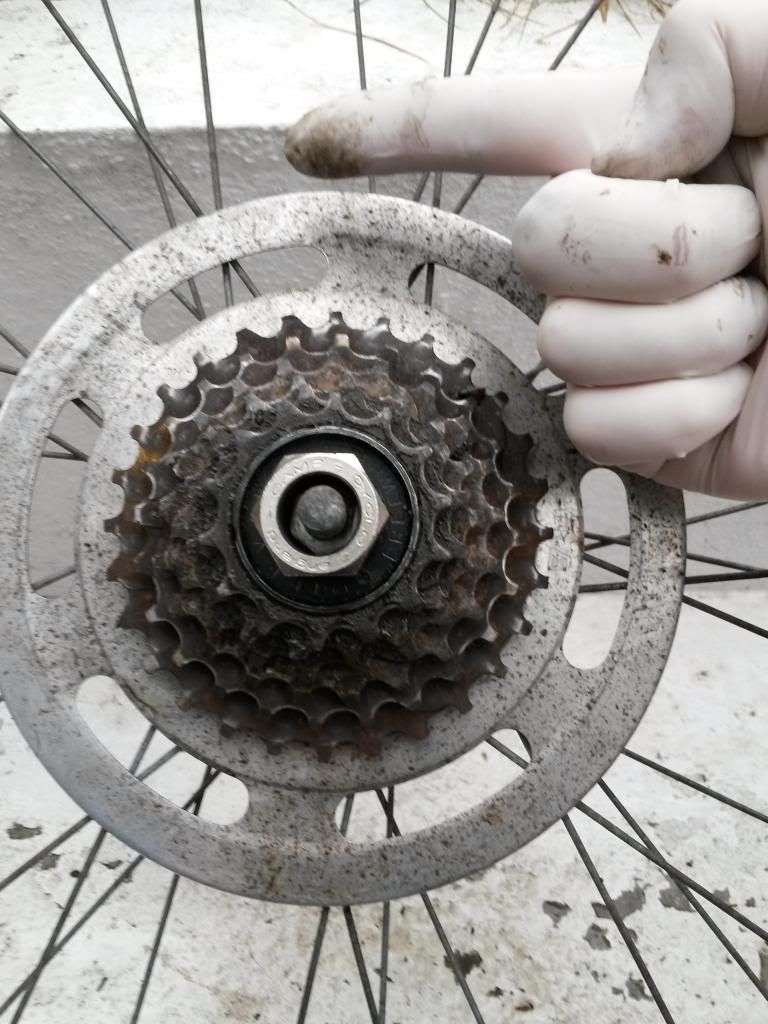
Place your freewheel tool in the freewheel slot then put your axle nut back on (or quick release skewers) in order to keep the tool secure and in place when you are going to attempt to remove the freewheel.
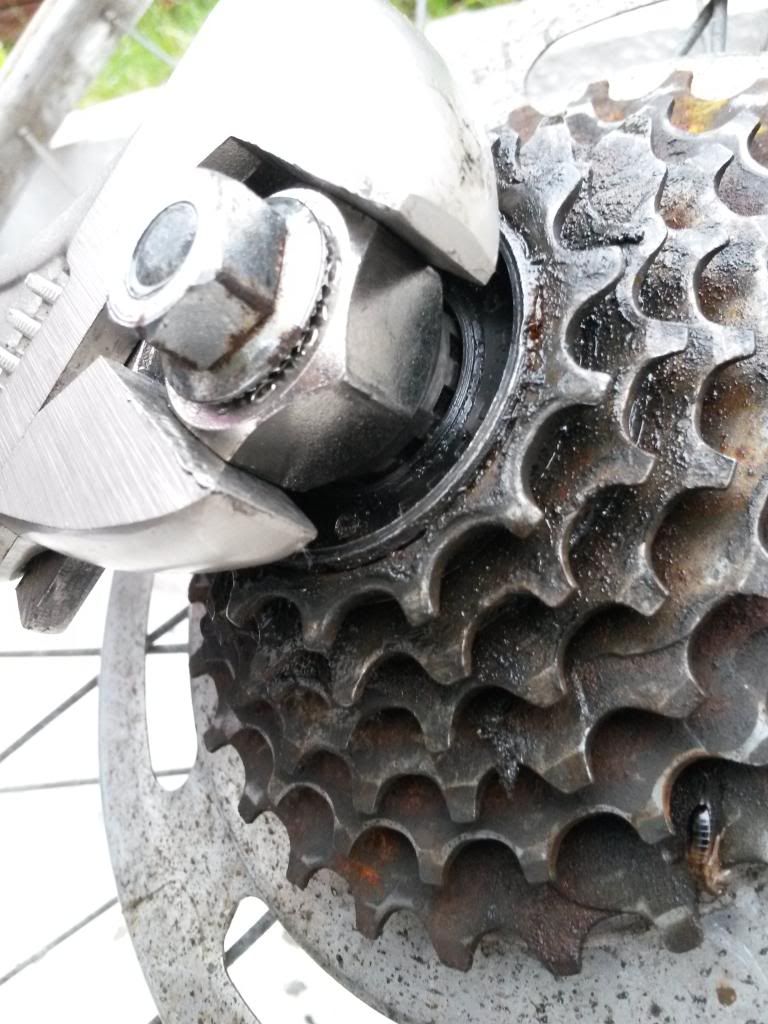
This is quite important as if the tool slides out, you might injure yourself, or worst damage the tool or strip the freewheel.
If the freewheel is properly stuck, you will need more leverage so up an extension on your wrench - personally, I use my hoover metal extension.
Once the initial brute force has been applied, the freewheel should unscrew easily. Make sure you remove the axle nut or QR skewer which was holding the tool in place.
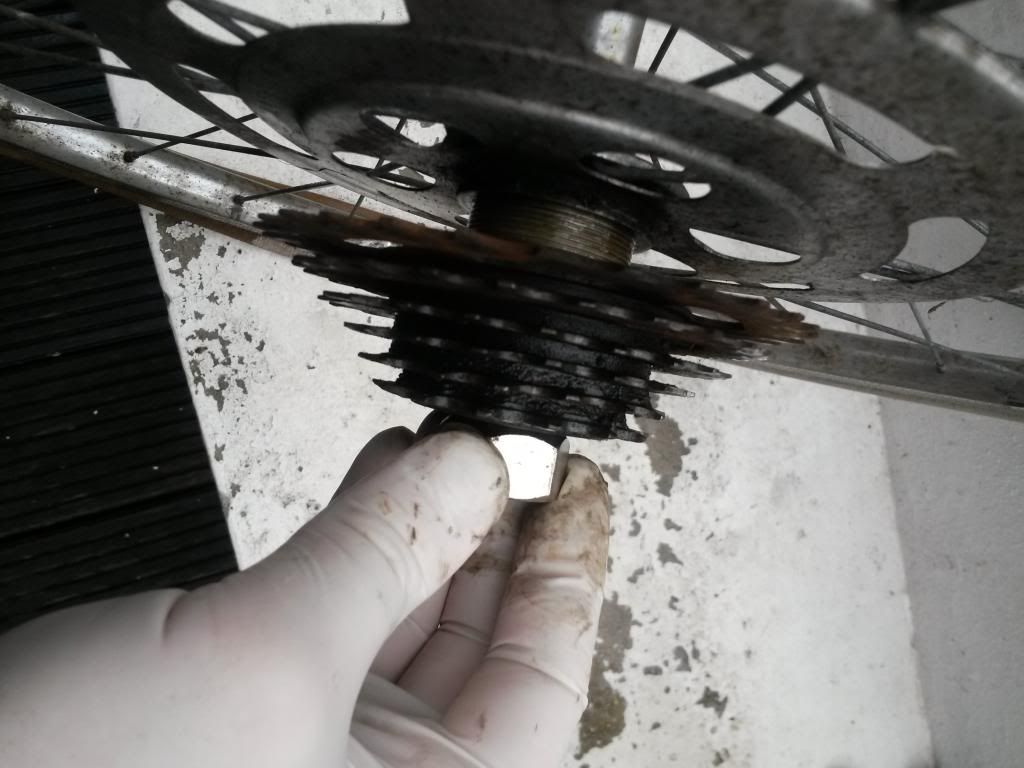
Voila! the freewheel is off. Chuck it in the bin and while it is off, you have a good opportunity to clean the rear hub and regrease the bearings (that's another tutorial).
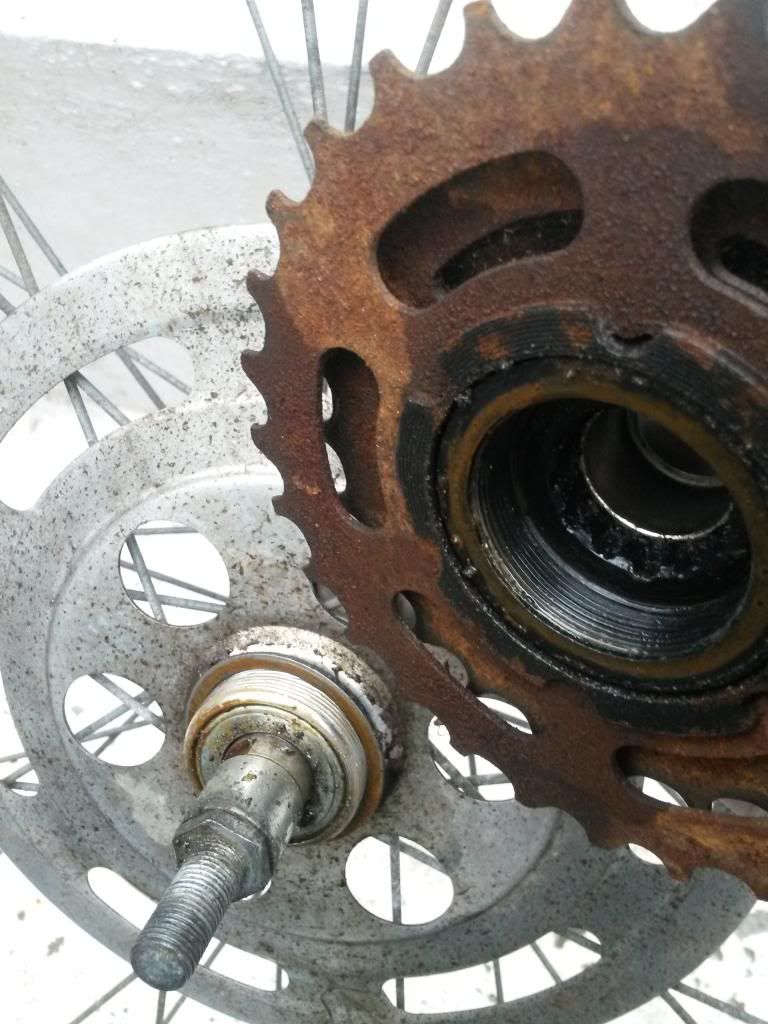
When the rear hub and freewheel thread are clean, you can grease them up to put the new freewheel on.
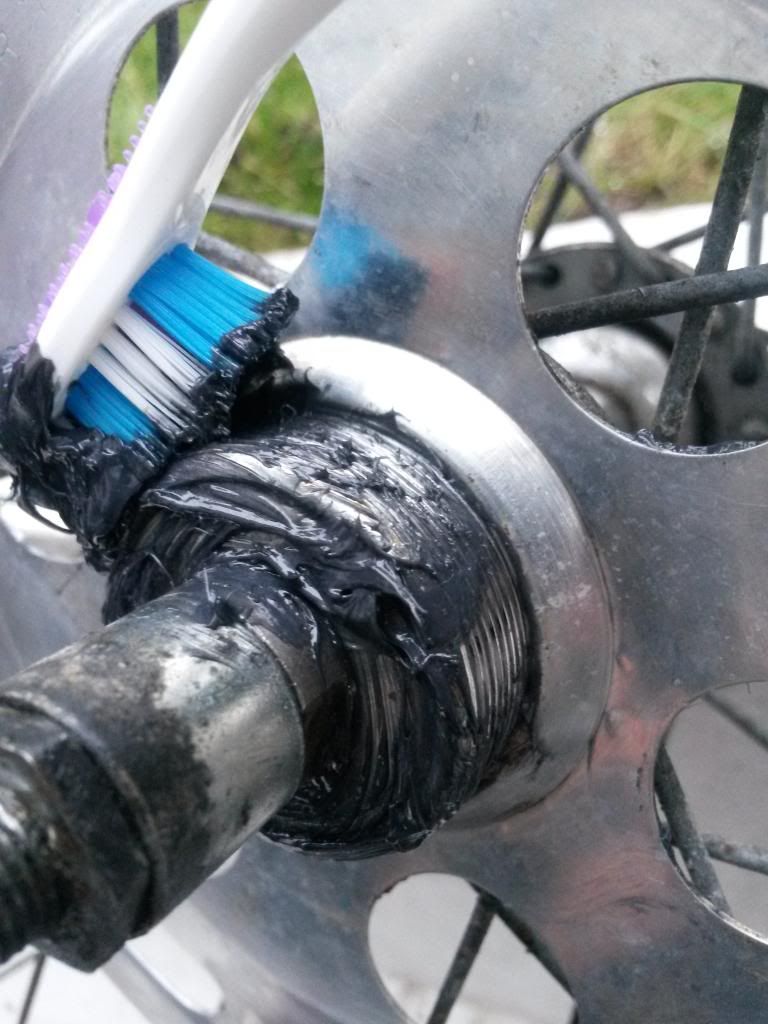
Make sure you grease the freewheel thread too, the next person changing the freewheel will thank you.
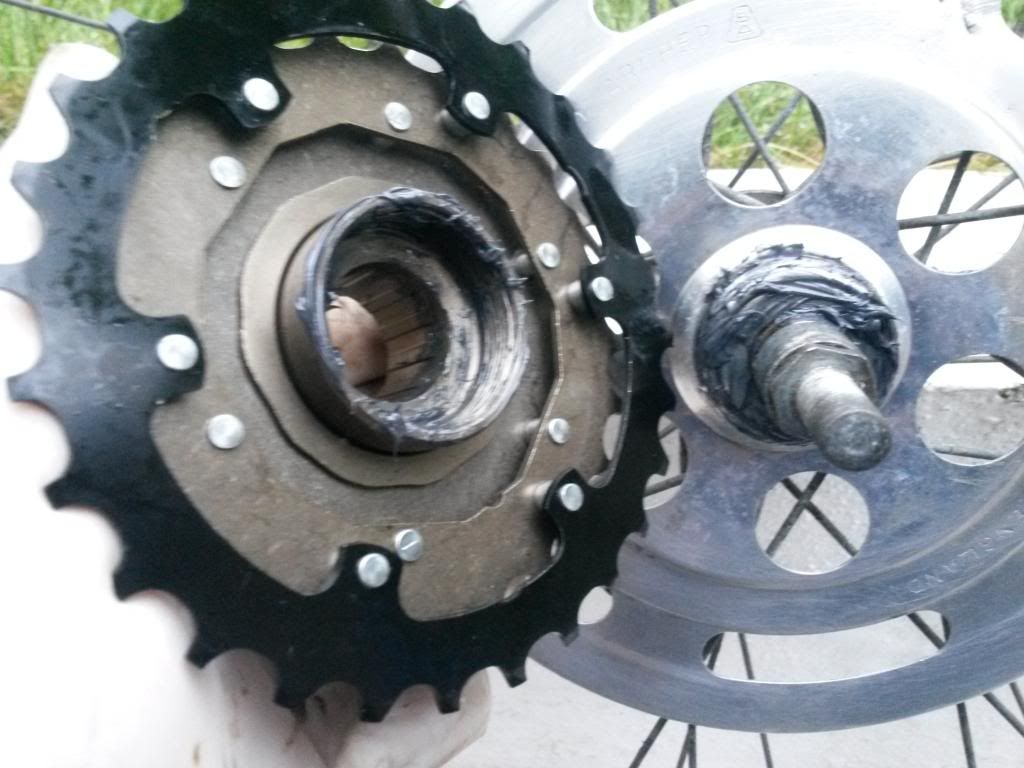
Now it is just a matter of screwing on the freewheel in place. Freewheels tighten when you pedal therefore you need to tighten clockwise.
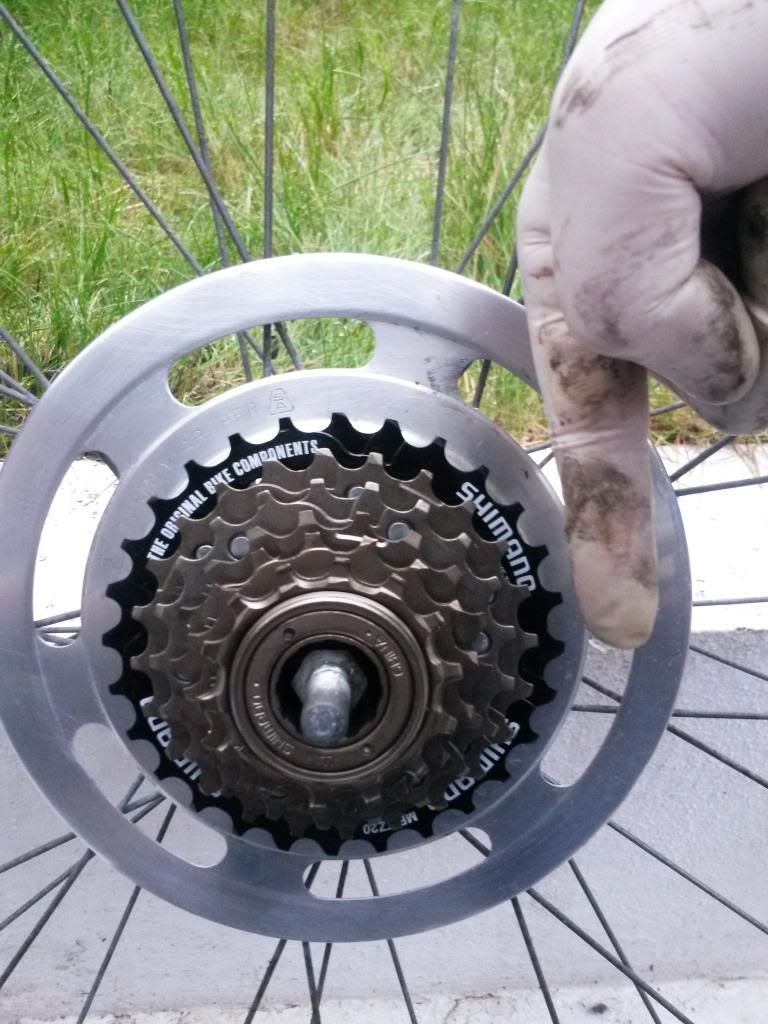
I like to tighten it properly in place with the freewheel tool so it won't move once the wheel is on the bike.
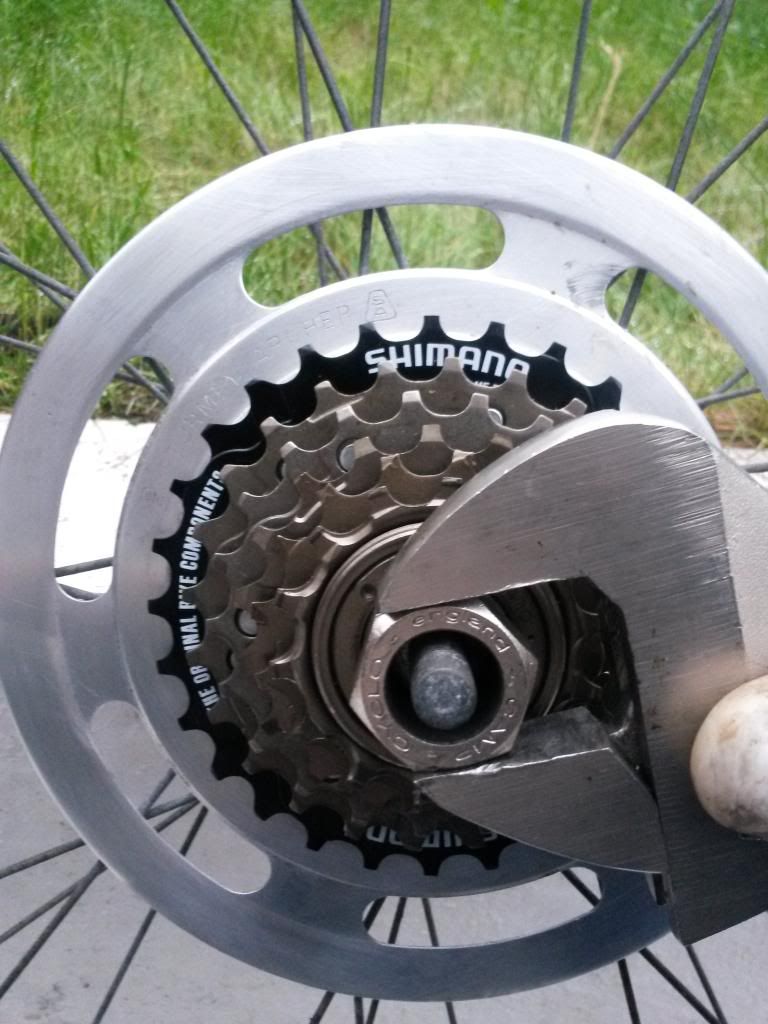
Technically you could just tighten it by and it will tighten itself properly when you ride.
But since I like adjusting my rear derailleur, it is best if the freewheel is in place properly.
Remember that different brands of freewheel have different offsets so you will probably need to re-adjust your rear derailleur top and bottom stops by a couple of mm.
Looks great now it is in place - Job done!
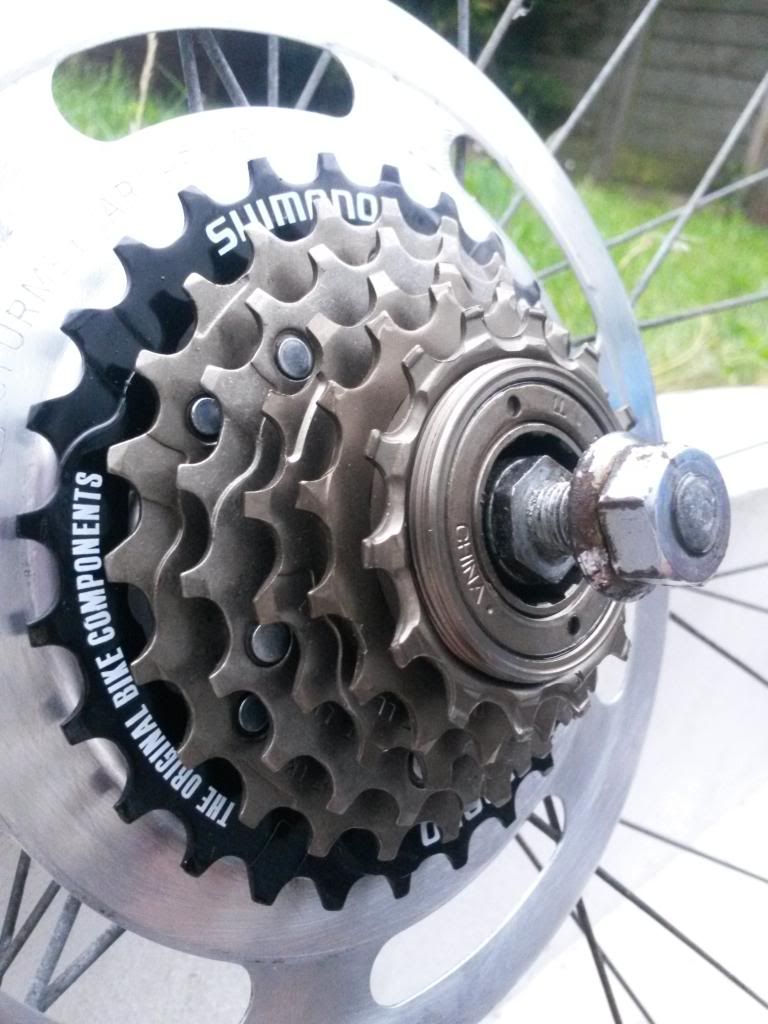
I have also replaced the tyre (27 1 1/4), tube and rim tape on this wheel as well as using wire wool to polish the chromes.
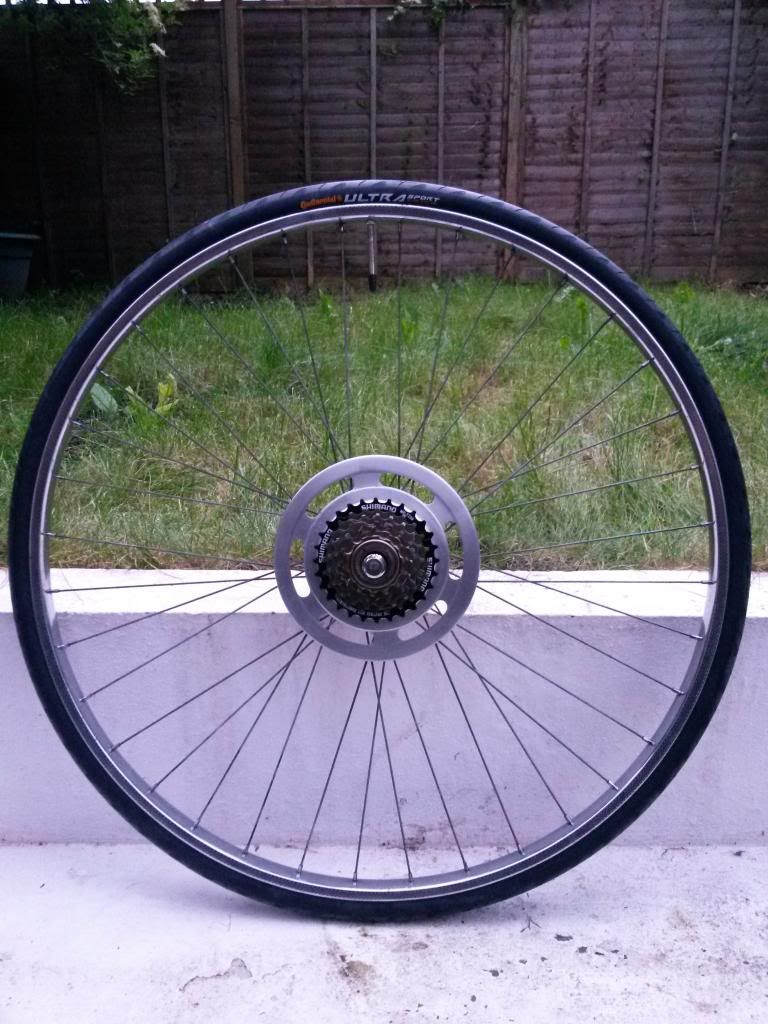
Good as new and ready to be refitted.
Since a new chain costs around £8, you might as well changing too so you have a new drivetrain. Make sure you buy a chain with a quick link (like a KMC Z7) as it is so much easier to fit and remove in the future.
Now you can have a beer and contemplate your work -* you saved yourself about £30 in LBS labour.*