-
• #2
Really curious how this has turned out! Your own bike was really awesome, such a shame it got stolen :(.
-
• #3
The front and back of the bike needed the most thought.
I'd originally considered fabricating the fork myself, but the more I researched, the more I realised that it wasn't going to be straightforward. Steel-bladed disc forks have to withstand an awful lot of stresses, and I wasn't confident about the robustness of what I could make with available materials. In the end I decided to use a Surly Disc Trucker fork, as it had the clearances and look I wanted.
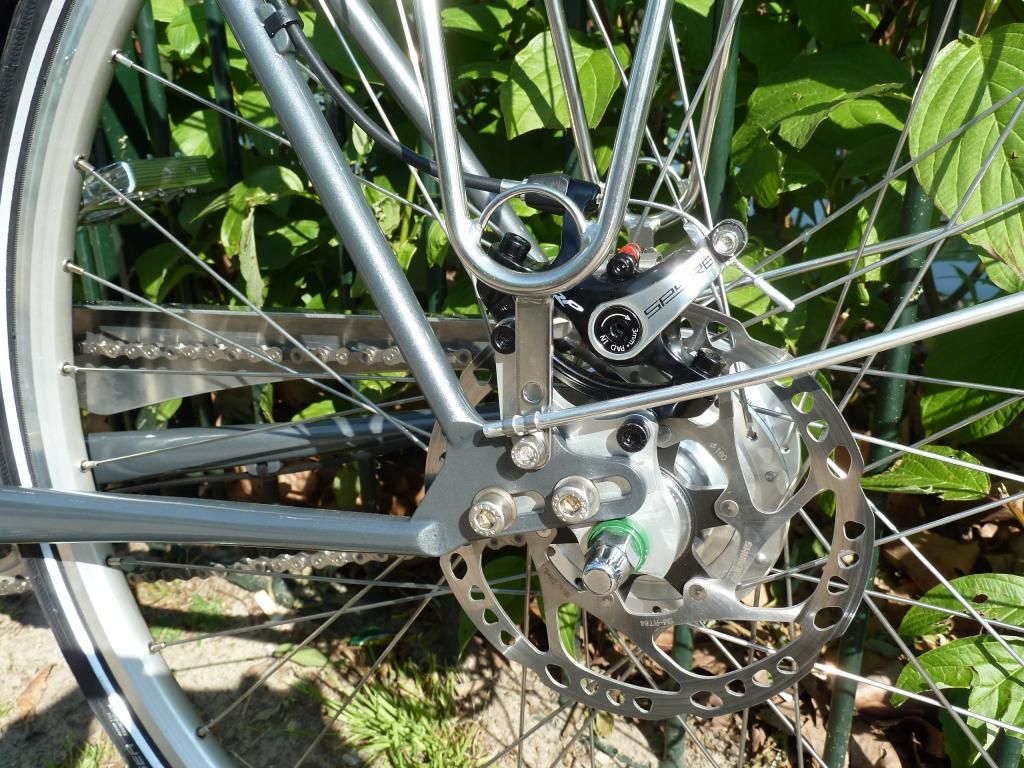
Although there were a couple of options for the rear dropouts, I went for the set in the picture above as they were easy to get hold of and not too expensive. Plus they have built in rack/mudguard mounting points.
The design meant I ended up with a very wide rear on the bike. Alfine hubs run 135mm OLD, then you have thick sliders, and the outer steel mounting plates. All told that gets the back out to about 160-165mm. I needed to bend the chain stays to get them around the 35mm town tyres, then back in and out to get to the correct width without causing heel-strike issues.
The first prototype is in the images below. The original plan was to use straight Zona stays, then heat them to the point where they anneal (go soft), bend them to the right shape and then let them cool.
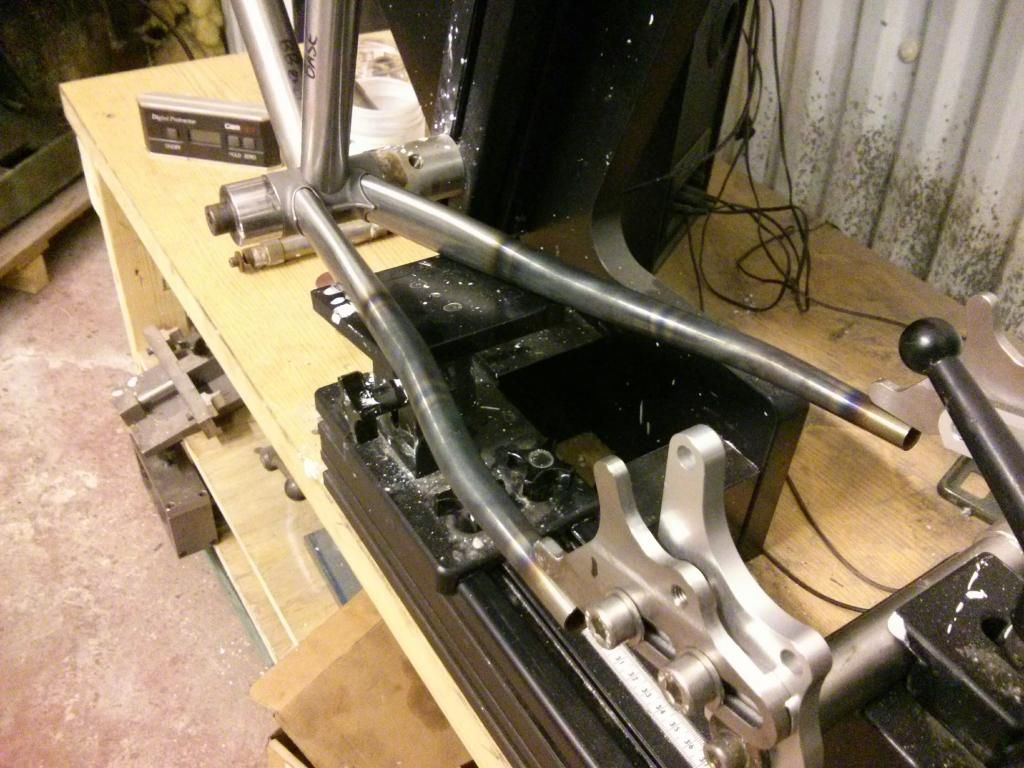
I mocked the back end up, holding stuff in place with tape to see if it would work.
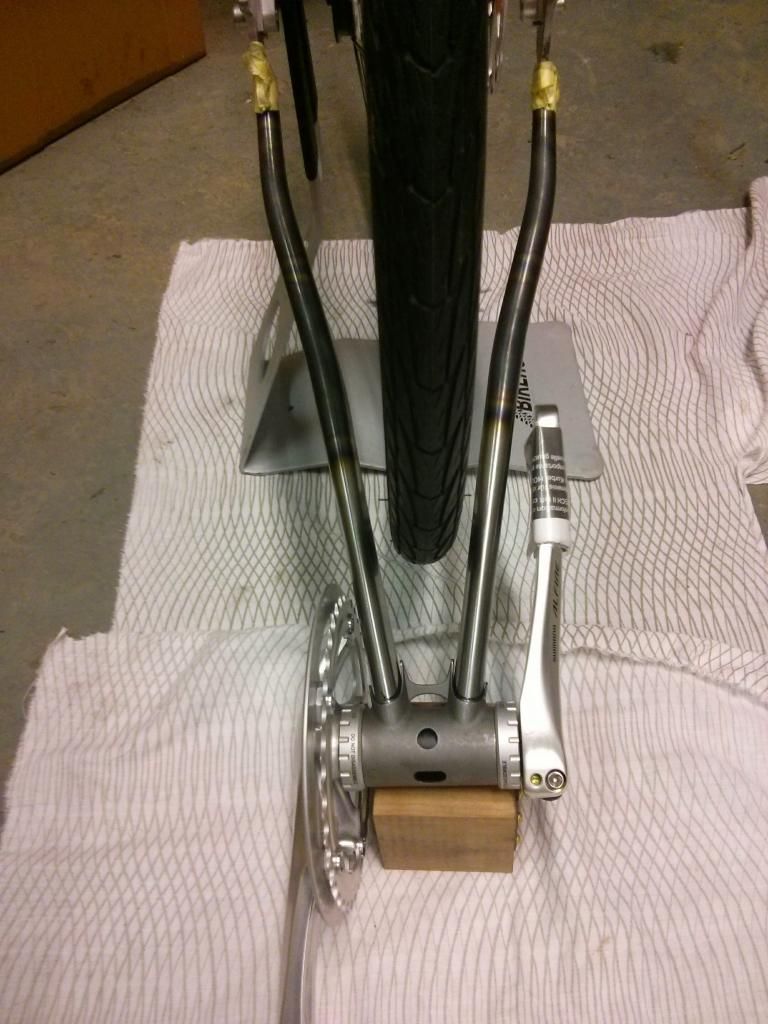
The answer was "sort of". Bending the stays went alright, but the original choice of a part-sockted BB caused problems. Getting the chainstay ports the right shape & angle wasn't really working. In the end, I changed approach.
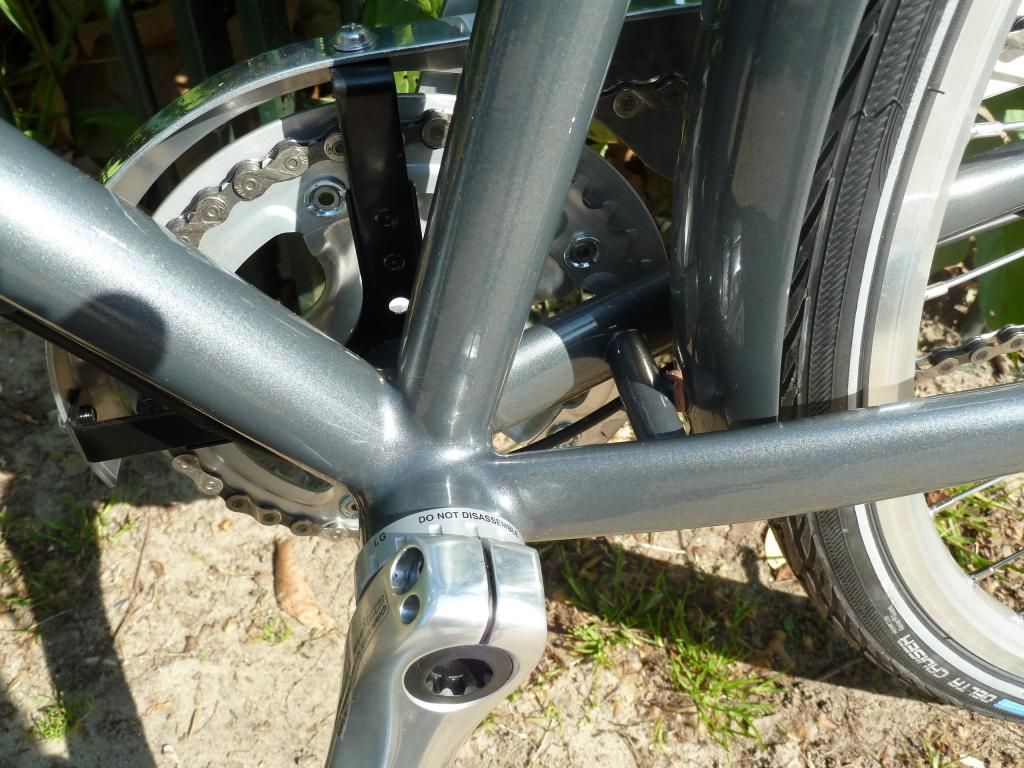
The final answer was to use a plain BB sleeve, Columbus Zona Cyclocross bend stays and fillet braze it all together. Once I'd settled on them, I bought a pair of Zona CX bend seat stays in order to get a consistent hourglass look to the back of the bike.
The rear dropouts were brazed into the chainstays. You cut a slot to allow the (shaped) tab to be inserted, then tack them into position with a dot or brazing alloy. After an alignment check you can secure them properly by heating the dropout really well, building a small pool of brazing alloy at the mouth of the chainstay, then using heat and gravity to draw the braze down inside the tube, forming a solid plug that bonds everything nice and strongly.
You can see the final result of that here. The brazing alloy is revealed when you file and shape the joint, giving a flowing transition from dropout to stay.
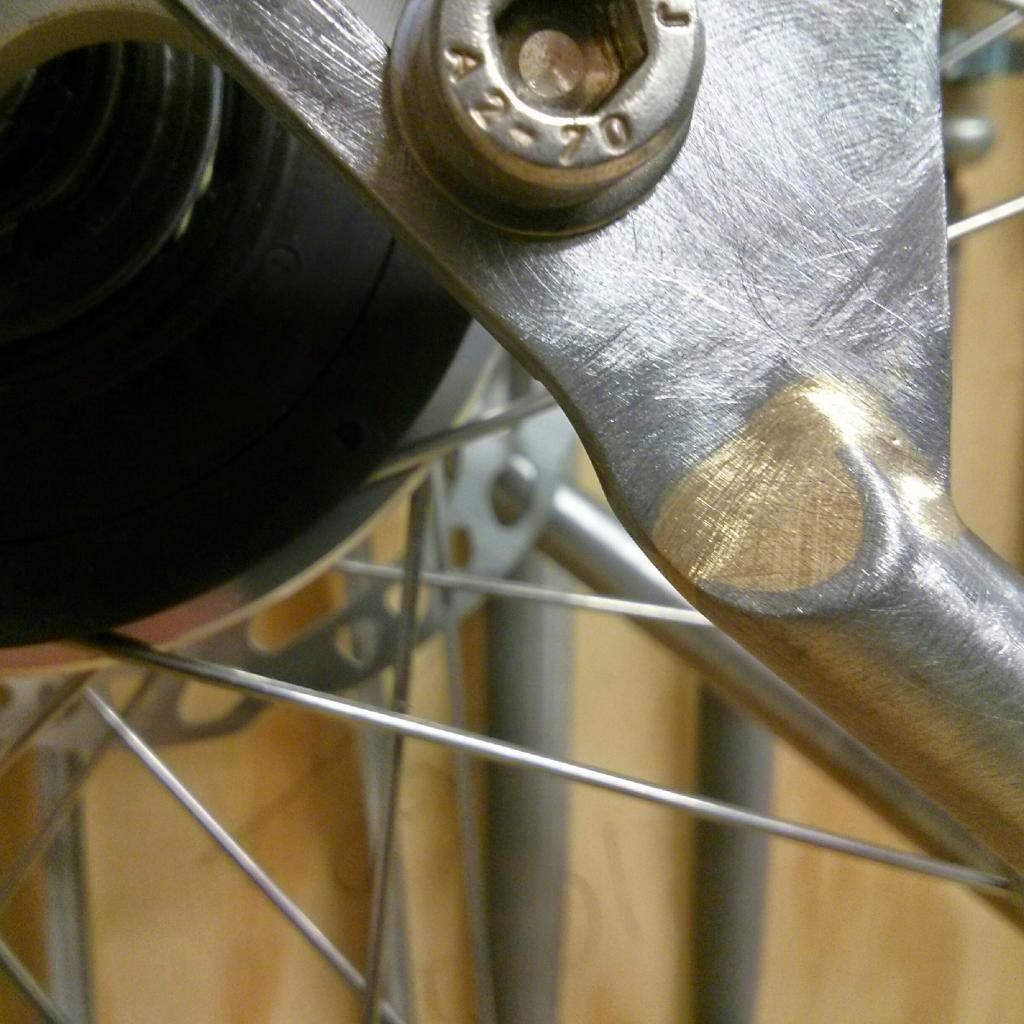
Trickiest part of the operation is to keep the torch flame off the aluminium dropout while you're brazing it together. You have to have the whole unit assembled with a dummy axle in place to hold everything in alignment. However, that went alright, so I was able to drop the wheel into the back end and check it looked alright.
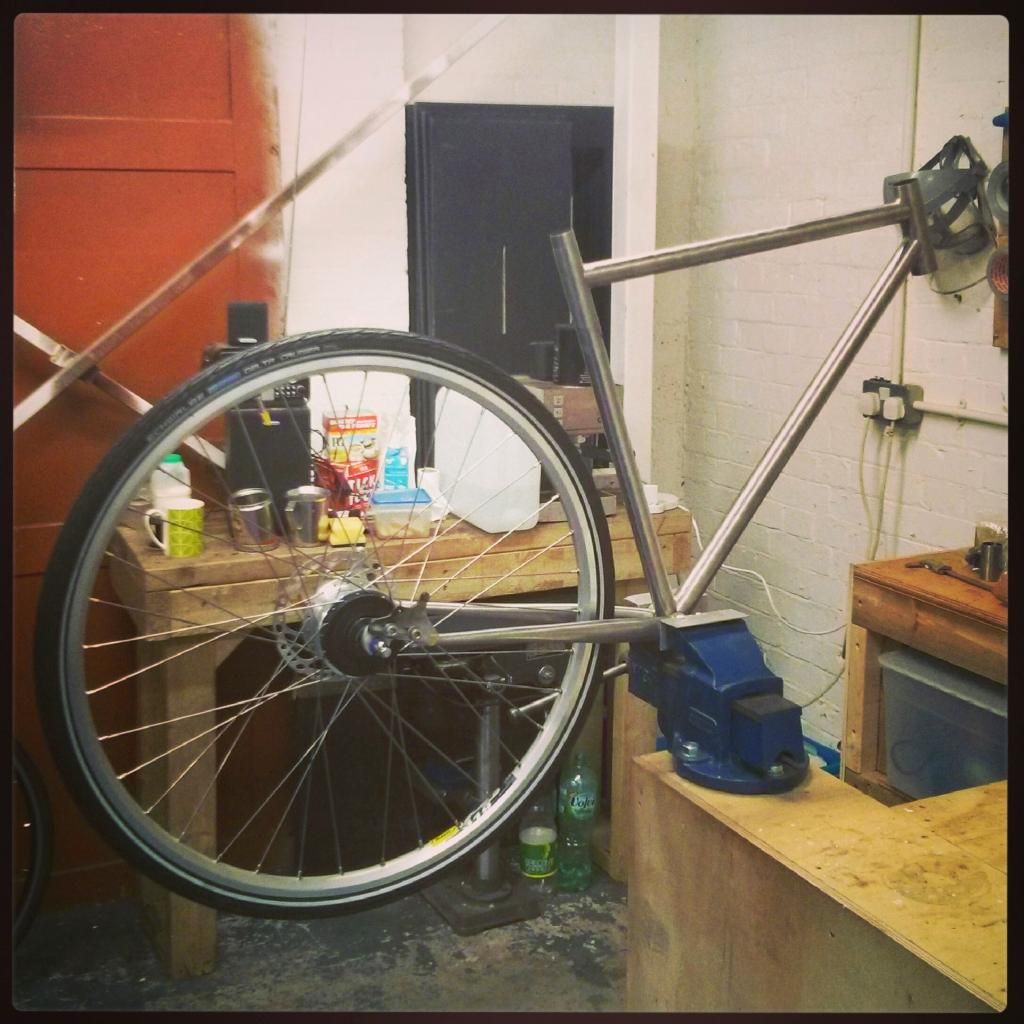
Once I was happy with that I moved onto fillet brazing the front triangle, chain stays and finally the seat stays.
-
• #4
Alignment of the tubes and dropout have always looked so difficult to me. Is a special tool or work stand of some sort required?
Looking forward to follow the progress.
-
• #5
I'm lucky because I have access to a proper frame-building jig. That holds the tubes steady while you tack them, and also has dummy axles that hold the dropouts in the correct position relative to each other and the stays.
When it comes to the actual full fillet brazes they're done in a regular bike workstand. You need to allow the tubes space for thermal expansion, otherwise you can effectively lock stresses into the tubes.
If your mitres are cut nice and tight, the tacks are well-made, and your heat control is good then the frame tends to stay pretty true. That's checked on an engineer's alignment table. The largest movement I've seen is when you braze the bridges into the chainstays and seat stays, which tends to pull the triangle closed, so you need to spread it by gentle(ish) pulling.
Some builders use slightly over-length dummy axles (so a 137.5mm one for a 135mm backend) to artificially "spring" the backend wider. The idea being that this compensates for the bridges pulling it closer, hopefully leaving you with a perfectly spaced set of dropouts.
-
• #6
Once I was happy with the alignment I brazed up the whole of the frame, and used the normal technique of careful filing and various grades of abrasive paper to shape them.
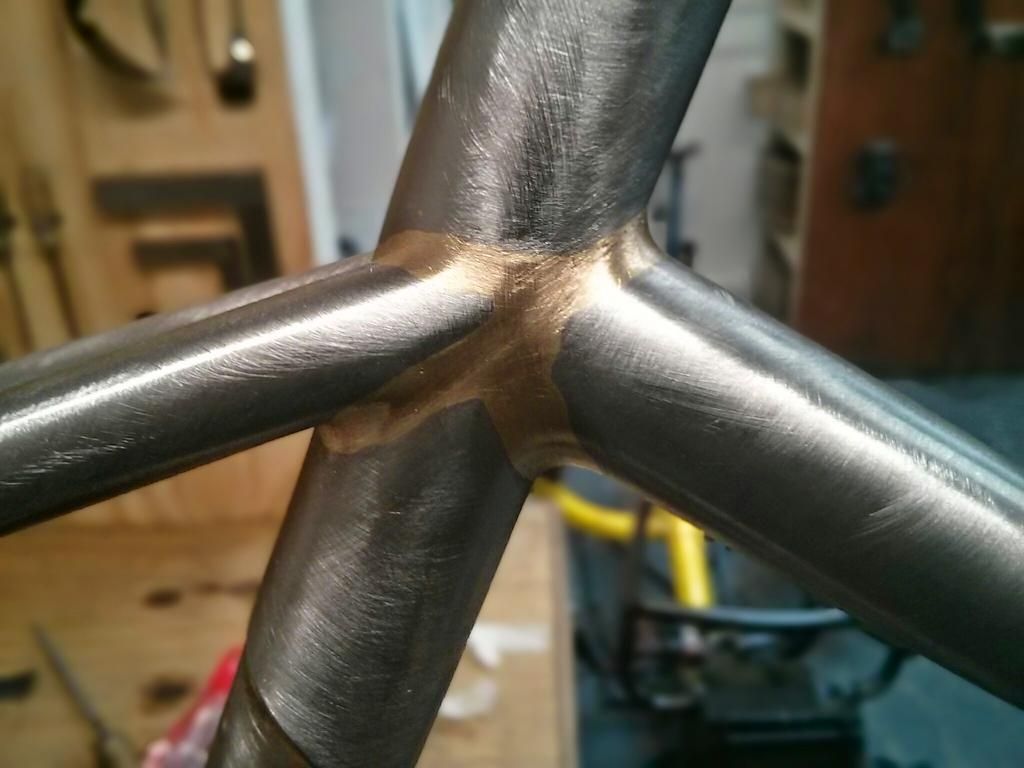
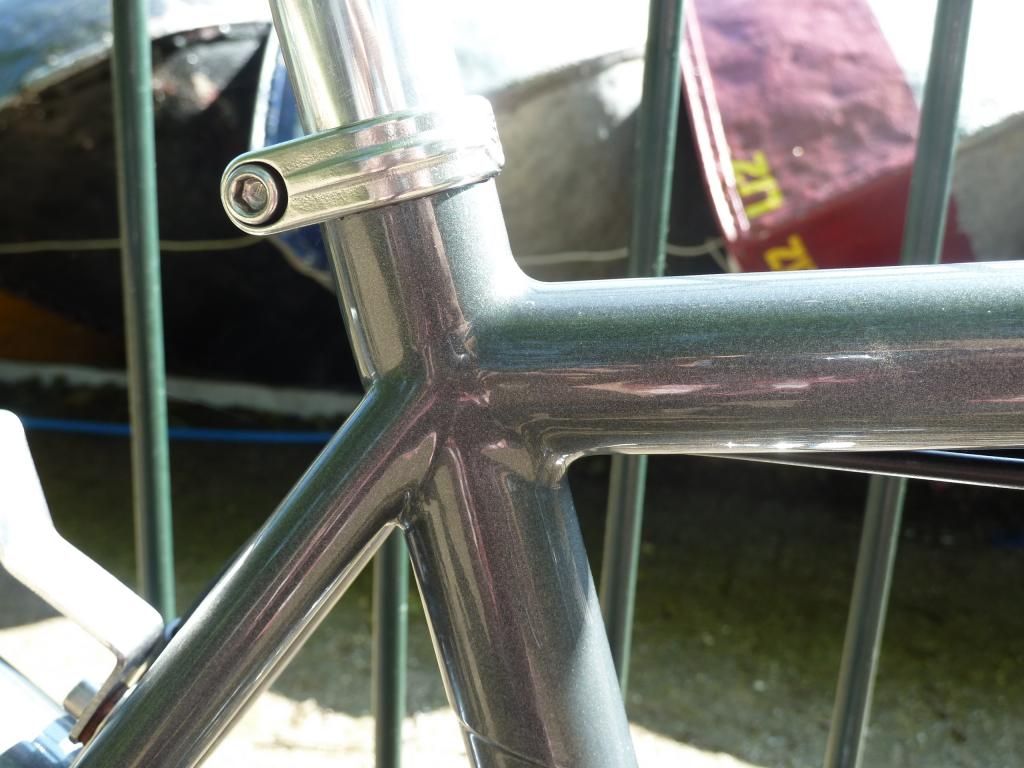
This is the seat tube cluster. I silver brazed a reinforcing sleeve over the tube itself, you can just see the bottom of it in shot.
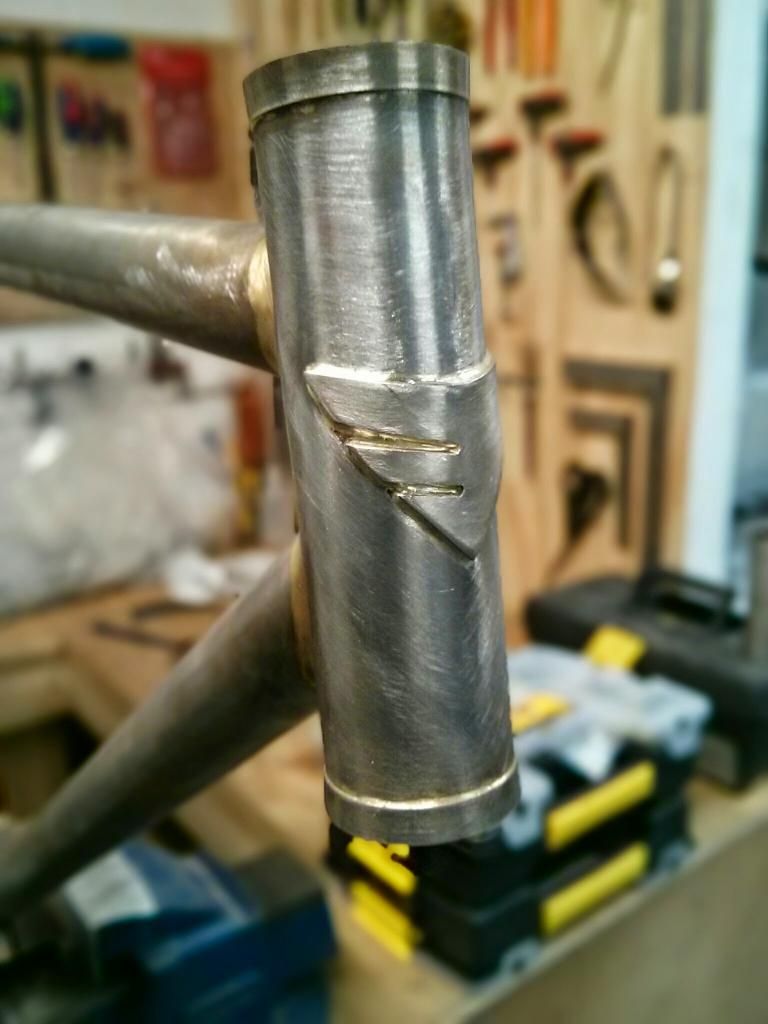
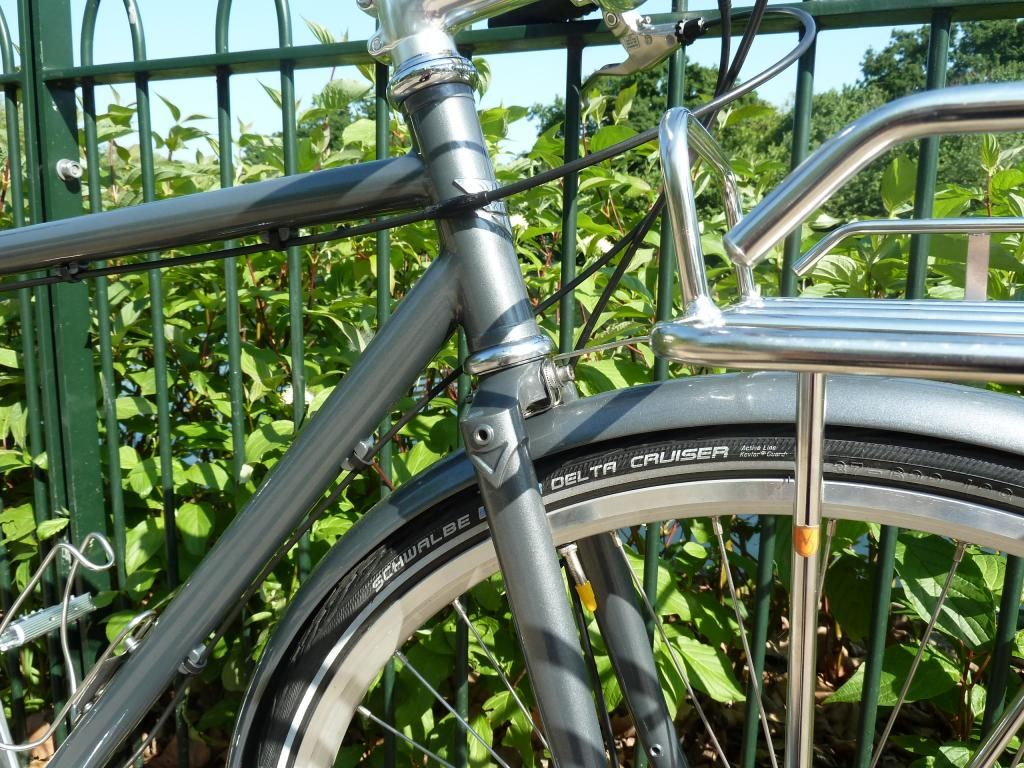
Then I cut and shaped the head badge from a piece of stainless steel, the idea being that this was left polished and unpainted. I brazed stainless reinforcing rings onto the top and bottom of the head tube, which you can see in this shot.
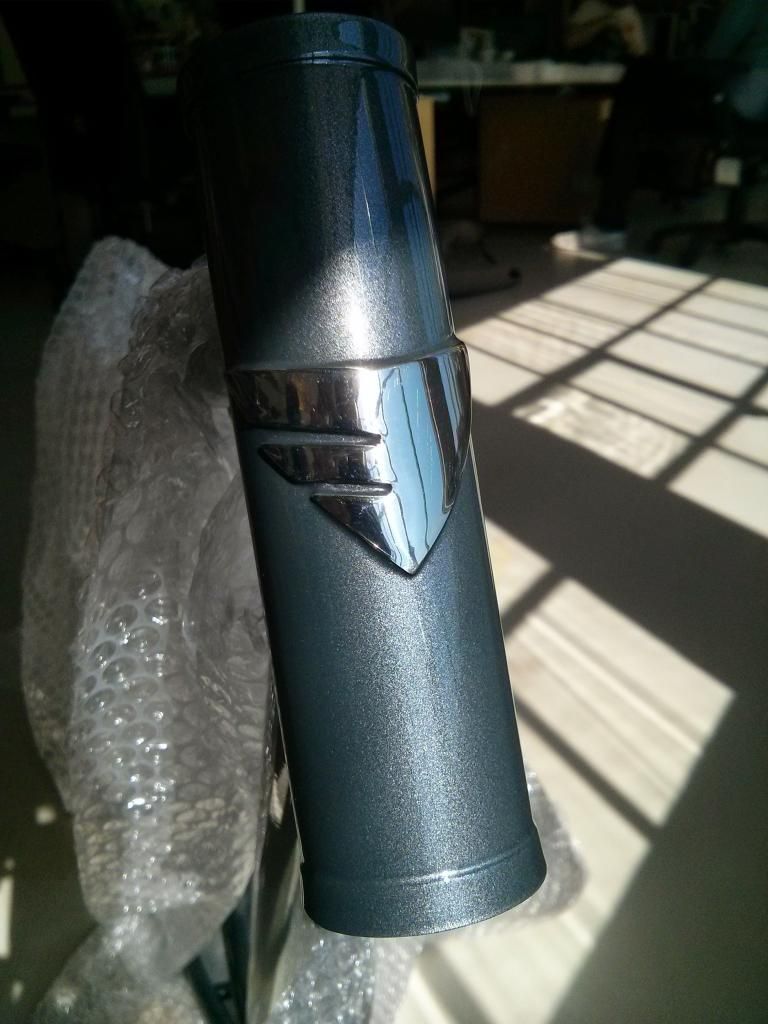
And here's how it looked once it was painted. I went for a metallic powder coat, Dark Steel was the name of the finish, with a gloss lacquer over the top.
-
• #7
Five Stars for excellent!
Another great project.
Do you think you need the extra seat tube reinforcing tube? Or is it just a better safe than sorry.
-
• #8
Five Stars for excellent!
Another great project.
Do you think you need the extra seat tube reinforcing tube? Or is it just a better safe than sorry.
Thanks!
Good question, and for the particular tube I used I think the answer is yes. If you look at tubing specification charts you can use seat tubes that are plain at the saddle end, or ones that are butted, either internally or externally. The butting adds wall thickness, and strength. The Zona tube I used has a wall thickness of 0.6mm. The externally butted one has a wall of 1.2mm. So adding a 0.7 mm wall-thickness sleeve gets me a good slab of reinforcement.
I suspect the non-butted tubes are intended for use with a lug, which would provide the extra strength. The sleeving does the same job, and also allows you to do some aesthetic customisation. It also gives a very slightly wider diameter tube to play with. That helps a smooth tube to tube transition across the fillet.
I'll ask someone with more experience!
-
• #9
Awesome project, impressive!
-
• #10
Final instalment!
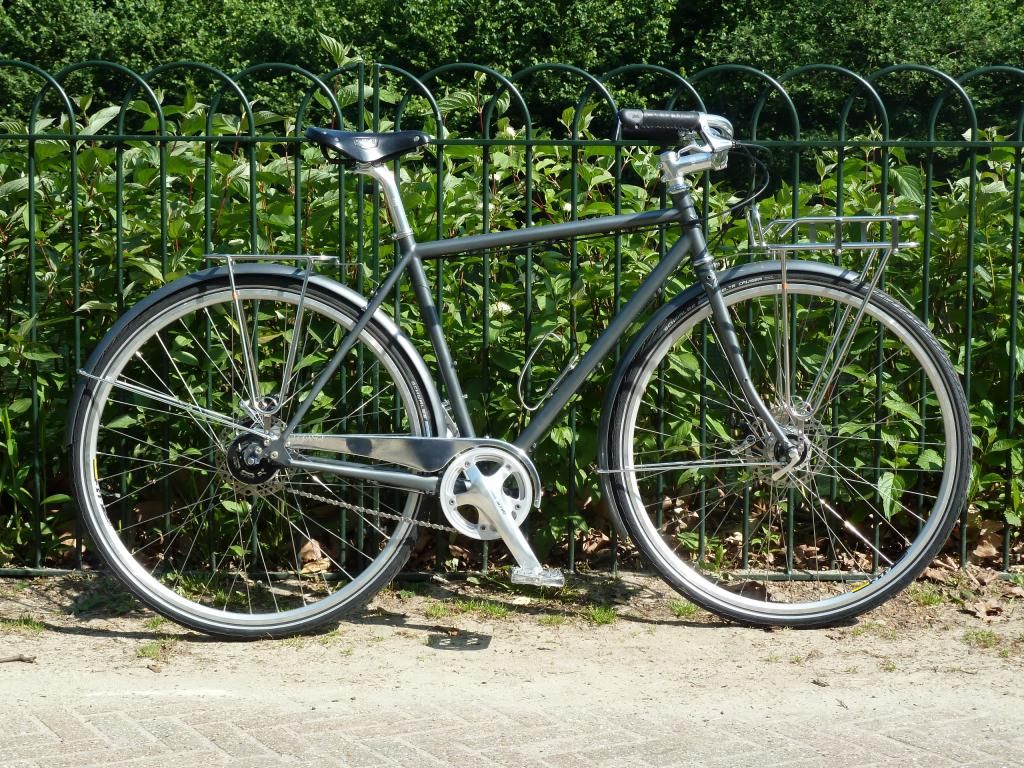
I did a dry-build of the frame once I'd finished the brazing to check that there weren't going to be any assembly problems. With the amount of stuff going on with the mudguards, racks, chain guard etc then there was a chance there would be issues. The only problem in the end was that I somehow sheared a bolt, then broke a screw extractor trying to get it out. A slightly stressful couple of hours, but in the end it was removed with no damage.
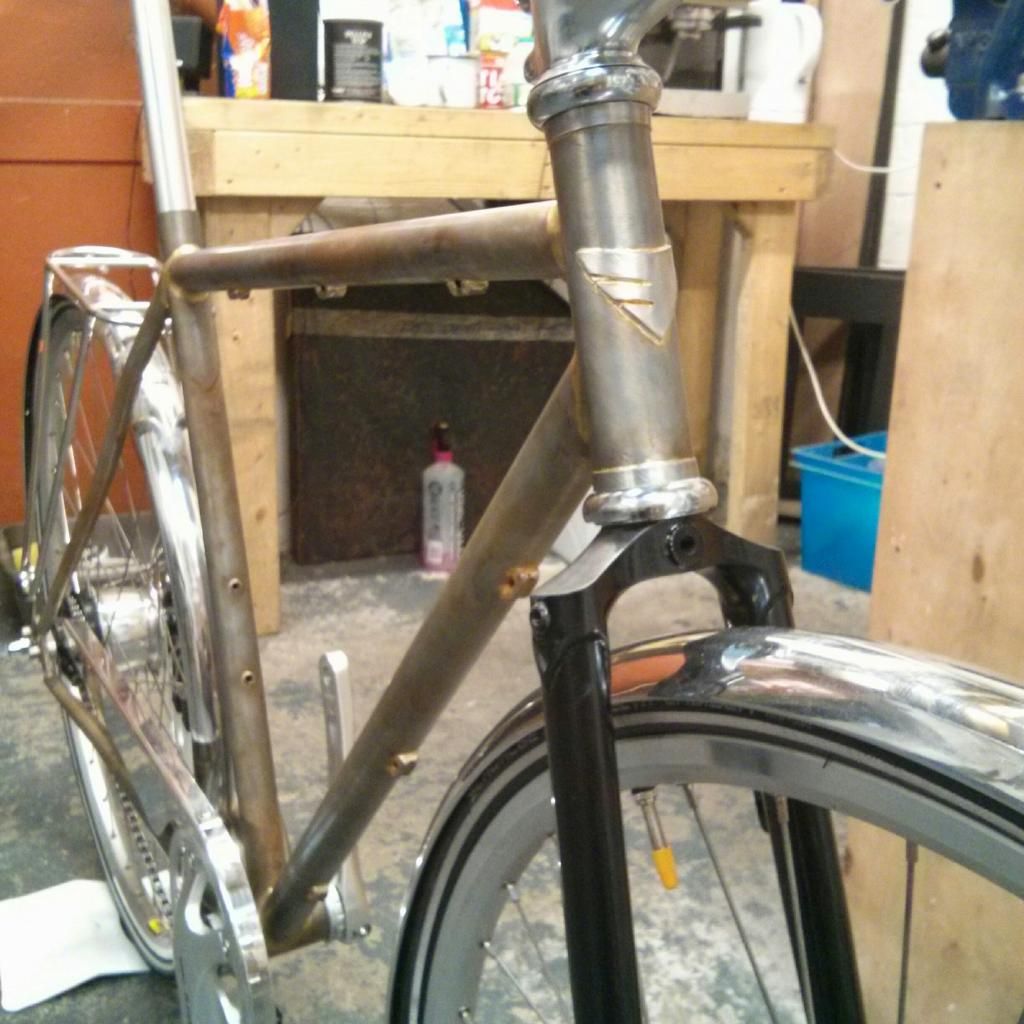
You can just about see where I filed the Surly logos off the top of the fork crown in that shot.
The painting and assembly process went pretty smoothly. The drive train is an Alfine 8-speed hub running off a JTek bar end shifter, with matching crank and dynamo hub. Brakes are Ultegra flat-bar levers with TRP Spyre disc brakes. I really like them.
The finishing kit is Velo Orange, and the end of the bar was made safe with the top off a Hendrick's gin bottle. The cork is just the right size to fit snugly inside the bar.
It all seems to work well, the bike's quite nippy given how much stuff is on it, handling is fine with a loaded front rack, and most of all my missus is very happy with the final result.
-
• #11
got ya bottle cage upside down!! cracking build tho!
-
• #12
Hahahaha! What a doofus.
I totally didn't notice that in the shots. I've just checked and I appear to have put it on the right way up after adding a pump holder.
-
• #13
durp ;) i have the same one, i do like the VO stuff. nice and classic.
-
• #14
so clean, awesome skill, much jealousy from my girlfriend and me!
-
• #15
Really beautiful work, Mike. Thanks for sharing.
-
• #16
^ +1
What are your plans for the light setup?
-
• #17
Cheers guys!
I'm looking at the Busch&Muller lights, but not made a final decision yet. They seem to offer a good balance of performance and price, and have models with standlights so they stay on when you stop at lights etc. Going to mount them on the racks, there are plenty of spots to attach them.
-
• #18
what you are doing is inspirational. thank you for sharing it.
-
• #19
That's swell, if only I was your gf.
-
• #20
Love it!
looks like a disc braked version of the bike I made my girlfriend a couple of Christmases back
 nutsjesmoar
 Mikenetic
 hugo7
hugo7 russmeyer
 JT
JT FredyCro
 andyp
andyp wqvm
wqvm
Hello!
You may remember me from previous threads such as, "I built my own frame then someone stole it," and "How many braze-ons can you attach to a Karate Monkey?"
I've been working away on my next bike, a birthday present for my better half. I've just completed the build, so I thought I'd document the process over a few posts.
The brief I got was to build a bike she could jump onto for trips around town in normal clothes, and that could carry a decent amount of stuff. This wasn't to be "a retro show-pony" (quote). There was a fair amount of thinking, some changes in direction as problems emerged, plus a workshop move part-way through the build. So it took a little longer than planned.
However, the basic pattern for the design was set fairly early on. A porteur-style bike with a practical front rack, full mudguards, chain guard, dynamo lighting, hub gear and disc brakes.
So it was with a happy heart but some small degree of trepidation that I set off on build number two. The process of turning a pile of bits into a thing was ahead of me.